

P0031 on 2008-2013 Hyundai Genesis: Heater Circuit Low Causes and Fixes
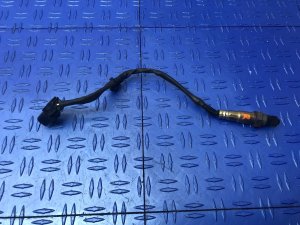
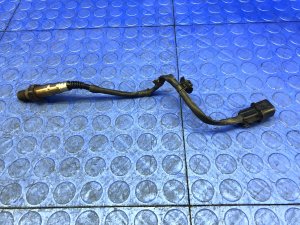
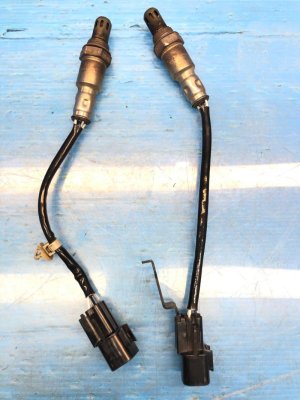
P0031 on a Hyundai Genesis almost always means the heating element inside the Bank 1, Sensor 1 oxygen sensor has failed. This is the upstream sensor on the passenger side for V6/V8 engines, or the only upstream sensor for the 2.0T. A new sensor costs $60-$120 for aftermarket or $150-$220 for OEM.
- P0031 points directly to a problem with the Bank 1 Sensor 1 (upstream) oxygen sensor's internal heater.
- The most likely fix is replacing the sensor itself. This is a DIY-friendly job with the correct 22mm O2 sensor socket.
- For V6/V8 engines, Bank 1 is the passenger side. For the 2.0T Coupe, ensure you buy the correct sensor for your model year (2010-2012 is different from 2013+).
- Always check the 'SENSOR 1' or 'ENG SNSR 1' fuse in the engine bay fuse box before replacing parts.
- Ignoring this code will lead to poor fuel mileage and can eventually damage the more expensive catalytic converter.
What's Unique About the 2008-2013 Hyundai Genesis
For the 2008-2013 Genesis, this code applies to two distinct platforms: the Sedan (BH) and the Coupe (BK). On the V6 and V8 engines, Bank 1 is consistently the passenger side of the engine. For the Genesis Coupe 2.0T, it's critical to know that the 2010-2012 (BK1) and 2013-2014 (BK2) models use different, non-interchangeable upstream oxygen sensors. The most common point of failure is the sensor itself, making this a frequent and straightforward repair for owners.
Generation note: The 2008-2013 range covers the first-generation Genesis Sedan (BH) and the first-generation Genesis Coupe (BK). The Coupe was updated in 2013 (becoming the 'BK2'), and it uses a different upstream oxygen sensor for the 2.0T engine than the 2010-2012 'BK1' models. The V6/V8 sedan models are consistent through this period.
Symptoms You May Notice
- Check Engine Light is on
- Reduced fuel economy
- Rough idle or hesitation, especially when cold
- Failing an emissions test
- Replacing the wrong oxygen sensor (e.g., Bank 2 or the downstream Sensor 2).
- Replacing the oxygen sensor without first checking the fuse and wiring.
Most Likely Causes
- Failed Upstream Oxygen Sensor (Bank 1) 🔴 High Probability The internal heating element has a finite lifespan and is a common failure item on most vehicles, including the Genesis.
How to confirm: Unplug the sensor and measure the resistance between the two heater circuit pins (often the two same-colored wires). A healthy sensor should read between 8.1 and 11.1 Ohms at 21°C (70°F). An open circuit (infinite resistance) or a dead short (near zero resistance) confirms failure.
Typical fix: Replace the Bank 1, Sensor 1 oxygen sensor. A special 22mm slotted socket is recommended for removal.
Est. part cost: $60 - $220 - Damaged Wiring or Connector 🟡 Medium Probability The sensor wiring is located near the hot exhaust manifold, making it susceptible to melting, chafing, or becoming brittle over time.
How to confirm: Visually inspect the wiring harness and connector leading to the oxygen sensor for any signs of melting, burns, or corrosion. With the sensor unplugged and key on, use a multimeter to check for 12V power at the heater power pin in the connector.
Typical fix: Repair the damaged section of the wiring harness or replace the connector pigtail.
Est. part cost: $15 - $50 - Blown Fuse ⚪ Low Probability A short circuit in the sensor or wiring can cause the corresponding fuse to blow as a protective measure.
How to confirm: Locate the engine compartment fuse box and check the fuse labeled 'ENG SNSR 1' or 'SENSOR 1' (typically a 10A or 15A fuse). If it is blown, there is a short in the circuit that needs to be found.
Typical fix: Replace the blown fuse after diagnosing and fixing the underlying short circuit. Simply replacing the fuse without fixing the short will cause it to blow again.
Est. part cost: $1 - $5
Rare But Worth Checking
- Faulty Engine Control Module (ECM): This is very uncommon. The ECM should only be considered after all other possibilities (sensor, wiring, fuses) have been exhaustively tested and ruled out.
Diagnosis Steps
- Read the code with an OBD-II scanner to confirm P0031.
- Identify the correct sensor. For 2.0T engines, it is the sensor in the exhaust manifold. For V6/V8 engines, it is the upstream sensor on the passenger side.
- Inspect the sensor's wiring harness and connector for any visible damage, such as melting, chafing, or corrosion.
- Check the fuse. In the engine bay fuse box, locate the fuse for the oxygen sensors (often labeled 'ENG SNSR 1' or 'SENSOR 1') and verify it is not blown.
- Test the sensor's heater circuit. Disconnect the sensor and use a multimeter to measure the resistance across the heater pins (usually the two wires of the same color). The reading should be between 8.1 and 11.1 Ohms at room temperature. If it's out of spec, the sensor is bad.
- Test the vehicle-side circuit. With the sensor unplugged and the ignition on (engine off), check for battery voltage (approx. 12V) at the power supply pin on the harness connector. If there is no voltage, the problem is upstream in the wiring or fuse box.
- If voltage is present, check the ground control wire for continuity to the ECM. A wiring diagram is recommended for this step.
- If the sensor tests bad, replace it. If the circuit tests bad, repair the wiring. After the repair, clear the code with the scanner.
Parts You'll Likely Need
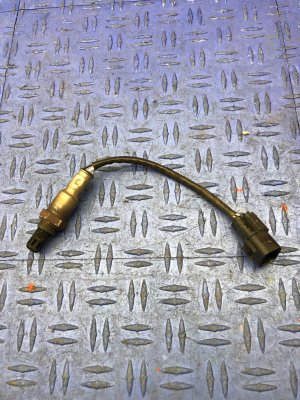
- Upstream Oxygen Sensor (2.0T Coupe, 2010-2012 BK1)
(OEM #39210-2C200)— This is the most common failure part for this code on the early 2.0T Genesis Coupe.
Trusted brands: Hyundai (OEM), NGK/NTK, Denso
OEM price range: $160-$200
Aftermarket price range: $70-$120 - Upstream Oxygen Sensor (2.0T Coupe, 2013-2014 BK2)
(OEM #39210-2C400)— The 2013+ facelifted 2.0T Coupe uses a different sensor from the earlier model. This is the correct part for the BK2 generation.
Trusted brands: Hyundai (OEM), NGK/NTK, Bosch
OEM price range: $180-$220
Aftermarket price range: $80-$130 - Upstream Oxygen Sensor (V6/V8, Bank 1 / Passenger Side)
(OEM #39210-3C910)— This is the upstream sensor for the passenger side (Bank 1) on V6 models like the 3.8L. Part number 39210-3C100 is also commonly used for V6 applications.
Trusted brands: Hyundai (OEM), Denso, Walker
OEM price range: $150-$210
Aftermarket price range: $60-$110
Related Codes That Often Appear With This One
- P0030 — This is a general code for the same heater circuit. P0031 is a more specific fault indicating low voltage, but they point to the same root problem.
- P0032 — This code indicates 'Heater Control Circuit High', the opposite of P0031. It can occur if the wiring is shorted to power instead of ground.
Mechanic-Grade Diagnostic Values
- HO2S Heater Element Resistance — expected: 8.1 ~ 11.1 Ω at 21°C (69.8°F). Failure: A reading of near zero ohms (short circuit) or infinite ohms/OL (open circuit).
- Heater Power Supply Voltage at Harness Connector — expected: 11V - 16V (approx. battery voltage) with Key On, Engine Off. Failure: Voltage below 11V suggests an issue with the power supply circuit, fuse, or relay.
- Heater Control Circuit Duty Cycle (Scan Tool) — expected: The ECM controls the heater via a pulse-width modulated (PWM) ground signal. The duty cycle will vary based on sensor temperature.. Failure: A fixed 0% or 100% reading when it should be modulating can indicate a wiring or ECM driver issue.
Scan Tool Commands That Help
- Hyundai GDS (Global Diagnostic System): DTC Status / Readiness Flag — After a repair, a technician uses this function to confirm the fault has been corrected and is no longer 'Present'. It helps verify the fix before clearing the code and returning the vehicle to the customer.
- Hyundai GDS (Global Diagnostic System): Live Data - O2 Sensor Heater — To monitor the duty cycle control of the heater circuit in real-time. This helps differentiate between a failed sensor heater and a problem with the ECM's control over the circuit.
Wiring & Ground Locations
- B1S1 Connector (V6/V8) — On the passenger side of the engine, connecting to the upstream O2 sensor located in the exhaust manifold.. This is the primary connector to test for power, ground, and sensor resistance. For a 4-wire sensor, Pin 3 is typically heater power (from Main Relay) and Pin 4 is the ECM ground control.
- B1S1 Connector (2.0T) — Connecting to the upstream O2 sensor in the exhaust manifold/turbo housing.. This is the main test point. On a 2010 Genesis Coupe, Pin 3 is heater power and Pin 4 is the ECM ground control.
- Engine Ground Points (GE01, GE02, etc.) — Various points on the engine block and chassis. For the Genesis Coupe, key grounds are on the intake manifold, coolant piping, and engine mount bracket.. While the heater circuit is ground-controlled by the ECM, a poor main engine or ECM ground can cause floating voltages and intermittent electrical issues, including heater circuit codes. Ensuring these grounds are clean and tight is a crucial step in advanced diagnosis.
- E/R Junction Box (Engine Room) — Typically on the passenger or driver side of the engine bay.. This box contains the 'SNSR 1' or 'AF HEATER' fuse and potentially the main relay that supplies power to the O2 sensor heater circuit.
Real Owner Repair Stories
- Gencoupe.com forum user (2010 Hyundai Genesis Coupe 2.0T) — Check Engine Light with code P0031.
❌ Tried (didn't work) Initially replacing the downstream (post-cat) O2 sensor by mistake.
✅ What actually fixed it The user realized Bank 1 Sensor 1 is the upstream (pre-cat) sensor. After replacing the correct upstream sensor, the P0031 code was resolved.
OEM Part Supersession History
39210-2C200→N/A, but sometimes incorrectly cross-referenced
Heads up: Some aftermarket parts listings have incorrectly suggested that part number 39210-33010 is a valid supersession for 39210-2C200. This is not accurate; 39210-2C200 is the specific part for the 2010-2012 2.0T Coupe. Always verify the part number against the vehicle's VIN.
Model Year Variations Within This Range
- 2010-2012 vs 2013-2014 (Genesis Coupe 2.0T): The upstream oxygen sensor is different between the BK1 (2010-2012) and BK2 (2013-2014) 2.0T models. The BK1 uses part number 39210-2C200, while the BK2 uses 39210-2C400. They are not interchangeable.
Diagnostic Flowchart
Used vs. New Parts: Buying Guide for This Vehicle
When a used part is the smart pick: For this repair, buying a used oxygen sensor is strongly discouraged. They are wear items with a finite lifespan. However, if the cause is a damaged connector pigtail, a used pigtail from a junkyard harness is a perfectly acceptable and cost-effective repair.
Donor-vehicle mileage cap: roughly under 50000 miles for the part to have meaningful remaining life.
What to inspect on the donor part:
- For a connector pigtail: ensure the plastic is not brittle or cracked.
- Check that the locking tab is intact.
- Inspect the wire insulation for any signs of melting, chafing, or oil contamination.
- Ensure the terminals inside are clean and free of corrosion.
OEM-only on this vehicle (don't cheap out):
- While not strictly 'OEM-only', using a reputable OEM supplier is critical for oxygen sensors on this platform.
Aftermarket brands forum-validated for this vehicle:
- NTK (often the original OEM supplier)
- Denso
Brands owners have reported issues with on this vehicle:
- Generic, unbranded sensors from online marketplaces are frequently reported by forum members to fail prematurely or not meet the ECM's specific requirements, causing codes to return.
Real Owner Stories
Aggregated from forums and TSBs cited above. Mileages and costs reflect what owners reported in those sources.
Hyundai Genesis Coupe 3.8L V6
Symptoms: Owner was seeking the correct location for Bank 1 to address an O2 sensor issue and confirmed the cylinder layout.
What fixed it: Identification of Bank 1 as the passenger side (cylinders 1, 3, and 5) to ensure the correct sensor was diagnosed.
Source hint: r/genesiscoupe thread about cylinder numbering on the 3.8L V6
Hyundai Genesis Coupe V6
Symptoms: Discussion regarding O2 sensor locations for correct part replacement.
What fixed it: Confirmed Bank 1 is the passenger side upstream sensor.
Source hint: r/genesiscoupe thread discussing O2 sensor locations
Related OBD-II Codes
Frequently Asked Questions
Where is the Bank 1 sensor located on my Hyundai Genesis V6 or V8?
Which sensor do I need to replace for a P0031 code on the Genesis 2.0T?
What resistance should I look for when testing the O2 sensor heater circuit on my Genesis?
Is there a specific fuse I should check for the P0031 code?
Can I use a generic aftermarket oxygen sensor to fix this code?
What tools are recommended for removing the Bank 1 Sensor 1 on this vehicle?
Helpful Videos
We Have This Part in Stock

The information in this article is provided for general reference and educational purposes only. Vehicle specifications, procedures, and part compatibility can vary by production date, trim level, and region. Always consult your vehicle's factory service manual and verify part numbers before purchasing or performing repairs. Safety-critical components such as airbags, seat belts, and braking systems should be installed by a qualified professional.
- Hyundai Genesis:
- 🎬 Helpful Videos
- 🛍️ Shop This Part
- What's Unique About the 2008-2013 Hyundai Genesis
- Symptoms You May Notice
- Most Likely Causes
- Rare But Worth Checking
- Diagnosis Steps
- Parts You'll Likely Need
- Related Codes That Often Appear With This One
- Mechanic-Grade Diagnostic Values
- Scan Tool Commands That Help
- Wiring & Ground Locations
- Real Owner Repair Stories
- OEM Part Supersession History
- Model Year Variations Within This Range
- Diagnostic Flowchart
- Used vs. New Parts: Buying Guide for This Vehicle
- Real Owner Stories
- Hyundai Genesis Coupe 3.8L V6
- Hyundai Genesis Coupe V6
- Related OBD-II Codes
- Frequently Asked Questions
- 🎟️ Get 5% Off