

C0035 on 2011-2015 Kia Optima: Left Front Wheel Speed Sensor Fault Causes and Fixes
Code C0035 on a 2011-2015 Kia Optima indicates a fault with the left front wheel speed sensor circuit. The most common fix is replacing the faulty sensor itself, which costs around $40-$90 for an aftermarket part. This is a common DIY repair with a difficulty of 2/5, but the sensor can be seized in the knuckle. Be aware that the part number is different for 2011-2013 vs. 2014-2015 models.
- C0035 on a 2011-2015 Optima means the left front wheel speed sensor circuit has failed, disabling ABS and traction control.
- The most likely cause is a bad sensor, followed by damaged wiring along the suspension.
- The repair is straightforward for a DIYer with an ABS scanner, but the sensor can be difficult to remove if rusted in place.
- This vehicle generation has significant known issues with engine failure and steering components that owners should be aware of.
What's Unique About the 2011-2015 Kia Optima
For the third-generation (2011-2015) Kia Optima and its platform-mate, the Hyundai Sonata, the C0035 code is definitively for the left front wheel speed sensor. While some generic code readers or sources for other manufacturers (like GM) may incorrectly define this as a right-side sensor issue, for Kia and Hyundai, it consistently refers to the driver's side front wheel. The failure is almost always the sensor itself or its exposed wiring, which is susceptible to damage from road debris, weather, and rubbing against suspension components. A critical detail for this platform is a part number change mid-generation: 2011-2013 models use a different sensor than the 2014-2015 facelift models.
Symptoms You May Notice
- ABS warning light is on
- ESC (Electronic Stability Control) or Traction Control (TCS) warning light is on
- Check Engine Light may also be on in some cases
- Loss of anti-lock braking function (wheels may lock and skid during hard braking)
- Traction control system is disabled (drive wheels may spin on slippery surfaces)
- Brake pedal may feel different or pulsate at low speeds as the system tries to engage incorrectly
- Replacing the right front wheel speed sensor due to relying on generic, non-Kia-specific code definitions.
- Replacing the ABS control module before thoroughly testing the sensor and its wiring circuit.
Most Likely Causes
- Faulty Left Front Wheel Speed Sensor 🔴 High Probability The sensor is exposed to harsh conditions like water, road salt, and debris, leading to internal electronic failure or corrosion over time. They can become seized in the steering knuckle due to rust, making removal difficult.
How to confirm: Use a scan tool to monitor live data from all four wheel speed sensors. While driving straight at a low speed, the reading from the left front sensor will be zero, erratic, or will not match the other three sensors. Alternatively, test the sensor's resistance with a multimeter; a healthy sensor should read between 1,000 and 1,500 Ohms (1.0-1.5 kΩ).
Typical fix: Replace the left front wheel speed sensor. It is held in by a single 10mm bolt on the steering knuckle. Soaking the sensor with penetrating oil before attempting removal is highly recommended.
Est. part cost: $40-$90 - Damaged Wiring or Corroded Connector 🟡 Medium Probability The wiring harness runs down the suspension strut and is subject to stretching, rubbing, and impact from road debris, which can cause breaks or shorts. The plastic clips holding the wire to the strut and frame are often brittle and can break. Wires can break internally at flex points, showing no visible external damage.
How to confirm: Visually inspect the entire length of the wire from the sensor to where it enters the fender liner. Look for frayed wires, melted sections, or green/white corrosion inside the connector plug. Perform a 'wiggle test' on the harness while monitoring live data to see if the signal returns intermittently.
Typical fix: Repair the broken section of wire or replace the connector pigtail. Ensure the repaired section is sealed against moisture. The connector is located behind the fender liner.
Est. part cost: $15-$50 - Damaged or Debris-Covered Tone Ring ⚪ Low Probability The tone ring, which the sensor reads, is part of the wheel hub or CV axle. Heavy buildup of brake dust and metallic debris can obscure the signal. Less commonly, the ring can crack, especially on aftermarket CV axles.
How to confirm: With the sensor removed, visually inspect the tone ring through the mounting hole. Rotate the hub to check for missing teeth, cracks, or heavy contamination.
Typical fix: Clean the tone ring with a brake cleaner and a brush. If the ring is cracked, the CV axle or wheel hub assembly must be replaced.
Est. part cost: $5 (cleaner) - $400 (hub/axle)
Rare But Worth Checking
- Worn Wheel Bearing / Hub Assembly: A failing wheel bearing can introduce excessive 'wobble' or play, which increases the air gap between the sensor and the tone ring, causing the signal to drop out. This is usually accompanied by a grinding or humming noise that changes with vehicle speed. In some cross-manufacturer cases, such as NHTSA ODI #10287028, a bad wheel hub was identified as the root cause of the C0035 code.
- Faulty ABS Control Module: This is the least likely cause. Before condemning the expensive ABS module, you must definitively rule out the sensor, wiring, and tone ring. A module failure might be suspected if swapping the left and right sensors (if possible) does not cause the code to move to the other side. Note that 2011-2015 Optimas were subject to a major recall for ABS module internal shorts causing fire risk.
Diagnosis Steps
- Connect an ABS-capable OBD-II scanner and confirm C0035 is the active or stored code.
- Navigate to the live data stream for the ABS module.
- Monitor the speeds of all four wheels while driving slowly in a straight line. Confirm the Left Front sensor reads 0 MPH or shows an erratic signal compared to the others.
- Raise and secure the front of the vehicle. Remove the left front wheel.
- Liberally apply penetrating spray around the base of the sensor where it enters the steering knuckle and let it soak.
- Visually inspect the wheel speed sensor (mounted on the knuckle) and its wiring harness for any obvious signs of damage, chafing, or corrosion. Pay close attention to the clips holding the wire to the strut.
- Follow the wire into the fender well, remove the plastic clips, and disconnect the sensor's main electrical connector. Inspect the connector pins for corrosion or damage.
- With the connector unplugged, use a multimeter set to Ohms (Ω) to measure the resistance across the two pins on the sensor side. A good sensor should read between 1.0 kΩ and 1.5 kΩ. An open circuit (OL) or short (near 0 Ω) indicates a bad sensor.
- If the sensor tests good, check the wiring harness for continuity from the sensor connector to the ABS module. A common failure point is an internal wire break at the harness flex point near the lower control arm.
- If a new sensor does not fix the issue, use a multimeter to check for continuity and voltage at the sensor's harness connector to trace a potential wiring break.
- With the sensor removed, inspect the tone ring for damage or heavy debris buildup.
Parts You'll Likely Need
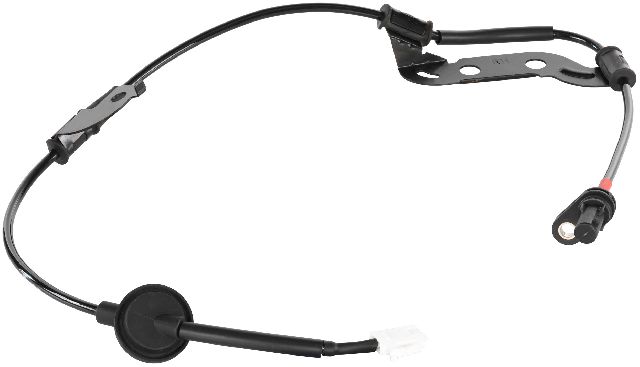
- Left Front ABS Wheel Speed Sensor
(OEM #59810-2T500 (2011-2013) / 59810-4C000 (2014-2015))— This is the most common failure point for code C0035. The sensor's internal electronics fail from exposure and vibration. Note that OEM parts may come in either Kia or Hyundai branded packaging but are the same part. It is critical to use the correct part number for your model year.
Trusted brands: Kia (OEM), Hyundai (OEM), Bosch, Standard Motor Products (SMP), Delphi, Mando
OEM price range: $90-$150
Aftermarket price range: $40-$90
Related Codes That Often Appear With This One
- C0040 — This code is for the Right Front Wheel Speed Sensor. Seeing it with C0035 could indicate a common wiring problem, a fault within the ABS module, or issues with both front sensors simultaneously.
- P2159 — This powertrain code for 'Vehicle Speed Sensor 'B' Range/Performance' can be triggered because the ABS wheel speed sensors are often used as a primary source for vehicle speed data. A fault in one can create a conflict recognized by the ECU.
Platform-Specific Known Issues
- The ABS sensor can become tightly seized in the steering knuckle due to rust. It is highly recommended to apply penetrating oil generously before attempting removal to avoid breaking the sensor off in the knuckle.
- The plastic clips that secure the sensor wire to the suspension strut and frame are known to become brittle and break during removal. Be prepared to replace them with new clips or zip ties.
Documented NHTSA Reports
- A manufacturer service bulletin, referenced in NHTSA ODI #10273914, notes that the ABS and/or Brake light may illuminate at times with EBCM DTCs C0035, C0040, and C0220.
- NHTSA ODI #10440851 describes a scenario where both the ABS light and the "Brake Light" were illuminated on the dashboard, with OBD II codes C0035 and C0040 indicating a left front wheel sensor circuit malfunction.
- An owner reported in NHTSA ODI #10442197 that a dealer estimated a repair cost of $762.00 for a new sensor and hub after receiving error codes C0035 and C0220.
- NHTSA ODI #11228687 records a vehicle with multiple indicators illuminated and a string of diagnostic codes including C0035, C0040, and C0050.
Mechanic-Grade Diagnostic Values
- Left Front Wheel Speed Sensor Resistance — expected: 1,000 - 1,500 Ohms (1.0 - 1.5 kΩ). Failure: A reading of OL (Open Loop/infinite resistance) or near 0 Ohms (short circuit) indicates a failed sensor.
- Left Front Wheel Speed Sensor AC Voltage (Passive Sensor) — expected: Greater than 200mV (0.2V) AC while spinning the wheel at approximately one revolution per second.. Failure: No voltage or significantly lower voltage suggests a failed sensor or an issue with the tone ring.
Scan Tool Commands That Help
- ABS-Capable Scan Tool (e.g., Autel, Foxwell, GDS): Live Data -> ABS/ESC Module -> Wheel Speed Sensors — This is the primary diagnostic step. Use this to compare the signal from the left front sensor to the other three while driving in a straight line. A reading of zero or an erratic signal from only the LF sensor confirms the fault is in that circuit.
Wiring & Ground Locations
- ABS (HECU) Module — In the engine bay, on the passenger side, near the firewall, below the air intake box.. This is the control unit that receives the signal from the wheel speed sensor. All wiring for the sensor ultimately terminates here. A technician may need to test for signal continuity at this module's main connector if a new sensor and visible wiring inspection do not solve the problem.
- ABS Fuses — Multiple fuses exist. In the engine compartment fuse box, check fuses labeled 'ABS 1' (40A multi-fuse) and 'ABS 2' (30A). In the interior fuse panel (driver's side dash), check the 10A fuse labeled 'MDPS'.. While a blown fuse is unlikely to isolate only one sensor, it can cause power issues to the entire ABS module, potentially leading to various codes including C0035. It's a quick check before more complex diagnostics.
- ABS Module Connector Pinout — At the ABS (HECU) module.. A specific pinout diagram for the 2011-2015 Optima is not readily available in public sources and typically requires access to paid professional services like Kia GDS, AllData, or Mitchell. Knowing the pin numbers for the LF wheel speed sensor would allow a technician to test for signal and continuity directly at the module, definitively ruling out a wiring issue.
Real Owner Repair Stories
- YouTube channel 'Chris Fixes' (Chevrolet Impala (similar failure pattern)) — ABS and Traction Control lights on, with codes C0035/C0040.
❌ Tried (didn't work) Initial visual inspection showed no obvious damage to the wiring harness.
✅ What actually fixed it The wire for the wheel speed sensor had broken internally inside the protective loom, right at the point where the harness flexes with suspension travel near the lower control arm. The break was not visible from the outside. The fix was to cut open the loom, find the broken wire, and splice in a new pigtail harness. - YouTube channel 'Auto Repair Procedures' (Vehicle with integrated sensor/bearing (similar to some hub designs)) — ABS and Traction Control lights on with code C0035.
❌ Tried (didn't work) Attempting to repair the wire was not possible.
✅ What actually fixed it The wire leading directly into the wheel speed sensor had been completely sheared off flush with the sensor body, which was integrated into the wheel bearing hub. The entire wheel bearing and hub assembly had to be replaced to fix the issue.
OEM Part Supersession History
59810-2T500→59810-4C000 (for later model years, not a direct replacement)— Part design changed with the 2014 model year facelift.
Heads up: Part number 59810-2T500 is for 2011-2013 models. Part number 59810-4C000 is for 2014-2015 models. They are not interchangeable. Using the wrong part for your model year will result in the code not clearing.
Model Year Variations Within This Range
- 2011-2013: Uses Left Front ABS Sensor with OEM part number 59810-2T500.
- 2014-2015: These facelift models use a different Left Front ABS Sensor, with OEM part number 59810-4C000.
Diagnostic Flowchart
Other Known Issues on This Vehicle
Issues unrelated to this code that are worth knowing about as an owner of this generation:
- Theta II GDI Engine Failure 🔴 High — Widespread across 2011-2019 models with 2.0L & 2.4L GDI engines. Failure can occur suddenly, often under 100,000 miles, due to premature connecting rod bearing wear. (Ref: Recall 17V-224; NHTSA Campaign 20V750000. Subject to a major class-action lawsuit settlement providing lifetime warranties and a Knock Sensor Detection System (KSDS) software update for affected vehicles.)
- MDPS Steering Coupler Degradation 🟠 Medium — Very common. Owners report a clicking or knocking noise from the steering column when turning the wheel, especially when stationary. The flexible rubber coupler inside the Motor Driven Power Steering (MDPS) unit wears out. (Ref: Customer Satisfaction Program CS1604 / Warranty Extension Program WTY006. Not a formal recall, but Kia extended the warranty to 10 years/unlimited mileage and offered replacement for affected vehicles, particularly in high-humidity states.)
- Engine Fire Hazard (Fuel Leaks) 🔴 High — Affects vehicles that had engines replaced under the main engine recall (17V-224). The high-pressure fuel pipe may have been damaged or misaligned during the engine replacement, leading to fuel leaks. (Ref: Recall 18V-907; NHTSA Campaign 20V100000.)
- Malfunctioning Door Latch Assembly 🟡 Low — Commonly reported around 100,000 miles, particularly on the driver's side door. The latch may fail to open from the inside or outside.
Used vs. New Parts: Buying Guide for This Vehicle
When a used part is the smart pick: A used ABS sensor is generally not recommended. The part is a relatively low-cost wear item exposed to harsh elements, and the labor to replace it is the same whether the part is new or used. A used part carries a high risk of premature failure. A used wiring pigtail from a junkyard can be a smart choice if your issue is a damaged connector, as it provides an OEM-quality connector to splice onto your existing harness.
Donor-vehicle mileage cap: roughly under 60000 miles for the part to have meaningful remaining life.
What to inspect on the donor part:
- For a wiring pigtail, inspect for any signs of cracking, brittleness, or previous repairs.
- Ensure the connector pins are clean, straight, and free of any green or white corrosion.
- Check that the locking tab on the connector is intact and functional.
- Avoid parts from vehicles with obvious signs of major front-end collision damage.
OEM-only on this vehicle (don't cheap out):
- ABS Control Module (HECU) - Due to the complexity of programming (variant coding) and the critical safety recall for fire risk on this generation, using a new OEM module or a professionally remanufactured unit from a reputable source is strongly advised.
Aftermarket brands forum-validated for this vehicle:
- Mando (Often the Original Equipment manufacturer for Hyundai/Kia)
- Bosch
- Delphi
- Standard Motor Products (SMP)
Brands owners have reported issues with on this vehicle:
- No-name, unbranded sensors from online marketplaces should be avoided. Forum discussions frequently point to these parts failing quickly or being dead-on-arrival, wasting time and money.
Real Owner Stories
Aggregated from forums and TSBs cited above. Mileages and costs reflect what owners reported in those sources.
2013 Kia Optima
Symptoms: ABS warning light is on; Traction control system is disabled.
What fixed it: Replacement of the wheel speed sensor.
Cost: $500-$500
Source hint: Reddit: r/kia - '13 Optima Wheel Sensor Replacement
2013 Kia Optima
Symptoms: ABS and Traction Control lights on; need to locate 10mm sensor bolt and 12mm harness bracket bolts.
What fixed it: Replacement of the front ABS sensor/wheel speed sensor after using penetrating oil to prevent breakage.
Source hint: Electrical Car Repair LIVE - KIA OPTIMA FRONT ABS SENSOR, WHEEL SPEED SENSOR REPLACEMENT REMOVAL
Related OBD-II Codes
Frequently Asked Questions
Why is my 2011-2015 Kia Optima ABS sensor so difficult to remove from the steering knuckle?
Are the plastic wiring clips on the strut of my Optima reusable during a C0035 repair?
Can I test the resistance of the left front wheel speed sensor on my 2013 Optima to see if it's bad?
Where is the main electrical connector for the front wheel speed sensor located on this model?
Does the Hyundai Sonata share this same ABS sensor issue with the Kia Optima?
Helpful Videos
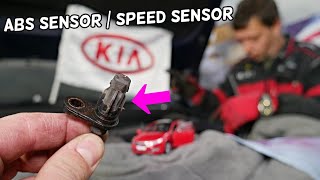
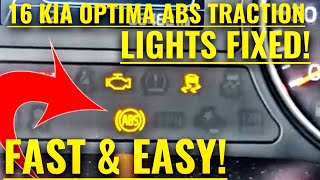
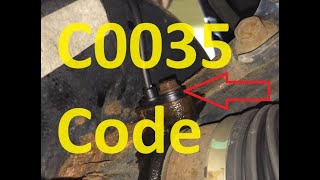
We Have This Part in Stock

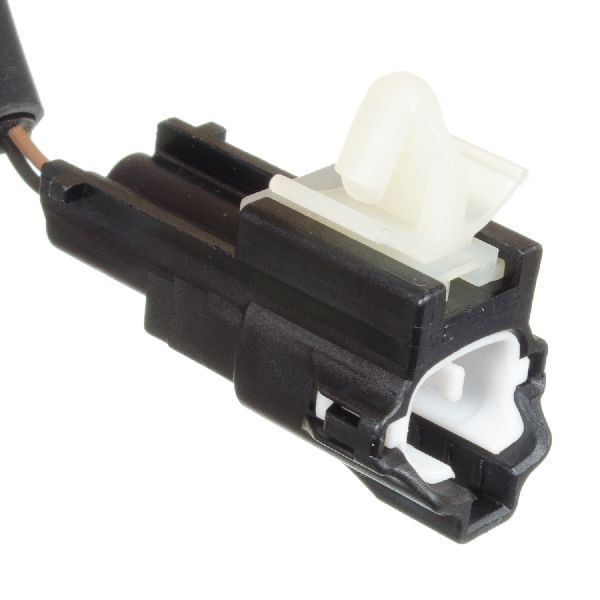



The information in this article is provided for general reference and educational purposes only. Vehicle specifications, procedures, and part compatibility can vary by production date, trim level, and region. Always consult your vehicle's factory service manual and verify part numbers before purchasing or performing repairs. Safety-critical components such as airbags, seat belts, and braking systems should be installed by a qualified professional.
- Kia Optima:
- 🎬 Helpful Videos
- 🛍️ Shop This Part
- What's Unique About the 2011-2015 Kia Optima
- Symptoms You May Notice
- Most Likely Causes
- Rare But Worth Checking
- Diagnosis Steps
- Parts You'll Likely Need
- Related Codes That Often Appear With This One
- Platform-Specific Known Issues
- Documented NHTSA Reports
- Mechanic-Grade Diagnostic Values
- Scan Tool Commands That Help
- Wiring & Ground Locations
- Real Owner Repair Stories
- OEM Part Supersession History
- Model Year Variations Within This Range
- Diagnostic Flowchart
- Other Known Issues on This Vehicle
- Used vs. New Parts: Buying Guide for This Vehicle
- Real Owner Stories
- 2013 Kia Optima
- 2013 Kia Optima
- Related OBD-II Codes
- Frequently Asked Questions
- 🎟️ Get 5% Off