

2017-2021 Honda Clarity Window Regulator: Diagnosis, Replacement, and Reset Procedure
This guide covers common failure symptoms, replacement costs, and the essential window reset procedure for all Honda Clarity models.
- The front driver's side window regulator (part # 72250-TRT-A01) is a single assembly with the motor and fits all 2017-2021 Clarity variants (PHEV, EV, FCV).
- After replacement, a window reset procedure is mandatory to restore the 'auto up/down' function. This is a simple manual process.
- Common failure symptoms include grinding noises, slow movement, and a crooked or dropped window.
- There are no widespread defects, recalls, or TSBs for this part; failures are typically due to normal wear.
- When buying a used unit, the most important check is for frayed cables and cracked plastic guides.
Symptoms of a Failing Window Regulator
A failing window regulator on a Honda Clarity typically gives several warning signs before it stops working completely. Because the cabin is so quiet, especially in electric mode, these symptoms are often easy to notice. Identifying them early can prevent a situation where the window is stuck open or drops inside the door.
- Grinding, Clicking, or Popping Noises: Any unusual sound from inside the door when operating the window is a primary symptom. This is often caused by a frayed cable or a broken plastic pulley inside the regulator assembly.
- Slow or Stuttering Window Movement: If the window moves noticeably slower than it used to, or if it hesitates on its way up or down, the motor is likely straining due to resistance from a failing regulator.
- Crooked Window: A window that tilts forward or backward as it moves is a clear sign that a guide clip has broken or the regulator is bent, preventing it from holding the glass securely. This can leave gaps that let in wind and water.
- Window Drops Inside the Door: In cases of complete failure, a cable can snap, causing the window to fall suddenly and uncontrollably into the door panel. This requires immediate replacement.
- Window Won't Move at All: If you press the switch and hear a faint click or hum from the door, the motor is receiving power but the mechanical part of the regulator is jammed. If you hear nothing, the problem could be the switch, fuse, or the motor itself.
Known Issues, Recalls, and Technical Service Bulletins (TSBs)
As of mid-2024, there are no recalls or Technical Service Bulletins (TSBs) issued by Honda or the National Highway Traffic Safety Administration (NHTSA) specifically for window regulator failures on the 2017-2021 Honda Clarity. Searches of owner forums and repair databases show isolated incidents of failure consistent with normal wear and tear, but no widespread or systemic defect has been identified. This indicates that the original OEM regulators are generally reliable.
Pro Tip: While there are no regulator-specific recalls, Honda did issue a warranty extension for the A/C condenser on some 2018-2021 Clarity models due to potential leaks. It's always a good practice to check for any open recalls or warranty extensions by entering your vehicle's VIN on the official Honda recall lookup site.
Buying a Used 2017-2021 Clarity Window Regulator
Since the Clarity was a lower-volume vehicle, direct-fit aftermarket window regulators can be hard to find. A quality used OEM regulator is often the best value, providing the exact fit and performance of the original part without the high cost of a new one from the dealer.
What to Inspect:
- Cables: Carefully examine the steel cables. They should be tight and free of any fraying, kinks, or rust. A frayed cable is the most common point of failure.
- Plastic Components: Check all plastic pulleys and guide clips for cracks or stress marks. These parts can become brittle over time.
- Motor and Connector: Ensure the electric motor is physically attached and the electrical connector is clean, with no bent or corroded pins.
- Mounting Points: Verify that all metal mounting brackets are straight and not bent from a previous accident.
Compatibility and Part Numbers:
The front driver's side window regulator is the same for all 2017-2021 Honda Clarity variants, including the Plug-In Hybrid (PHEV), Electric (EV), and Fuel Cell (FCV). Always match the part number to ensure you are buying the correct part for your vehicle's door.
| Position | OEM Part Number |
|---|---|
| Front Left (Driver) | 72250-TRT-A01 |
| Front Right (Passenger) | 72210-TRT-A01 |
| Rear Left (Driver Side) | 72750-TRT-A01 |
| Rear Right (Passenger Side) | 72710-TRT-A01 |
Replacement Overview
Replacing the window regulator is a manageable DIY project for someone with basic tools and patience. The most delicate part of the job is removing the interior door panel without breaking any of the plastic clips.
- Difficulty: 2 out of 5
- Estimated Time: 1-1.5 hours
- Tools Required: Plastic trim removal tools, Phillips screwdriver, 10mm socket/wrench.
Basic Steps:
- Pry up the power window switch panel on the armrest using a trim tool.
- Disconnect the electrical connectors from the switch panel.
- Remove the single Phillips screw located under the switch panel.
- Carefully pry the door panel away from the door frame, starting from the bottom. There are numerous clips around the perimeter.
- Lift the panel up and off the door, disconnecting any remaining cables for the door handle or lights.
- Peel back the plastic weather barrier to access the inside of the door.
- Temporarily reconnect the window switch and lower the window until you can see the bolts that attach the glass to the regulator through the access holes.
- Loosen the bolts holding the glass, then carefully lift the glass by hand and secure it at the top of the door frame with strong tape.
- Disconnect the window motor's electrical connector.
- Unbolt the old regulator assembly and remove it from the door.
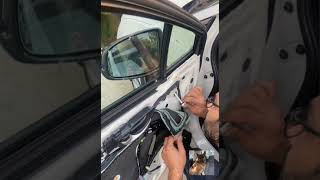
- Installation is the reverse of removal. 🎬 Watch this step-by-step Honda window regulator replacement guide
Important: After installing the new regulator and reconnecting the battery, you MUST perform a window reset procedure. Failure to do so will result in the 'auto up/down' feature not working correctly.
Required Window Reset Procedure
This procedure teaches the new motor the fully open and fully closed positions. The steps must be followed exactly.
- Start the engine.
- Push and hold the driver's window switch down until the window is fully open.
- Pull and hold the driver's window switch up until the window is fully closed, and continue to hold the switch for at least one or two more seconds.
- Test the 'auto up/down' function. If it works, the reset is complete. If not, repeat the process. Some complex variations of this reset exist for other Honda models, but this simple version is typically all that is needed for the Clarity after a regulator replacement. 🎬 See how to perform the Honda window reset procedure
Cost Comparison
The cost for a replacement window regulator can vary significantly. A used OEM part offers a substantial savings over a new part from the dealership.
| Part Type | Estimated Price Range |
|---|---|
| New OEM (Dealer) | $340 - $515 |
| New Aftermarket | $90 - $150 (Limited availability) |
| Used OEM | $75 - $175 |
| Shop Labor | $120 - $200 |
Frequently Asked Questions (FAQ)
Does the front driver's side regulator (72250-TRT-A01) fit all Clarity models?
Yes, the front left window regulator, part number 72250-TRT-A01, fits all 2017, 2018, 2019, 2020, and 2021 Honda Clarity models, including the Plug-In Hybrid, Electric, and Fuel Cell versions.
Do I need to program the new window regulator after installation?
You do not need a special scan tool for programming, but you must perform a simple manual 'reset' procedure. This involves running the window all the way down, then all the way up, and holding the switch for a few seconds to re-initialize the auto up/down feature.
Can I just replace the motor or the cables instead of the whole assembly?
No, the window regulator for the Honda Clarity is sold as a complete and sealed assembly that includes the motor, cables, and tracks. These components are not available separately from Honda. Attempting to repair the assembly with individual parts is not recommended.
My window is just slow, but it still works. Is the regulator failing?
Yes, a window that moves slower than usual is a very common early sign of a failing regulator. The slowness is caused by increased friction from worn guides or a fraying cable, which makes the motor work harder. It is best to replace it before it fails completely and potentially drops the window.
Helpful Videos
Technical Specifications
OEM Part Numbers: 72250-TRT-A01 (Front Left) 72210-TRT-A01 (Front Right) 72750-TRT-A01 (Rear Left) 72710-TRT-A01 (Rear Right)
Cable-driven regulator integrated with a 12V DC power window motor. Sold as a single assembly.
We Have This Part in Stock


The information in this article is provided for general reference and educational purposes only. Vehicle specifications, procedures, and part compatibility can vary by production date, trim level, and region. Always consult your vehicle's factory service manual and verify part numbers before purchasing or performing repairs. Safety-critical components such as airbags, seat belts, and braking systems should be installed by a qualified professional.
- Honda Clarity:
- 🎬 Helpful Videos
- 🛍️ Shop This Part
- Symptoms of a Failing Window Regulator
- Known Issues, Recalls, and Technical Service Bulletins (TSBs)
- Buying a Used 2017-2021 Clarity Window Regulator
- What to Inspect:
- Compatibility and Part Numbers:
- Replacement Overview
- Basic Steps:
- Required Window Reset Procedure
- Cost Comparison
- Frequently Asked Questions (FAQ)
- 🎟️ Get 5% Off