

Tesla Autopilot Camera Problems: 2015-2026 Model S, 3, X, Y & Cybertruck
This guide covers common failures, critical calibration needs, and buying advice for the video cameras essential to your Tesla's Autopilot and safety systems.
- Camera calibration is mandatory after any replacement or physical disturbance, such as a new windshield. Autopilot will not function until this is done.
- Many camera errors are temporary, caused by dirt, condensation, or software glitches that can be resolved with a cleaning, a system reboot, or by initiating a self-calibration drive.
- Condensation inside the B-pillar and front camera housings is a common, known issue. Tesla has issued service bulletins and recommends pre-heating the cabin to clear it.
- Part number compatibility is critical. Always match the OEM part number from your vehicle's original camera when buying a used replacement.
Common Symptoms of Tesla Camera Failure

When a camera in your Tesla fails or its view is obstructed, the car will typically display a specific warning on the touchscreen. You'll notice a loss of certain functions until the issue is resolved.
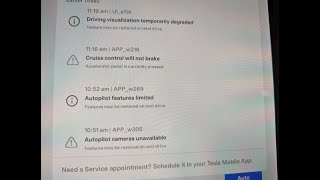
- "Autopilot cameras unavailable" Message: This is the most common alert, indicating a problem with one or more cameras in the Autopilot system. It often appears with error codes like APP_w305. 🎬 Watch: Troubleshooting common Autopilot camera error codes and solutions.
- "Camera blocked or blinded" Message: This alert appears when a camera's lens is obstructed by dirt, debris, condensation, or even harsh sun glare.
- Loss of Autopilot/FSD: When a critical camera fails, Autopilot, Full Self-Driving, and even basic Traffic-Aware Cruise Control will be disabled. The car will revert to manual driving only.
- Blank or Flickering Camera Feeds: The rearview, side, or front camera display may appear black, flicker intermittently, or show a distorted image.
- Condensation Inside Camera Housing: Visible moisture, fog, or haze inside the front windshield camera housing or the B-pillar camera enclosures is a well-known issue.
- Delayed Rearview Camera: On some models, the rearview camera image may be slow to appear or show a black screen for several seconds after shifting into reverse.
Known Issues, TSBs, and Recalls

Several known issues and service actions relate to the camera systems in these Tesla models.
Condensation in B-Pillar and Windshield Cameras
A common complaint is moisture buildup inside the B-pillar and front camera housings, especially in cold or wet weather. Tesla has acknowledged this, stating the enclosures are not hermetically sealed by design. Service Bulletin SB-20-12-002 was issued for some 2016-2019 Model S, X, and Model 3 vehicles to address B-pillar camera condensation by removing internal gore patches to improve airflow. For front camera condensation, preconditioning the cabin or using a defroster can help clear it.
Cybertruck Rearview Camera Delay Recall
In late 2024, Tesla recalled 27,185 Cybertrucks produced between November 2023 and September 2024. A software issue could cause the rearview camera display to be delayed or remain blank for up to 8 seconds after shifting to reverse, increasing crash risk. This issue was resolved with an over-the-air (OTA) software update (version 2024.32.5.2 or later).
Model 3 Rear Camera Harness Recall
Tesla recalled 2017-2020 Model 3 vehicles due to the potential for the rearview camera cable harness to become damaged from opening and closing the trunk lid. Repeated flexing could cause the coaxial cable to wear and fail, leading to a loss of the rearview camera feed.
NHTSA Investigation into Vision System
As of early 2026, the National Highway Traffic Safety Administration (NHTSA) has an ongoing engineering analysis into Tesla's camera-only Autopilot system. The investigation focuses on the system's performance in reduced visibility conditions like sun glare or fog, where cameras may fail to detect hazards without adequately warning the driver.
Compatibility Warning: Tesla began removing radar sensors from its vehicles in mid-2021, relying solely on cameras (Tesla Vision). Camera hardware and software from a radar-equipped car may not be compatible with a vision-only vehicle, and vice-versa. Always match part numbers precisely.
Buying a Used Tesla Camera: What to Check

Purchasing a used OEM camera can be a cost-effective solution, but careful inspection is critical. Since these cameras are essential for safety systems, a faulty used part is a waste of money and time.
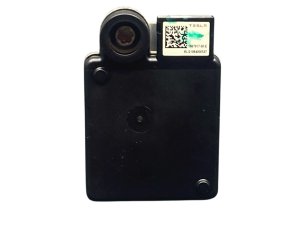
- Verify the Part Number: This is the most important step. Tesla uses many camera revisions. Using the wrong part number can lead to incompatibility. Match the full OEM part number from your original camera to the used part. The provided list of part numbers is a starting point, but always confirm the exact number on your specific part.
- Inspect the Lens: Carefully examine the camera lens for scratches, chips, or hazing. Any damage to the lens will distort the camera's vision and render it useless for Autopilot functions.
- Check the Housing and Connectors: Look for cracks in the plastic housing, broken mounting tabs, or any signs of physical damage. Inspect the electrical connector pins to ensure they are straight, clean, and free of corrosion. Water intrusion is a known issue, so any sign of rust or water marks is a major red flag.
- Ask About the Donor Vehicle: If possible, find out the history of the vehicle the camera came from. Was it involved in a front-end collision? A flood? A camera from a car with rear-end damage is a much safer bet than one from a car with a shattered windshield.
- Avoid 'As-Is' Untested Parts: Only buy from sellers who guarantee the part is functional. Since you cannot test the camera's electronics without installing it, you are relying on the seller's word. A part that has been tested and verified is worth a higher price.
Replacement and Calibration Process
Replacing a Tesla camera is not a simple plug-and-play operation. While physical installation can be straightforward for some cameras (like repeaters), the process is dominated by the mandatory calibration procedure that follows.
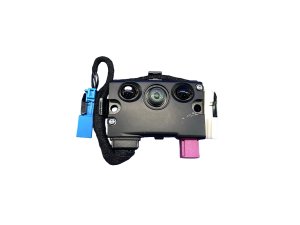
Physical Installation: This varies by camera location. The front triple-camera assembly requires removing the mirror housing inside the car. B-pillar cameras require removing the exterior applique. 🎬 See this walkthrough on how to replace a B-pillar camera. Repeater cameras are integrated into the side turn signal indicator.
Calibration is Mandatory: After any camera is replaced or even just moved (e.g., during a windshield replacement), its calibration must be cleared and the system must relearn its position and viewing angle. Without this, Autopilot and other safety features will not work.
The calibration process has two potential phases:
- Dynamic Calibration: This is a self-calibration process the owner can initiate. After clearing the old calibration via the service menu (Controls > Service > Camera Calibration > Clear Calibration), the owner must drive the vehicle. The car will use lane markings on well-marked roads to align the cameras. This typically takes 20-25 miles but can take up to 100 miles (160 km) depending on road conditions.
- Static Calibration: In some cases, especially after a collision, a static calibration performed by a qualified shop is necessary. This involves placing the vehicle on a perfectly level surface and aiming the cameras at specific targets placed at precise distances, a process that requires professional tools.
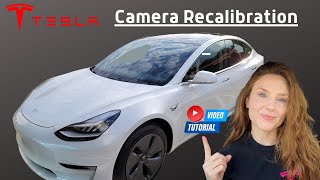
Pro Tip: Many owners report that a simple software reboot or clearing the calibration through the service menu can resolve camera errors that appear to be software glitches, avoiding a service visit. 🎬 Watch: A simple guide to performing your own camera recalibration. This should be the first step in troubleshooting.
Cost of Replacing a Tesla Video Camera
The cost can vary significantly based on which camera needs replacement and whether you use Tesla service, an independent shop, or DIY.
| Item | Estimated Cost |
|---|---|
| New OEM Camera (from Tesla) | $150 - $400 per camera |
| Used OEM Camera | $50 - $200 per camera |
| Shop Labor (Replacement) | $150 - $300 |
| Shop Labor (Calibration Only) | $100 - $250 |
| Total Tesla Service Center Cost | $400 - $850+ |
Note: Prices are estimates and can vary based on location and specific vehicle model. Aftermarket options are generally not available or recommended for this part.
Frequently Asked Questions (FAQ)
Can I replace just one of the three front cameras in the windshield assembly?
No, the three forward-facing cameras are sold as a single, integrated assembly. If one fails, the entire unit must be replaced.
Why did my Autopilot stop working after a windshield replacement?
The front camera assembly is attached to the windshield. When the windshield is replaced, the camera is moved. This changes its precise alignment, requiring a camera calibration to be performed before Autopilot can be re-enabled. Many glass shops are not equipped to do this, so you may need to perform the dynamic calibration yourself or visit a qualified service center.
My screen says "Camera blocked or blinded." What should I do?
First, physically inspect all eight camera lenses. Clean them with a soft microfiber cloth and water. The issue is often caused by dirt, snow, ice, or condensation. If the weather is cold or humid, preconditioning the car can help clear internal fogging. If the message persists in clear conditions with clean lenses, it may indicate a software or hardware problem.
What is the difference in cameras on the Model 3 'Highland'?
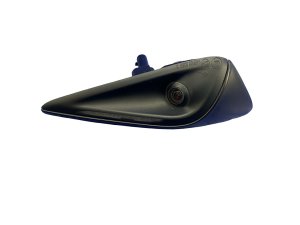
The updated Model 3 'Highland' (2024+) features improved camera hardware for better image quality compared to older models. Some newer builds, starting in 2025/2026, also include a new front bumper camera, similar to the Cybertruck, which was not present on the initial Highland release. This part is reportedly not able to be retrofitted to earlier Highland models.
Helpful Videos
Technical Specifications
OEM Part Numbers: 1086332-00 1086332-00-D 1086332-00-E 1086332-00-F 1095949 1095949-00 1095949-00-E 1100437-00-E 1108647 1108647-00-B 1108647-00-C 1108647-00-D 1108647-00-E 1108647-00-H 1125106
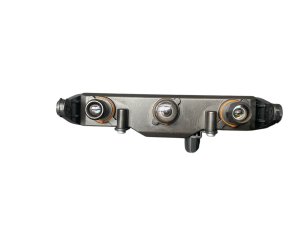
The Tesla Vision system uses a suite of cameras, including three forward-facing cameras with different focal lengths, plus side and rear-facing cameras to provide a 360-degree view. The cabin-facing camera is located in the rearview mirror assembly. Newer models (Model 3 'Highland', Cybertruck) may also feature a front bumper camera.
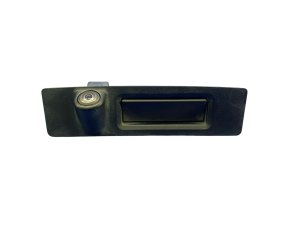
We Have This Part in Stock

The information in this article is provided for general reference and educational purposes only. Vehicle specifications, procedures, and part compatibility can vary by production date, trim level, and region. Always consult your vehicle's factory service manual and verify part numbers before purchasing or performing repairs. Safety-critical components such as airbags, seat belts, and braking systems should be installed by a qualified professional.
- Tesla Model 3:
- Tesla Model Y:
- Tesla Model S:
- Tesla Model X:
- Tesla Cybertruck:
- 🎬 Helpful Videos
- 🛍️ Shop This Part
- Common Symptoms of Tesla Camera Failure
- Known Issues, TSBs, and Recalls
- Condensation in B-Pillar and Windshield Cameras
- Cybertruck Rearview Camera Delay Recall
- Model 3 Rear Camera Harness Recall
- NHTSA Investigation into Vision System
- Buying a Used Tesla Camera: What to Check
- Replacement and Calibration Process
- Cost of Replacing a Tesla Video Camera
- Frequently Asked Questions (FAQ)
- 🎟️ Get 5% Off