

2010-2017 Audi Side Assist Fault: Radar Sensor Guide for Q5, A4, RS5 & More
Diagnosing and replacing the rear blind spot radar sensor (8T0907566B) for Audi Side Assist systems in the Q5, A4, A4 allroad, RS5, and RS4.
- The most common cause of an "Audi Side Assist: system fault" is a failed rear radar sensor, often due to water intrusion.
- This is NOT a simple plug-and-play replacement. The new sensor requires both 'Component Protection' removal and calibration by a dealer or specialist with ODIS online access.
- A DIYer can save money by physically swapping the sensor (which requires rear bumper removal), but a professional visit is mandatory to make the part functional.
- When buying a used sensor, always get the latest revision (8T0907566B) and inspect it carefully for cracks and corrosion.
Understanding the Audi Side Assist System Fault


If you own a 2013-2017 Audi Q5, 2013-2015 Audi A4, 2010-2016 Audi A4 allroad, 2010-2016 Audi RS5, or a 2013-2016 Audi RS4, you may eventually see a "Audi Side Assist: system fault" message on your dashboard. This warning indicates a problem with the blind spot monitoring system, and the cause is often a failed rear radar sensor. This guide covers the common symptoms, diagnosis, and replacement of the right (passenger side) rear sensor, part number 8T0907566B and its variants.
Most Common Symptoms of Failure
When the Side Assist radar sensor fails, you will notice distinct symptoms:
- "Audi Side Assist: system fault" Warning: This is the most common and direct indicator. The message will appear on your instrument cluster display.
- Inoperative Mirror Lights: The yellow warning lights in your side mirrors will not illuminate when a car is in your blind spot. They may also fail to light up briefly when you start the car, which is a normal system check.
- System Unavailable in MMI: The option to adjust or turn on/off the Side Assist system may be grayed out or show as unavailable in the Multi Media Interface (MMI) menu.
- Intermittent Functionality: The system might work sporadically, often failing in wet or foggy weather before failing completely. This can be a sign of water getting into a cracked or poorly sealed sensor.
These symptoms are often accompanied by fault codes stored in the vehicle's control module (Address 3C), which can be read with a VAG-specific diagnostic tool like VCDS or ODIS.
Known Issues and Causes of Failure
These radar sensors are located in a vulnerable position behind the rear bumper corners, exposing them to several risks.
- Water Intrusion: This is the leading cause of failure. The sensor housings can develop small cracks over time, allowing moisture from rain, snow, or car washes to seep in and corrode the internal circuit board.
- Physical Damage: Minor bumper impacts, even ones that don't leave much visible damage on the bumper cover itself, can be enough to crack the sensor housing or its mounting brackets.
- Wiring and Connector Corrosion: The electrical connector for the sensor can also suffer from corrosion, leading to a poor connection and system faults.
Pro Tip: Before assuming the sensor has failed, thoroughly wash the rear bumper corners. A thick layer of dirt, road salt, or snow can sometimes temporarily block the radar and trigger a fault message.
Buying a Used Side Assist Radar Sensor

A used OEM sensor is an excellent, cost-effective alternative to a new dealer part, which can be very expensive. However, you must inspect a used part carefully before purchasing.
- Verify the Part Number: Ensure the part number matches what your vehicle needs. The most current revision is 8T0907566B. Older versions like 8T0907566 and 8T0907566A will also work but the 'B' revision is generally preferred.
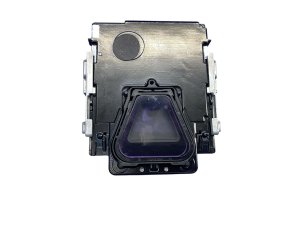
- Inspect the Housing: Look for any cracks, even hairline ones, in the black plastic casing. Squeeze the part gently and listen for any crunching sounds that might indicate internal corrosion.
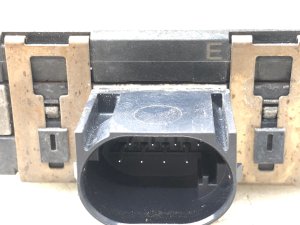
- Check the Connector Pins: The electrical pins should be clean, straight, and free of any green or white corrosion.
- Examine Mounting Points: Ensure all plastic mounting tabs are intact and not cracked or broken. This is crucial for proper alignment.
- Ask About the Source Vehicle: If possible, find out if the donor car had a rear-end collision. It's best to source a sensor from a vehicle with front-end damage to reduce the risk of the sensor having been damaged in an impact.
Replacement and Calibration Guide

Replacing the sensor is a multi-step process that requires removing the rear bumper cover. While mechanically straightforward, the final steps are critical and require specialized tools.
Installation Difficulty: 4 out of 5 (due to bumper removal and mandatory calibration)
- Remove the Rear Bumper Cover: This is the most time-consuming step. It involves removing screws in the wheel wells, under the car, and fasteners inside the trunk area. The exact procedure varies slightly between the Q5, A4 sedan/allroad, and RS5 coupe.
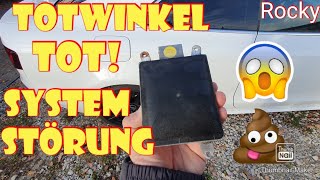
- Unbolt the Old Sensor: The sensor is bolted to a bracket on the car's body. Unplug the electrical connector and remove the bolts holding it in place. 🎬 See how to swap the sensor unit and check for damage.
- Install the New Sensor: Bolt the replacement sensor onto the bracket and plug in the electrical connector.
- Reinstall the Bumper Cover: Carefully reinstall the bumper, ensuring all wiring for lights and other sensors is reconnected.
Warning: Component Protection and Calibration are Required. This is NOT a plug-and-play part. After installation, the system will not work until two critical steps are performed by a dealer or a qualified independent shop with the right tools (like ODIS with online access):
1. Component Protection Removal: Because this is a security-related part, the replacement sensor must be electronically matched to your car's VIN. This process, called Component Protection removal, requires an online connection to Audi's servers.
2. Calibration: The sensor must be calibrated to ensure it is aimed correctly and accurately measures the distance and speed of other vehicles. Skipping this step can result in the system not working or, worse, providing inaccurate warnings.
Vehicle-Specific Notes
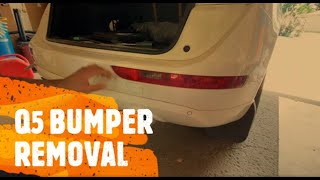
- Audi Q5 (2013-2017): Bumper removal involves accessing fasteners behind the tail lights and within the cargo area side panels. 🎬 Watch: Step-by-step guide to removing the Audi Q5 rear bumper.
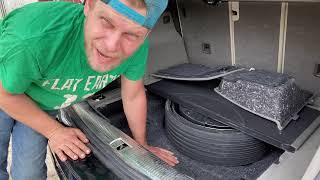
- Audi A4/S4/RS4 (2010-2016): Sedan models require removing trim inside the trunk to access the upper bumper fasteners.
- Audi RS5 (2010-2016): As a coupe, the rear bumper and trunk trim removal process may differ slightly from the A4 sedan.
Cost Comparison
| Part or Service | Estimated Cost |
|---|---|
| New OEM Sensor | $970 - $1320 |
| New Aftermarket Sensor | Not commonly available |
| Used OEM Sensor | $75 - $200 |
| Shop Labor (Replacement) | $250 - $400 (Bumper R&R) |
| Shop Labor (Calibration & CP) | $200 - $350 |
Frequently Asked Questions (FAQ)
Can I replace the sensor myself and drive to the dealer for calibration?
Yes, you can perform the physical installation yourself to save on labor costs. However, the Side Assist system will remain inoperative and display a fault until the Component Protection is removed and the sensor is calibrated by a professional.
What is "Component Protection"?
Component Protection (CP) is an anti-theft feature used by Audi and other VW Group brands. It links important electronic modules, like this radar sensor, to the specific vehicle they were installed in at the factory. When you install a used part, the car recognizes it's from a different vehicle and disables its functionality until a dealer or specialist with online access officially adapts the "new" part to your car.
Do I need to replace both the left and right sensors at the same time?
No, you only need to replace the sensor that has failed. A diagnostic scan can confirm which side is faulty (e.g., Master or Slave sensor fault). The right (passenger) side is part number 8T0907566B, while the left (driver) side is 8T0907568B.
Are there any recalls for this issue?
As of early 2026, there are no widespread recalls specifically for this Side Assist sensor failure on these models. However, you can always check for recalls and service campaigns on your specific vehicle by entering your VIN on the official Audi recall website or the NHTSA website.
Helpful Videos
Technical Specifications
OEM Part Numbers: 8T0907566 8T0907566A 8T0907566B
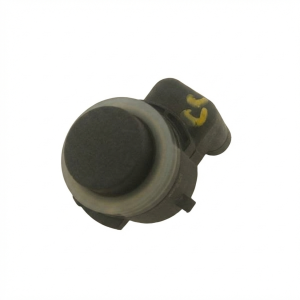
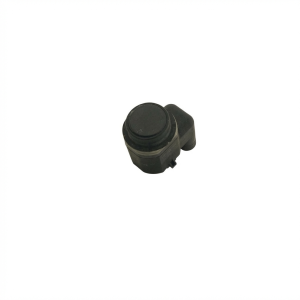
24GHz Radar Sensor for Audi Side Assist (Lane Change Assist). Position: Rear Right (Passenger Side).
We Have This Part in Stock



The information in this article is provided for general reference and educational purposes only. Vehicle specifications, procedures, and part compatibility can vary by production date, trim level, and region. Always consult your vehicle's factory service manual and verify part numbers before purchasing or performing repairs. Safety-critical components such as airbags, seat belts, and braking systems should be installed by a qualified professional.
- Audi Q5:
- Audi A4:
- Audi A4 allroad:
- Audi RS5:
- Audi RS4:
- 🎬 Helpful Videos
- 🛍️ Shop This Part
- Understanding the Audi Side Assist System Fault
- Most Common Symptoms of Failure
- Known Issues and Causes of Failure
- Buying a Used Side Assist Radar Sensor
- Replacement and Calibration Guide
- Vehicle-Specific Notes
- Cost Comparison
- Frequently Asked Questions (FAQ)
- 🎟️ Get 5% Off