

2012 Volvo S60 & XC60 Brake Vacuum Pump: Diagnosing and Fixing the Common Oil Leak
This guide covers the common failure mode—a significant oil leak—of the engine-driven brake vacuum pump on the 2012 Volvo S60 and XC60 with the T5 engine.
- The primary failure is not braking performance but a major oil leak from degraded seals, often misdiagnosed as a transmission leak.
- This part fits the 2012 S60 and XC60 with the 5-cylinder T5 engine ONLY.
- Resealing the original pump with an upgraded Viton seal kit is often a more durable and cost-effective repair than replacing the entire unit.
- Replacement is a straightforward DIY job, requiring removal of the airbox and battery for access.
The #1 Problem: A Major Oil Leak

The most common failure for the vacuum pump on the 2012 Volvo S60 and XC60 isn't a loss of braking power, but a significant engine oil leak. The seals and O-rings inside the pump assembly become hard and brittle from heat and age. This allows engine oil to seep out, typically from the seal between the pump and the engine, or the seal between the two halves of the pump body.
This leak can be severe. Owners often find oil dripping onto the top of the transmission case, the driver's side control arm, and eventually onto the ground. Because of its location, the leak is frequently misdiagnosed as a leaking transmission seal or a rear main seal, which are much more expensive repairs. If you see oil on the driver's side of your engine bay, the vacuum pump is the first place you should inspect.
Compatibility Warning: This guide and the associated parts are for the 2012 Volvo S60 and XC60 models equipped with the 2.5L 5-cylinder turbocharged (T5) engine only. These vehicles were also available with a 6-cylinder engine that may use a different part. 🎬 See this repair guide for Volvo 6-cylinder 3.2 and T6 engines. Always confirm your vehicle's engine before purchasing.
Symptoms of a Failing Vacuum Pump

While an oil leak is the most prominent sign, other symptoms can also point to a failing vacuum pump.
- Obvious Oil Leak: This is the primary symptom. Look for fresh, dark oil coating the top of the transmission, behind the engine on the driver's side.
- Stiff or Hard Brake Pedal: If the pump fails internally and can no longer create a vacuum, you will lose power brake assist. The brake pedal will become very difficult to press, and stopping distances will increase significantly.
- Hissing or Whistling Noises: A hissing sound from the engine bay could indicate a vacuum leak from the pump's hoses or the pump body itself.
- Check Engine Light: In some cases, a malfunctioning vacuum system can trigger diagnostic trouble codes (DTCs) related to vacuum-dependent components, illuminating the check engine light.
Known Issues, TSBs, and Recalls
As of early 2026, there are no specific recalls or Technical Service Bulletins (TSBs) from Volvo or the NHTSA for this mechanical vacuum pump on the 2012 S60 and XC60. The issue of leaking seals is a widely known problem in owner and mechanic communities but has not been addressed with a formal campaign. Recent NHTSA warnings about Volvo brake issues apply to much newer hybrid and electric models with software-related problems and are not relevant to this mechanical pump.
Repair Option 1: Resealing the Pump


Because the pump itself is a simple and durable mechanical part, the internal components rarely fail. The problem is almost always the rubber seals. For this reason, many owners choose to reseal the original pump instead of replacing it. Aftermarket seal kits are available that often use Viton rubber, which is more resistant to heat and oil than the original seal material.
A reseal kit typically includes:
- The main O-ring that seals the pump to the engine block.
- A square-profiled gasket that seals the two halves of the pump body.
- A new check valve and its small O-ring.
- New Torx screws for the pump body, as the old ones can be greasy and easily stripped.
Resealing is a cost-effective option for DIY mechanics comfortable with disassembling the pump.
🎬 Watch this step-by-step DIY guide for resealing your vacuum pump.Repair Option 2: Replacing the Pump Assembly
Replacing the entire pump is a more straightforward, though more expensive, option. You can choose between a new OEM pump, a new aftermarket pump, or a used OEM pump.
Buying a Used Vacuum Pump: What to Check
A used OEM vacuum pump is an excellent value, as the pump mechanism is very reliable. When buying a used unit, you are primarily getting a good core to either install directly or reseal with an upgraded kit for maximum longevity.
- Verify Part Numbers: Match the part number on the listing to your old part. Known compatible numbers include 31329920, 31340067, and 313400673.
- Inspect the Housing: Check photos for any cracks or significant damage to the aluminum body.
- Check the Drive Tang: Ensure the metal tang that engages with the camshaft is not bent, cracked, or excessively worn.
- Consider Mileage: A pump from a lower-mileage vehicle is preferable, as its seals may have more life left. However, given the high failure rate of the seals, it's wise to plan on resealing any used pump before installation.
- Why Used OEM is a Good Choice: The original Volvo/Pierburg pump body is a high-quality casting. A used OEM part, especially when fitted with a new, upgraded seal kit, can be more reliable than a cheap, new aftermarket unit of unknown quality.
Cost Comparison
| Part/Service | Estimated Cost |
|---|---|
| New OEM Pump | $550 - $800 |
| New Aftermarket Pump | $70 - $150 |
| Used OEM Pump | $40 - $90 |
| Seal Repair Kit | $25 - $50 |
| Shop Labor Cost | $180 - $300 |
Installation Guide & Difficulty
Replacing the vacuum pump is a moderately easy job for a DIYer with basic tools. The main challenge is accessing the pump, which is tucked behind the engine.
- Difficulty: 2/5
- Estimated Time: 1.5 - 2.5 hours
Step-by-Step Overview:
- Disconnect the Battery: Always disconnect the negative battery terminal before starting work.
- Remove Airbox and Battery: To access the pump, you will need to remove the engine air filter box and the battery, along with the battery tray. This will clear the space needed to work behind the engine.
- Disconnect Hoses: Unplug the quick-disconnect vacuum hose from the pump. It may be stiff, but it pulls straight off after squeezing the release tabs.
- Remove Mounting Bolts: The pump is held to the engine by two bolts. Remove them.
- Remove the Pump: Wiggle the pump and pull it straight out from the engine. Be prepared for some oil to spill out.
- Installation: Before installing the new or resealed pump, clean the mounting surface on the engine. Lubricate the new O-ring with clean engine oil. Note the orientation of the slot in the camshaft and align the drive tang on the pump to match it. Slide the pump into place, reinstall the bolts, reconnect the hose, and reassemble the battery and airbox.
Pro Tip: While you have the battery and airbox out, it's a great time to clean your battery terminals and inspect the serpentine belt for cracks or wear.
Frequently Asked Questions (FAQ)
Is it safe to drive with a leaking vacuum pump?
If the pump is only leaking oil but your brakes feel normal, it is generally safe to drive in the short term, but you should monitor your engine oil level closely. A significant oil leak can lead to engine damage if the oil level gets too low. If you experience a hard brake pedal, the vehicle is NOT safe to drive and requires immediate repair.
How can I be sure it's the vacuum pump leaking and not the transmission?
Clean the affected area thoroughly with a degreaser and then run the engine for a few minutes. Use a flashlight and mirror to inspect the area around the vacuum pump, which is located high up on the driver's side of the engine, behind the cylinder head. If fresh oil appears there first, the vacuum pump is the culprit. Transmission fluid is also typically red, while this leak will be brown or black engine oil.
Is this an electric or mechanical pump?
On the 2012 S60 and XC60 with the T5 engine, this is a mechanical pump. It is driven directly by the engine's camshafts. It is not an electric pump and has no complex wiring aside from a possible sensor on some variants.
Should I replace the whole pump or just the seals?
If you are comfortable with basic disassembly, resealing the pump with an upgraded Viton seal kit is the most cost-effective and durable repair. The pump itself is very robust. If you prefer a quicker job, replacing the entire unit with a used OEM or new aftermarket part is also a good option.
Helpful Videos
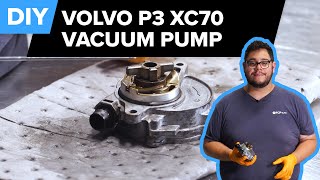
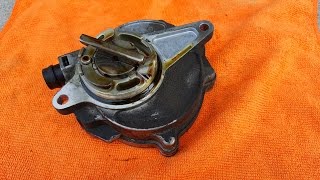
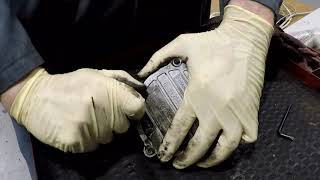
Technical Specifications
OEM Part Numbers: 31329920 31340067 313400673
Mechanical, camshaft-driven vane-style pump.
We Have This Part in Stock



The information in this article is provided for general reference and educational purposes only. Vehicle specifications, procedures, and part compatibility can vary by production date, trim level, and region. Always consult your vehicle's factory service manual and verify part numbers before purchasing or performing repairs. Safety-critical components such as airbags, seat belts, and braking systems should be installed by a qualified professional.
- Volvo S60:
- Volvo XC60:
- 🎬 Helpful Videos
- 🛍️ Shop This Part
- The #1 Problem: A Major Oil Leak
- Symptoms of a Failing Vacuum Pump
- Known Issues, TSBs, and Recalls
- Repair Option 1: Resealing the Pump
- Repair Option 2: Replacing the Pump Assembly
- Buying a Used Vacuum Pump: What to Check
- Cost Comparison
- Installation Guide & Difficulty
- Step-by-Step Overview:
- Frequently Asked Questions (FAQ)
- 🎟️ Get 5% Off