

Dodge Viper Rear Upper Control Arm (2003-2017): Failure Symptoms & Used Buying Guide
This guide covers the common failure points, symptoms, and inspection tips for the rear upper control arm used across all Gen 3, 4, and 5 Dodge Vipers.
- This single part (05290117AE) fits the rear upper position on BOTH sides for all Vipers from 2003 to 2017.
- The most common failure is not the metal arm, but the rubber bushings, which cause clunking noises and alignment issues.
- When buying a used arm, the condition of the bushings and the ball joint is more important than the metal arm itself.
- A four-wheel alignment is absolutely required after installation to prevent poor handling and rapid tire wear.
Key Part Information & Vehicle Fitment

A significant advantage of this part is its wide range of compatibility. The same rear upper control arm fits all Dodge Vipers from 2003 through 2017, covering Generation 3 (2003-2006), Generation 4 (2008-2010), and Generation 5 (2013-2017). Furthermore, the part is interchangeable, meaning it can be installed on either the left (driver) or right (passenger) side of the vehicle. This simplifies sourcing a replacement.
The complete assembly includes the metal control arm, pre-installed rubber bushings where it mounts to the frame, and a ball joint at the wheel end. The primary failure point is typically not the sturdy metal arm itself, but the rubber bushings which can degrade over time.
Symptoms of a Failing Rear Upper Control Arm


A bad rear upper control arm can make your Viper feel unstable and produce noticeable sounds. Here are the most common symptoms:
- Clunking or Popping Noises: This is the most frequent sign. You may hear a clunk, pop, or creak from the rear of the car, especially when going over bumps, accelerating, or decelerating. This sound is often caused by worn bushings allowing metal-on-metal contact between the control arm and the frame. One Viper owner described a noise that sounded like a failed rubber bushing when transitioning from a standstill.
- Uneven Tire Wear: A worn control arm can no longer hold the wheel at the correct angle, leading to improper alignment. This often causes the inside or outside edge of the rear tires to wear out much faster than the rest of the tread.
- Poor Handling & Unstable Steering: The rear of the car may feel loose, disconnected, or like it's wandering, particularly during turns. This instability is due to excessive movement in the wheel assembly caused by worn bushings or a failing ball joint.
- Visible Bushing Damage: If you look at the control arm, you may see that the rubber bushings are cracked, torn, rotted, or deformed. An eBay listing for a used OEM arm specifically noted its dry-rotted bushings as the reason for replacement.
Pro Tip: While control arm issues cause clunking, Viper owners on forums frequently report other sources for rear-end noises. These can include drivetrain lash (considered normal on many Vipers), differential issues, loose half-shafts, or even worn parking brake pads. It's important to diagnose the sound carefully before replacing parts.
Known Issues, TSBs, and Recalls

There are no recalls specifically for the rear upper control arm on 2003-2010 Dodge Vipers. The National Highway Traffic Safety Administration (NHTSA) did investigate reports of rear suspension knuckle failures on these models. However, the investigation concluded in 2013, finding that the failures were the result of collisions, not manufacturing defects, and no recall was issued. While not directly related to the control arm, Chrysler did issue a Technical Service Bulletin (TSB) instructing technicians to inspect the rear suspension, including the knuckle, if a customer expressed concern, though any replacement would not be free of charge unless covered by warranty.
Important: While the control arm itself has not been recalled, several recalls were issued for 2003-2010 Vipers related to inadvertent airbag deployment. It is crucial to ensure these safety recalls have been addressed.
Buying a Used Rear Upper Control Arm: What to Check
A used OEM control arm is an excellent alternative to expensive new parts, especially since the Mopar part has been discontinued. However, careful inspection is critical. The metal arm is robust, but the bushings and ball joint are wear items.
- Inspect the Bushings: This is the most important check. The two rubber bushings where the arm mounts to the frame should be free of cracks, tears, and dry rot. They should be firm and not show signs of being crushed or deformed. If the bushings are bad, they will need to be pressed out and replaced, which requires a hydraulic press and adds cost and complexity to the repair.
- Check the Ball Joint: The ball joint connects the arm to the wheel knuckle. Try to move the ball joint stud by hand. It should be stiff and difficult to move. If it's loose, floppy, or makes noise, it is worn out. The rubber boot covering the ball joint should be intact with no rips or leaks.
- Examine the Arm for Damage: Inspect the entire metal arm for any signs of bending, cracks, or heavy corrosion. A bent arm will make proper wheel alignment impossible. Check for scraped or damaged areas that might indicate the vehicle was in an accident.
- Verify Part Numbers: The most current part number is 05290117AE (or 5290117AE). This number supersedes older versions like 5290117AA, 5290117AB, and 5290117AC. While older versions will fit, the latest part number ensures you have the most recent revision.
Cost of Replacement
Prices can vary based on supplier and condition. As the new OEM part is scarce, used OEM is the most common replacement option.
| Part Type | Estimated Cost | Notes |
|---|---|---|
| New OEM (Mopar) | $410 - $500 | Part is listed as discontinued or having limited supply, making it difficult to find new. |
| New Aftermarket | Not Widely Available | Complete aftermarket control arms for this specific application are not common. Bushing kits are available. |
| Used OEM | $150 - $300 | Price depends heavily on the condition of the bushings and ball joint. |
| Shop Labor | $150 - $350 per arm | Labor can take 1-3 hours per side. An alignment is required after installation, adding to the cost. |
Installation Guide & Difficulty
Replacing the rear upper control arm is a moderately difficult job that can be done by a skilled DIY mechanic with the right tools.
- Difficulty: 3 out of 5
- Estimated Time: 1.5 - 3 hours per side
- Tools Required: Jack and jack stands, lug wrench, socket set (18mm, 19mm), torque wrench, ball joint separator tool.
Simplified Replacement Steps:
- Safely lift and support the rear of the vehicle on jack stands and remove the wheel.
- Support the lower control arm with a jack to prevent the suspension from dropping suddenly.
- Loosen and remove the nut from the upper ball joint where it connects to the steering knuckle. Use a ball joint separator to pop the joint free from the knuckle.
- Remove the two bolts holding the control arm bushings to the vehicle's frame. These are 18mm bolts on a Gen 4 Viper.
- Remove the old control arm assembly.
- Install the new control arm by first loosely attaching it to the frame.
- Connect the new ball joint to the knuckle and tighten the castle nut to the manufacturer's specification, installing a new cotter pin.
- With the suspension still supported by the jack (to simulate normal ride height), tighten the two frame bolts to their specified torque. This prevents premature wear on the new bushings.
- Reinstall the wheel, lower the vehicle, and torque the lug nuts.
Critical Final Step: A four-wheel alignment is mandatory after replacing a control arm. Skipping this step will result in poor handling and rapid, uneven tire wear.
Frequently Asked Questions (FAQ)
Can I replace just the bushings instead of the whole control arm?
Yes, aftermarket polyurethane or OEM-style rubber bushings are available. However, replacing them requires a hydraulic press to remove the old bushings and press in the new ones. For many DIY mechanics, replacing the entire control arm assembly is simpler and faster, especially if the ball joint is also worn.
Is this part the same for the left and right side?
Yes, the rear upper control arm is identical for the driver's and passenger's side of the vehicle, which makes finding a replacement easier.
Will a bad rear upper control arm cause a vibration?
Yes, a bad control arm can cause vibrations. If the arm is bent or the bushings are severely worn, the wheel alignment will be off, which can lead to vibrations that may be felt in the seat or floor, especially at higher speeds. Uneven tire wear caused by the bad arm can also be a source of vibration.
Do I need an alignment after replacing this part?
Absolutely. A four-wheel alignment is required any time a major suspension component like a control arm is replaced. This ensures the camber, caster, and toe are all set to factory specifications for proper handling and to prevent tire damage.
Helpful Videos
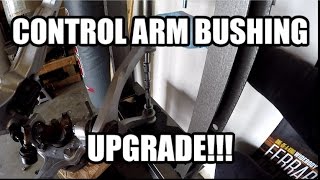
Technical Specifications
OEM Part Numbers: 05290117AE 5290117AE 05290117AC 5290117AC 05290117AB 5290117AB 05290117AA 5290117AA
Fits all 2003-2017 Dodge Vipers. Interchangeable for rear left or rear right side. Includes pre-installed bushings and ball joint.

The information in this article is provided for general reference and educational purposes only. Vehicle specifications, procedures, and part compatibility can vary by production date, trim level, and region. Always consult your vehicle's factory service manual and verify part numbers before purchasing or performing repairs. Safety-critical components such as airbags, seat belts, and braking systems should be installed by a qualified professional.
- Dodge Viper:
- 🎬 Helpful Videos
- Key Part Information & Vehicle Fitment
- Symptoms of a Failing Rear Upper Control Arm
- Known Issues, TSBs, and Recalls
- Buying a Used Rear Upper Control Arm: What to Check
- Cost of Replacement
- Installation Guide & Difficulty
- Simplified Replacement Steps:
- Frequently Asked Questions (FAQ)
- 🎟️ Get 5% Off