

2016-2023 Mazda CX-9 Trunk & Liftgate Trim: A Guide to Panels, Rattles, and Replacement
From identifying the correct interior panel to solving common liftgate rattles, here's what you need to know before buying a replacement trim piece for your CX-9.
- "Trunk Trim Panel" is not one part; it's a family of over a dozen different interior and exterior pieces. Identify the exact panel you need before buying.
- Rattles are the most common complaint. Before buying parts, check for simple fixes like securing the 3rd-row seatbelts or adjusting the liftgate latch.
- When buying a used panel, the condition of the mounting clips and tabs on the back is more important than minor scuffs on the front. A broken tab will lead to poor fit and more rattles.
- Several TSBs exist for related issues like noisy power liftgate motors and failing opener switches, which require trim removal to fix.
Identifying Your CX-9's Rear Trim Panels
Before purchasing a replacement, you must identify which specific panel you need. The trunk and liftgate area of the CX-9 is composed of multiple distinct trim pieces, each with a unique part number. Using a part from a vehicle with different options (like with or without a power liftgate) may result in improper fitment.
- Interior Liftgate Trim: These are the plastic panels on the inside of the hatch itself. They are typically separated into an upper panel, a large lower panel, and smaller side pieces.
- Cargo Area Side Trim (Quarter Panel Trim): These are the large, carpeted or plastic panels on the left (driver) and right (passenger) sides of the trunk interior. To access the power liftgate control module, the right-side panel must be removed.
- Exterior Liftgate Garnish/Molding: This is the painted trim piece on the exterior of the liftgate, often located above the license plate. It is color-matched to the vehicle, so verifying the color code is essential.
- Floor Storage Compartment Lid: This is the cover for the storage area in the trunk floor.
- D-Pillar Trim: These are the interior plastic panels located on either side of the rear window, connecting the headliner to the side trim panels.
Symptoms and Reasons for Replacement
Unlike mechanical parts, trim panels don't typically 'fail' but are replaced due to damage, noise, or related component failure.
Most Common Issues
- Rattles and Noises: This is the most frequent complaint. Rattles can come from loose trim panels, the liftgate latch needing adjustment, or even the third-row seatbelts tapping against the plastic. Before replacing panels, ensure the noise isn't from the spare tire, jack, or items stored in the trunk.
- Broken Clips or Mounting Tabs: Plastic clips become brittle over time and can easily break during removal for other repairs (like taillight replacement or power liftgate diagnostics). This is the most common damage found on used trim panels.
- Cosmetic Damage: Scratches, scuffs, and gouges from loading and unloading cargo are a primary reason for replacing interior panels. Sun damage or impacts can damage exterior trim.
- Power Liftgate Issues: While not a trim failure, diagnosing power liftgate problems often requires removing interior trim panels. Issues can stem from a weak battery, a bad fuse, a faulty switch, or the control module itself. A simple reset by disconnecting the battery can sometimes resolve issues.
Pro Tip: Before blaming a rattle on a trim panel, check the third-row seatbelt buckles. Many owners have spent hours searching for a noise only to find that securing the unused seatbelts solved the problem.
Known Issues, TSBs, and Recalls
- TSB 09-006/24: For 2016-2023 CX-9 models, Mazda issued a technical service bulletin for clicking or groaning noises from the power liftgate drive unit, caused by internal corrosion or lack of grease. The fix is to replace the drive unit.
- TSB 09-012/19: This TSB addresses the liftgate unlatching by itself or the exterior switch failing on 2016-2018 models. The cause is water intrusion corroding the switch, which requires replacement with an improved part.
- Power Liftgate Inoperative (DTC U3003:16): On some 2016 models, a low battery can cause the power liftgate to become inoperative. Recharging the battery and resetting the system may resolve the issue.
- Recalls: While several recalls exist for the 2016-2023 CX-9, none are directly for the trim panels themselves. Related recalls involve the power liftgate stay dampers on older models (pre-2016), second-row seat issues, and fuel pumps. Always check for open recalls using your vehicle's VIN on the NHTSA website.
Buying a Used Trunk Trim Panel: What to Inspect
Buying a used OEM trim panel is often a smart choice, offering better fit and quality than aftermarket alternatives, which are rare for these specific parts anyway. However, a thorough inspection is key.
- Inspect ALL Mounting Points: This is the most critical step. Carefully examine the back of the panel. Look for broken or stressed plastic tabs, clips, and screw holes. A panel with even one broken main tab may not sit flush and could cause future rattles.
- Check for Hidden Cracks: Flex the panel slightly and look for hairline cracks, especially around corners and speaker grilles. What looks like a minor scuff on the front could be a sign of a larger crack on the back.
- Verify Part Numbers: If possible, match the part number from your old panel to the new one. The initial data provided a long list of numbers, highlighting the complexity. For example, TK48-68-290A-02 is the left rear D-Pillar trim, while TK48-68-8F1-02 is the left side floor storage compartment lid.
- Color and Texture Match: For interior panels, ensure the color (e.g., black) and texture match your existing trim. For exterior painted parts like the liftgate garnish (e.g., TK48-50-810C-64, described as 'White Pearl'), verify the color code.
- Condition of Carpet/Fabric: On carpeted side panels, check for stains, mold, mildew, or strong odors. These can be difficult to remove and may indicate water leaks.
Cost & Replacement Info
Replacing trunk trim is a common DIY task. The main challenge is being patient and using the correct tools to avoid breaking the plastic clips.
| Item | Cost |
|---|---|
| New OEM Interior Panel (e.g., D-Pillar Trim) | $100 - $130 |
| New OEM Exterior Garnish (Painted) | $270 - $380 |
| Used OEM Interior Panel | $50 - $150 |
| Shop Labor to Replace One Panel | $75 - $150 |
Replacement Difficulty: 2/5
DIY Feasible: Yes.
Estimated Time: 0.5 - 1.5 hours per panel.
Tools Required: Plastic trim removal tool kit (essential to prevent scratching), Phillips head screwdriver, socket set (for some components).
The general process involves locating and removing any visible screws (often hidden under small covers or inside grab handles), then using a plastic pry tool to carefully pop the panel clips out of the body. Always pull straight out to avoid breaking clips. Installation is the reverse of removal, taking care to align all clips before pushing the panel into place.
Frequently Asked Questions (FAQ)
My liftgate is rattling. Is it a bad trim panel?
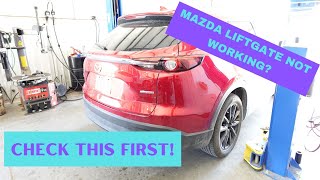
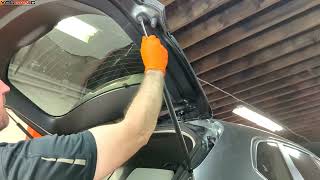
Not always. Before replacing panels, check for simpler causes. The most common sources of rattles in the rear of a CX-9 are the third-row seatbelts hitting the plastic trim, items in the spare tire well (like the jack), or the liftgate latch striker needing adjustment. 🎬 Watch: How to easily fix a rattling rear hatch Try securing these items first.
Do I need special tools to remove the trim panels?
Yes, it is highly recommended to use a plastic trim removal kit. Using a metal screwdriver or other hard object will almost certainly scratch or gouge the plastic panels and surrounding paint. These kits are inexpensive and essential for a clean job.
Can I fix a broken clip on my old panel?
It is generally not recommended. While some attempt to use epoxy or plastic welders, these repairs often fail due to vehicle vibrations. A broken clip means the panel will not be secure, likely leading to the very rattles and squeaks you're trying to eliminate. Replacing the panel is the only reliable solution.
My power liftgate stopped working. Do I need to remove the trim?
Probably. First, try a simple reset by disconnecting the negative battery terminal for a few minutes. Also, check the fuse. If those steps don't work, accessing the liftgate motor, control module, or latch mechanism requires removing the interior trim panels on the liftgate and/or the right side of the cargo area.
Helpful Videos


Technical Specifications
OEM Part Numbers: TK48-50-810C-64 TK48-50811 TK48-68-290A-02 TK48-68-290A-75 TK48-68-89XA-02 TK48-68-8F1-02 TK48-68-940E-02 TK48-68-960F TK4868280 TK4868280A02 TK4868290 TK4868850 TK486889X TK48688F0 TK48688F1 TK49626G0A TK49636G0A
Part types include interior liftgate panels, cargo area side panels (quarter panel trim), exterior painted liftgate garnish, floor storage covers, and D-pillar trim. Materials are typically ABS plastic, polypropylene, and carpet. Compatibility depends on model year, color, and options like the power liftgate.
We Have This Part in Stock



The information in this article is provided for general reference and educational purposes only. Vehicle specifications, procedures, and part compatibility can vary by production date, trim level, and region. Always consult your vehicle's factory service manual and verify part numbers before purchasing or performing repairs. Safety-critical components such as airbags, seat belts, and braking systems should be installed by a qualified professional.
- MAZDA CX-9:
- 🎬 Helpful Videos
- 🛍️ Shop This Part
- Identifying Your CX-9's Rear Trim Panels
- Symptoms and Reasons for Replacement
- Most Common Issues
- Known Issues, TSBs, and Recalls
- Buying a Used Trunk Trim Panel: What to Inspect
- Cost & Replacement Info
- Replacement Difficulty: 2/5
- Frequently Asked Questions (FAQ)
- 🎟️ Get 5% Off