

2020-2025 Kia Telluride Trunk Trim: A Guide to Panels, Part Numbers, and Replacement
This guide clarifies the different cargo area trim panels, helps you buy the right used part, and shows you how to inspect for common damage.
- The Telluride has multiple, distinct cargo trim panels; you must verify the exact OEM part number (e.g., 85720-S9000WK for the forward partition) before buying.
- When buying a used panel, the most critical inspection is of the rear mounting tabs and clips—broken tabs will cause rattles and poor fitment.
- Used OEM panels are the best value, as new aftermarket options are generally not available and new OEM panels are significantly more expensive.
- A major recall for 2023-2025 Tellurides involves exterior door trim falling off, but this does not affect the interior trunk panels.
Decoding the Telluride's Trunk Trim: Which Panel Do You Need?

The term "Trunk Trim Panel" for the Kia Telluride can be confusing because the cargo area is made up of several different, non-interchangeable pieces. Before buying, it's critical to identify the exact panel you need. The color for most of these interior trim pieces is black (color code WK).
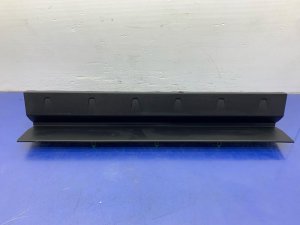
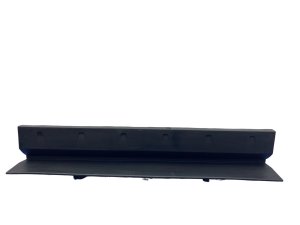
- Rear Trunk Floor Forward Trim Cover (Partition): This is the vertical panel that sits directly behind the third-row seats, partitioning the passenger area from the lower cargo well. It is one of the most commonly replaced pieces. The verified OEM part number is 85720-S9000WK.
- Lower Liftgate Trim Panel: This is the large plastic panel on the interior of the rear tailgate itself. It covers the latch mechanism and other components. The OEM part number for this is 81711-S9000WK.
- Folding Cargo Floor / Luggage Board: This is the flat, hinged floor panel that you lift to access the storage compartment below. It is a separate part from the vertical trim pieces. Its part number is typically 85715-S9000 or 85715-S9000WK.
- Tool Case / Jack Case: This is the foam or plastic organizer that sits in the bottom of the cargo well and holds the jack and tools. While located in the trunk, it is not a cosmetic trim panel. A common part number is 09149-S9100.
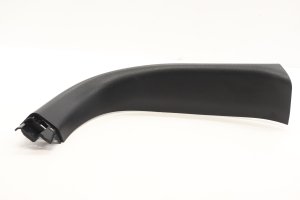
- Side Trim Panels: These are the large, complex panels on the left and right sides of the cargo area, often incorporating speakers or power outlets.
- Rear Sill Plate: This is the scuff plate at the very back edge of the trunk floor, which protects the body from scratches during loading.
Symptoms of a Failing Trunk Trim Panel

Failure of a trim panel is almost always due to physical damage rather than mechanical breakdown. Here’s what to look for:
- Visible Cracks and Scratches: The most common symptom is cosmetic damage from loading and unloading heavy or sharp objects.
- Broken Mounting Tabs: If a panel feels loose, rattles, or has large gaps, it's likely that the plastic clips or tabs on the back have broken. This often happens during removal for other repairs if not done carefully.
- Warping or Discoloration: Extreme heat or sun exposure over time can cause the plastic to warp or fade, although this is less common for interior trunk panels.
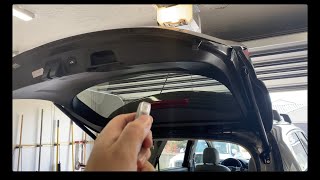
- Rattling Noises: A loose panel or broken clip can cause persistent rattling noises from the rear of the vehicle, especially on rough roads. 🎬 See how to fix a rattling rear hatch
Recall Notice: A major recall (NHTSA 25V494000 / Kia SC347) was issued for 2023-2025 Tellurides concerning exterior door belt moldings that can detach while driving. This recall does NOT apply to the interior trunk trim panels discussed in this article, but it highlights a pattern of trim-related issues owners should be aware of.
Known Issues, TSBs, and Recalls

While there are no specific recalls for the interior trunk trim panels, a few related items are worth noting:
- TSB SA445 (#10181999): This service action for some 2021 Tellurides addressed an issue where the incorrect color exterior front door belt line molding was installed at the factory, causing a mismatch with the rear doors. This points to potential quality control issues with trim finishes.
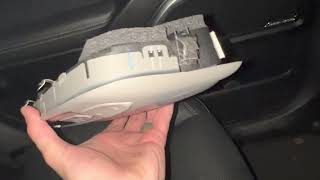
- Interior Rattles: Rattles are a common complaint from Telluride owners. While a loose cargo panel could be the cause, other known sources include the rear HVAC control panel in the headliner (TSB SA534) and loose wiring harnesses. 🎬 Watch: Diagnose a common rear rattle in the Telluride Before replacing a panel for a rattle, ensure the noise isn't coming from a nearby component.
Buying a Used Trunk Trim Panel: What to Check

Since aftermarket options for large interior trim pieces are virtually nonexistent, a used OEM panel is often the most cost-effective solution. Here’s how to inspect a used panel before you buy:
- Verify the Part Number First: This is the most critical step. Match the OEM part number from your old panel or a parts diagram to the one you are buying. Do not rely on visual identification alone.
- Inspect All Mounting Points: Carefully flip the panel over and check every single clip and tab location. This is the most important inspection point. Look for stress marks (white lines in the plastic) or outright broken tabs. A panel with even one broken main tab may not sit flush and could rattle.
- Check for Hidden Cracks: Pay close attention to corners and screw holes. A small crack can grow over time from vehicle vibrations.
- Look for Warping: Lay the panel on a flat surface to ensure it hasn't been warped by heat or improper storage. A warped panel will never align correctly.
- Assess Cosmetic Damage: Distinguish between minor scuffs that can be cleaned and deep gouges that have removed plastic. For a utility area like a trunk, minor cosmetic wear is acceptable and a major cost-saver compared to new.
Pro Tip: Many Telluride owners use all-weather cargo liners from day one. A used trim panel from a vehicle that had a liner is likely to be in near-perfect cosmetic condition.
Replacement Difficulty & Labor Costs
Replacing most trunk trim panels is a straightforward DIY job. The main challenge is removing the old panel without breaking the delicate plastic clips.
- Difficulty: 1 out of 5.
- Time: 0.5 Hours.
- Tools: A plastic trim removal tool set is highly recommended to avoid scratching panels or breaking clips. A T40 Torx bit may be needed for the tailgate latch anchor if removing the liftgate panel.
A repair shop would likely charge a minimum of 0.5 to 1.0 hour of labor for this task.
Cost Comparison: New vs. Used
| Part Type | Cost Estimate |
|---|---|
| New OEM | $150 - $260 |
| New Aftermarket | Typically Not Available |
| Used OEM | $60 - $125 |
| Shop Labor | $75 - $150 |
Frequently Asked Questions (FAQ)
Will this trim fit any Telluride trim level (LX, S, EX, SX, X-Line)?
Yes, for the most part. The core black plastic interior trim panels are consistent across the different trim levels of the 2020-2025 Telluride. The primary differences between trims are in features like upholstery, sound systems, and exterior styling, not the fundamental plastic molds of the cargo area. Always verify by part number if possible.
What tools do I need to replace a trunk trim panel?
A plastic trim removal kit is essential. Using a flathead screwdriver will almost certainly scratch the panels or break the hidden clips. For some panels, like the one on the liftgate, you may also need a socket set or Torx bits to remove bolts securing handles or latch components.
Is the folding cargo floor (luggage board) included with the side or forward trim panels?
No. The folding cargo floor is a distinct part (OEM part # 85715-S9000 or 85715-S9000WK) and is sold separately. When buying any trunk trim, assume you are only getting the single piece pictured and described.
My trim is rattling but doesn't look broken. What should I do?
Before replacing the panel, press firmly around its edges to see if you can locate a loose spot. It's possible a clip has just popped out of its hole and can be snapped back into place. Also, check for any loose items in the storage compartments or jack area, as these are common sources of rattles. Finally, be aware of TSBs for other rattling components in the rear of the vehicle, like the rear HVAC controls.
Helpful Videos
Technical Specifications
OEM Part Numbers: 85720-S9000WK 81711-S9000WK 09149-S9100 81721-S9000 85715-S9000WK
Material: Molded Plastic. Color Code: WK (Black)
We Have This Part in Stock


The information in this article is provided for general reference and educational purposes only. Vehicle specifications, procedures, and part compatibility can vary by production date, trim level, and region. Always consult your vehicle's factory service manual and verify part numbers before purchasing or performing repairs. Safety-critical components such as airbags, seat belts, and braking systems should be installed by a qualified professional.
- Kia Telluride:
- 🎬 Helpful Videos
- 🛍️ Shop This Part
- Decoding the Telluride's Trunk Trim: Which Panel Do You Need?
- Symptoms of a Failing Trunk Trim Panel
- Known Issues, TSBs, and Recalls
- Buying a Used Trunk Trim Panel: What to Check
- Replacement Difficulty & Labor Costs
- Cost Comparison: New vs. Used
- Frequently Asked Questions (FAQ)
- 🎟️ Get 5% Off