

2016-2022 BMW 7 Series Trunk Trim: Rattles, Replacement & The Ski-Bag Option
This guide covers common damage, part number variations, and the critical compatibility check for the G11/G12 7 Series trunk trim panel.
- The most critical compatibility check is for the 'through-loading system' (ski bag option S465A), which requires a panel with a center cutout.
- When buying a used panel, the most important inspection is checking the back for broken or cracked mounting clips, which cause rattles and poor fitment.
- Failure is almost always physical damage or broken clips; the panel itself has no electronic functions.
- Replacement is a very easy DIY job, typically taking less than 30 minutes with only a plastic trim removal tool.
Symptoms of a Damaged or Failing Trunk Trim Panel

Failure of this part is almost always due to physical damage or wear and tear. Since it has no electronic or moving components, the symptoms are straightforward and primarily affect aesthetics and noise levels.
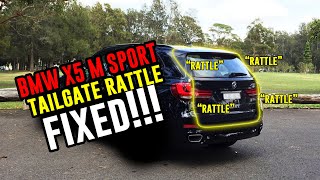
- Rattling or Buzzing Noises: The most common complaint. This is usually caused by broken or loose plastic mounting clips on the back of the panel, allowing it to vibrate against the car's body. 🎬 See how to fix a BMW trunk rattle
- Loose or Sagging Fit: The panel may hang loosely, pull away from the sides of the trunk, or fall down completely. This is a clear sign that the mounting points have failed.
- Visible Physical Damage: Cracks, deep gouges, and tears in the carpeting are common from loading and unloading heavy or sharp objects.
- Stains or Discoloration: Water stains on the trunk panel are a red flag. While this damages the panel, it also points to a more serious underlying issue like a leaking trunk seal or clogged sunroof drain that must be addressed.
Pro Tip: Many common electronic trunk problems, like a malfunctioning power liftgate, require the removal of these trim panels for diagnosis. If you are troubleshooting the power trunk struts or latch, you will need to remove this panel first.
Variant Differences: The Critical Through-Loading System Check

Before purchasing a replacement panel, you must determine if your vehicle is equipped with the through-loading system (BMW option code S465A). This is the single most important compatibility factor.
Warning: The trunk partition panel—the main vertical piece directly behind the rear seats—is shaped differently depending on this option. A panel for a car without the through-loading system will NOT fit a car with it, and vice-versa.
- Standard Panel: This is a solid, flat panel.
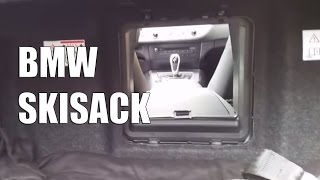
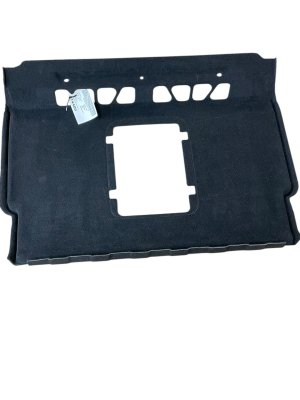
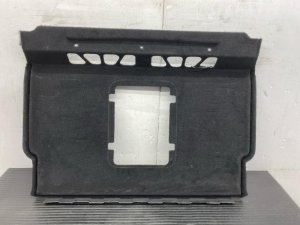
- Through-Loading System Panel: This version has a large, rectangular cutout in the center that allows the rear seat armrest to fold down, creating a pass-through (often called a "ski bag" port) from the trunk into the cabin. 🎬 Watch: BMW through-loading system and ski bag demonstration
Always compare photos of the replacement part with your original panel to ensure the cutout matches your vehicle's configuration.
Buying a Used Trunk Trim Panel: What to Inspect

Since aftermarket versions of this specific panel are virtually nonexistent, a used OEM part in good condition is the best value. Here’s what to look for:
- Verify the Through-Loading Cutout: This is the most important step. Confirm the panel you are buying matches your car's ski-bag option.
- Inspect All Mounting Points: This is the most critical inspection. Turn the panel over and carefully check every plastic clip and molded tab. These are frequently broken when a panel is removed carelessly. A panel with broken mounting points will never fit securely and is guaranteed to rattle.
- Check for Cracks and Warping: Examine the panel's structure, especially around the edges and corners. Ensure it is not warped or cracked, which can prevent it from sitting flush.
- Look for Water Stains: Check the carpeted side and the backing for any signs of water damage or mildew. Stains indicate a potential leak in the vehicle that needs to be fixed separately.
- Assess Cosmetic Condition: Minor scuffs and carpet fuzzing are normal for a used part from a high-traffic area like a trunk. However, look out for deep scratches, chemical stains, or significant tears that won't be acceptable.
Cost Comparison
Replacing a damaged trunk trim panel with a used OEM part is highly cost-effective compared to purchasing a new one from a dealer.
| Part Type | Estimated Cost |
|---|---|
| New OEM | $250 - $450 |
| New Aftermarket | Not Generally Available |
| Used OEM | $50 - $125 |
| Shop Labor | $50 - $100 |
Installation Guide and Difficulty

Replacing the trunk trim panel is a simple DIY job that requires only basic tools and patience.
- Difficulty: 1/5 (Easy)
- Estimated Time: 0.5 Hours
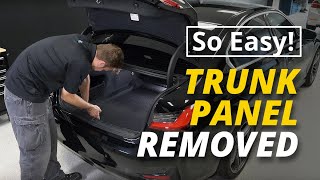
- Tools Required: Plastic trim removal tool kit, small flathead screwdriver. 🎬 Watch: Step-by-step BMW trunk panel removal tutorial
Step-by-Step Replacement
- Empty the Trunk: Remove the trunk floor covering and any personal items.
- Remove Fasteners: Locate and remove any plastic push-pin rivets or cargo hooks holding the panel in place. Use a trim removal tool to gently pry the center pin up, then pull the entire rivet out.
- Pry the Panel Loose: Starting at one edge, use a plastic pry tool to carefully release the hidden metal clips that secure the panel to the vehicle's body. Work your way around the panel, applying steady pressure.
- Disconnect Electronics (if applicable): If your panel has a 12V power socket or a light, carefully pull the panel away and disconnect the wiring harness by pressing the release tab on the connector.
- Install the New Panel: Align the new panel, reconnect any wiring, and line up the mounting clips with the holes in the body. Use firm pressure from the palm of your hand to snap each clip into place. You should hear an audible click.
- Reinstall Fasteners: Replace any push-pin rivets and cargo hooks you removed.
Known Issues, TSBs, and Recalls
There are no known recalls or Technical Service Bulletins (TSBs) specifically for the trunk trim panels. However, issues with other components in the trunk are common for this vehicle generation.
- Power Tailgate Failure: Many owners report issues with the power trunk struts (spindle drives) failing, resulting in grinding noises or the trunk unlatching but not lifting. Diagnosing this requires removing the side trunk trim panels to access the motors and control module.
- Unintentional Tailgate Opening: BMW issued a TSB (SI B51 30 16) for the tailgate opening unintentionally, which is resolved with a software update.
- Airbag Module Recall: A recall (NHTSA #16V173000) was issued for some 2016 models due to a faulty airbag control module. This is unrelated to the trunk trim but is important safety information for owners.
Technical Specifications and Part Numbers
These part numbers are for the main rear trunk partition/bulkhead panel. Part numbers can change based on vehicle options and production date, so always verify with a VIN if possible.
- Chassis Codes: G11 (Standard Wheelbase), G12 (Long Wheelbase). Trunk components are generally interchangeable between both.
- Known OEM Part Numbers: 51477345599, 51477360175, 7360175
Frequently Asked Questions (FAQ)
What is the 'through-loading system' and how do I know if I have it?
The through-loading system (option code S465A) is a pass-through from the trunk to the cabin, also known as a ski bag or ski port. The easiest way to check is to go inside your car and see if the rear seat center armrest can fold down to create an opening into the trunk. If it does, you have the through-loading system and need the corresponding trunk panel with a cutout.
Will this panel fit both the G11 (standard) and G12 (long-wheelbase) 7 Series?
Yes, the trunk area dimensions are the same for both the standard (G11) and long-wheelbase (G12) models, so the trunk trim panels are interchangeable. The primary difference is compatibility with the through-loading system.
My trunk panel is rattling. Do I need to buy a new one?
Not necessarily. A rattle is almost always caused by broken or loose clips. You may be able to remove the panel and secure it using new OEM clips or add felt tape to the contact points to dampen the vibration without needing to replace the entire panel.
What tools do I need to replace the trunk trim panel?
You typically only need a plastic trim removal tool kit. These kits are inexpensive and designed to pry off panels and clips without scratching your car's paint or damaging the plastic parts.
Helpful Videos

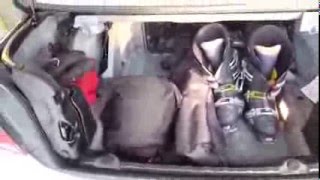
Technical Specifications
OEM Part Numbers: 51477345599 51477360175 7360175
Material: Molded composite backing with automotive-grade carpet face. Fitment varies based on presence of option S465A (Through-loading system).
We Have This Part in Stock
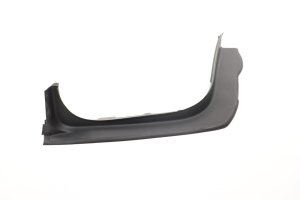
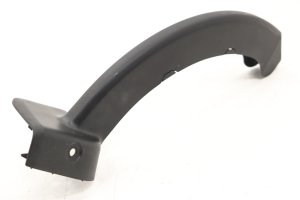
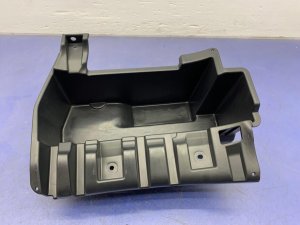

The information in this article is provided for general reference and educational purposes only. Vehicle specifications, procedures, and part compatibility can vary by production date, trim level, and region. Always consult your vehicle's factory service manual and verify part numbers before purchasing or performing repairs. Safety-critical components such as airbags, seat belts, and braking systems should be installed by a qualified professional.
- BMW 7 Series:
- 🎬 Helpful Videos
- 🛍️ Shop This Part
- Symptoms of a Damaged or Failing Trunk Trim Panel
- Variant Differences: The Critical Through-Loading System Check
- Buying a Used Trunk Trim Panel: What to Inspect
- Cost Comparison
- Installation Guide and Difficulty
- Step-by-Step Replacement
- Known Issues, TSBs, and Recalls
- Technical Specifications and Part Numbers
- Frequently Asked Questions (FAQ)
- 🎟️ Get 5% Off