

2008-2015 Audi R8 Frunk Trim: Replacing Cracked Panels and Brittle Clips
A complete guide to the front trunk (frunk) trim panels in the first-generation Audi R8, covering common damage, part numbers, and replacement.
- The most common failure is not the panel itself, but the brittle plastic mounting clips on the back, which break easily and cause rattles.
- When buying used, you MUST inspect the back of the panel for intact mounting posts; this is more important than minor surface scuffs.
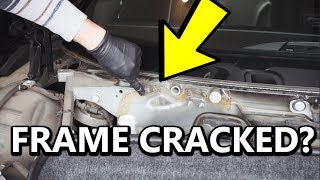
- On 2008-2010 models, removing these panels provides an opportunity to inspect the front strut towers for a known frame cracking issue.
- Replacement is a very simple DIY job that requires only basic trim tools and can be completed in under 30 minutes.
Identifying the Front Trunk (Frunk) Panels

The first-generation Audi R8 features a set of trim panels to line its front luggage compartment. When searching for a replacement, it's important to identify the specific piece you need. The main components are:
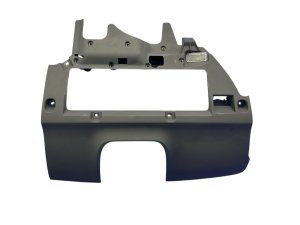
- Cowl Vent Panel: A large plastic trim piece located at the rear of the frunk, near the base of the windshield. The OEM part number is typically 423819401B.
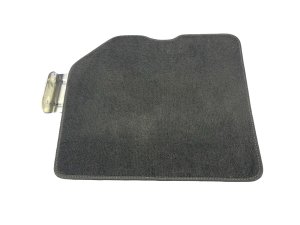
- Floor Liner / Access Cover: The main carpeted mat that covers the floor of the frunk. This also serves as an access panel. A common part number is 420-863-463-B.
- Side Panels: Smaller trim pieces that line the sides of the compartment.
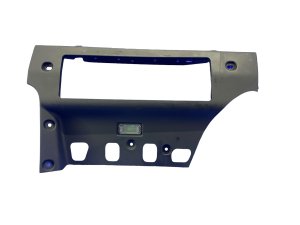
Part Number Warning: Some databases incorrectly list interior cabin parts like the passenger knee panel (423858434A) or footrest (423864420B) as 'trunk trim'. These are not frunk panels. Always verify the part's location with photos and the part number before purchasing.
Symptoms of a Failing Trunk Trim Panel

Failure of a frunk trim panel is always related to physical damage, not mechanical or electrical issues. Common symptoms include:
- Rattling or Buzzing Noises: The most common symptom, almost always caused by broken mounting clips on the back of the panel. This allows the panel to vibrate against the car's body, especially over bumps.
- Visible Cracks or Holes: Impacts from heavy or sharp cargo can easily crack or puncture the plastic or carpeted panels.
- Poor Fit or Sagging: A panel that is warped or has broken tabs will not sit flush, creating unsightly gaps. The cowl panel, which fits under a rubber seal, can be particularly prone to this if not installed correctly.
- Stains and Discoloration: Spills from fluids can permanently stain the carpeted floor liner.
Critical Issue: Front Frame Cracks on 2008-2010 Models. A known and serious issue on early first-generation R8s is the potential for cracks to develop in the aluminum frame structure near the front strut towers. These cracks are often discovered when removing the frunk trim panels to access the battery or suspension. If you are removing the panels, it is highly recommended to thoroughly inspect this area for any signs of fracture. 🎬 Watch: How to inspect your R8 frame for cracks This issue was reportedly addressed by Audi with factory reinforcements on 2011 and later models.
Buying a Used Trunk Trim Panel: Inspection Guide

Buying a used OEM trim panel is a cost-effective way to restore the look of your R8's frunk. However, careful inspection is crucial to avoid receiving a part that's no better than your current one.
- Inspect the Back of the Panel: This is the most important step. Flip the panel over and examine the plastic mounting posts where the clips attach. These are notoriously flimsy and often break when the panels are removed for service. Look for stress marks (white lines in the plastic) or outright broken posts. A panel with broken mounting points will never fit securely and will likely rattle.
- Check for Cracks and Warping: Flex the panel slightly to reveal any hidden cracks. Lay it on a flat surface to ensure it is not warped from heat or improper storage.
- Verify All Clips are Present: If the seller includes the small metal or plastic clips, ensure they are all there. If not, you may need to transfer them from your old panel, assuming they are not broken.
- Confirm Compatibility: The frunk trim panels are consistent across V8, V10, Coupe, and Spyder models for the 2008-2015 generation. However, it is always a good practice to confirm the part number matches what you are replacing.
Cost Comparison for R8 Frunk Panels

Prices can vary based on which specific panel you need. The plastic cowl panel is often the most expensive.
| Part Source | Estimated Cost | Notes |
|---|---|---|
| New OEM | $400 - $600+ | Purchased from an Audi dealership. Can be expensive for a simple plastic or carpeted part. |
| New Aftermarket | N/A | Standard plastic replacements are not commonly available. High-end carbon fiber versions exist but cost $800+. |
| Used OEM | $150 - $300 | The best value. A used cowl panel can often be found for around $200-$250. Prices depend on condition and which panel is needed. |
| Shop Labor | $100 - $250 | Typically 0.5 to 1.0 hours of labor. Replacement is simple, so costs should be minimal. |
Replacement Guide & Difficulty
Replacing a frunk trim panel is a straightforward DIY task that requires basic tools.
- Installation Difficulty: 1/5 (Very Easy)
- Estimated Time: 0.5 Hours
- Tools Needed: Plastic trim removal tools, possibly a Torx or Phillips screwdriver.
Step-by-Step Process:
- Empty the Frunk: Remove all personal items.
- Locate Fasteners: Look for any visible screws or plastic push-pins holding the panel in place. These are often located inside handles or under small caps.
- Pry Gently: Use a plastic trim tool to gently pry up an edge of the panel. This helps avoid scratching the paint or breaking the panel. You are trying to locate the hidden clips by feel.
- Pop the Clips: Once you locate a clip, apply firm, steady pressure as close to the clip as possible to pop it out. Avoid pulling from the far side of the panel, as this can break the panel or its mounting points.
- Remove the Panel: The cowl panel may be tucked under the main rubber weather seal. You will need to lift the seal and carefully slide the panel out.
- Install New Panel: Installation is the reverse of removal. Line up the clips with their corresponding holes and press firmly until they click into place. Reinstall any screws.
Pro Tip: If a clip breaks or a mounting post on your replacement panel is damaged, you can often use a strong epoxy or plastic weld to repair it before installation. This can prevent future rattles.
Frequently Asked Questions (FAQ)
Do these frunk panels fit both Coupe and Spyder models?
Yes, the front trunk components and trim panels are the same for all first-generation (2008-2015) Audi R8 models, including V8, V10, Coupe, and Spyder variants.
My frunk won't open with the button. Is the trim panel the problem?
No. If you hear the actuator motor but the latch doesn't release, the problem is almost certainly a small, broken plastic bushing in the trunk release mechanism itself. This is a common failure, and specialized repair bushings are available that save you from replacing the entire expensive actuator assembly.
🎬 Watch: How to use the emergency frunk releaseWhat is the front frame crack I should look for when the panels are off?
On 2008-2010 models, inspect the aluminum chassis around the top of the front shock/strut towers. Look for any hairline cracks in the metal. This area is visible once the side or cowl trim panels are removed. If you find a crack, it should be addressed by a specialist in aluminum frame repair.
🎬 See: How a cracked R8 frame is repairedWhy are the mounting clips so important on a used panel?
The clips and the plastic posts they attach to are the only things holding the panel securely against the body. The plastic posts are known to be fragile and often break during removal. A used panel with broken mounting points will vibrate and cause persistent rattling noises from the front of the car.
Helpful Videos
Technical Specifications
OEM Part Numbers: 423819401B 420-863-463-B-1F9 420863463B
Material: Molded plastic or carpet-covered composite.
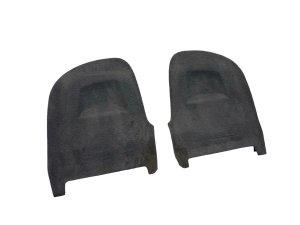
We Have This Part in Stock

The information in this article is provided for general reference and educational purposes only. Vehicle specifications, procedures, and part compatibility can vary by production date, trim level, and region. Always consult your vehicle's factory service manual and verify part numbers before purchasing or performing repairs. Safety-critical components such as airbags, seat belts, and braking systems should be installed by a qualified professional.
- Audi R8:
- 🎬 Helpful Videos
- 🛍️ Shop This Part
- Identifying the Front Trunk (Frunk) Panels
- Symptoms of a Failing Trunk Trim Panel
- Buying a Used Trunk Trim Panel: Inspection Guide
- Cost Comparison for R8 Frunk Panels
- Replacement Guide & Difficulty
- Step-by-Step Process:
- Frequently Asked Questions (FAQ)
- 🎟️ Get 5% Off