

2005-2017 Aston Martin Vantage Roadster Trunk Trim: Rattles, Fitment, and Replacement
This guide covers the common issues, compatibility warnings, and replacement process for the main trunk floor trim panel in the V8 and V12 Vantage Roadster.
- This trunk trim panel (6G33-45456-BC) is for 2005-2017 Vantage Roadster (convertible) models ONLY and will not fit the Coupe.
- When buying a used panel, the most critical inspection is of the mounting clips and tabs on the underside; broken clips will cause rattles.
- Rattles from the rear are common but can have many causes. Check that the panel is secure, but also inspect trunk lid stops and exhaust heat shields.
- Replacement is a simple DIY task, typically taking less than an hour with basic trim tools.
Symptoms of a Failing Trunk Trim Panel
Failure of the trunk trim panel is typically related to physical wear, damage, or improper fitment rather than mechanical or electrical breakdown. The symptoms are usually audible or visible.
Rattling or Buzzing From the Trunk Area
One of the most common complaints from Vantage owners is a persistent rattle coming from the rear of the car. While the source can be anything from a loose exhaust heat shield to tailgate adjusters, a poorly fitted or damaged trunk trim panel is a potential cause. If the panel's clips or backing are broken, it can vibrate against the floor or surrounding plastics, creating a buzzing or rattling sound, especially at low speeds or on uneven roads.
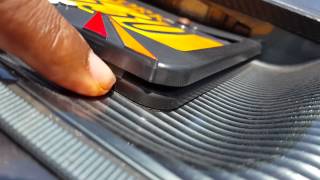
🎬 Watch: How to find and fix trunk rattlesPoor Fit and Visible Gaps
A panel that has been removed and reinstalled incorrectly may not sit flush. You might notice uneven gaps between the floor panel and the side trim pieces. This not only looks unsightly but also increases the likelihood of rattles. Warping, often caused by improper storage or water exposure, can also prevent the panel from lying flat.
Cosmetic Damage
The most obvious symptom is visible damage. This can include:
- Stains from spills or water ingress.
- Tears or rips in the carpet material.
- Fading or discoloration from prolonged sun exposure.
- Delamination, where the carpet layer separates from the rigid backing board.
Compatibility Warning: This trunk trim panel, OEM part number 6G33-45456-BC, is specifically for 2005-2017 Vantage Roadster (convertible) models. It will not fit Coupe models due to the different trunk and hatch construction. Parts for Coupes and Roadsters are not interchangeable.
Buying a Used Trunk Trim Panel: Inspection Guide
Since this part is primarily cosmetic and structural, a high-quality used OEM panel is an excellent value compared to a new part. However, a thorough inspection is crucial to ensure you get a usable part.
1. Inspect All Mounting Points
This is the most critical step. The panel is held in place by a series of plastic clips, tabs, and friction fitments. Carefully examine the underside of the panel:
- Check for Broken Clips: Look for any plastic clips that are cracked, broken, or missing. A panel with broken mounting points will not install securely and will almost certainly cause rattles.
- Examine Clip Sockets: Ensure the areas where clips mount to the panel itself are not cracked or stressed.
2. Verify Structural Integrity
Flex the panel slightly. It should feel rigid and solid. If it feels flimsy, makes crackling sounds, or is excessively bent, it may have been damaged during removal or stored improperly. Check for any signs of water damage, which can cause the backing material to degrade and warp.
3. Assess Cosmetic Condition
Look at the carpeted surface under bright, direct light. Check for:
- Stains and Discoloration: Some light dirt can be cleaned, but deep-set stains from oil or chemicals may be permanent.
- Wear and Fading: Pay attention to the color consistency. A panel from a car that was often parked in the sun may be faded.
- Tears and Scuffs: Check for any physical damage to the carpet pile from heavy or sharp cargo.
4. Confirm Part Number and Vehicle Fitment
Always double-check that the part is 6G33-45456-BC. Before purchasing, confirm with the seller that the panel came from a Vantage Roadster, not a Coupe. If possible, provide the seller with your vehicle's VIN to have them verify compatibility.
Cost of Aston Martin Vantage Trunk Trim Panel
| Part Type | Estimated Cost |
|---|---|
| New OEM | $260 - $350 |
| Used OEM | $100 - $200 |
| New Aftermarket | Not Commonly Available |
| Shop Labor for Installation | $150 - $300 |
Replacement Overview
Replacing the trunk trim panel is a straightforward job that can be done by most DIY mechanics with basic tools. The process involves removing the old panel and fitting the new one, which is often necessary to access other components like the trunk latch, tail light bolts, or the Convertible Roof Module (CRM).
Tools Required:
- Trim removal tool kit
- Phillips screwdriver
- Pick tool (optional)
General Steps:
- Empty the Trunk: Remove any personal items, tools, and accessories like the first aid kit.
- Remove Trunk Seal: The rubber weatherstripping around the trunk opening often holds the edge of the trim panel in place. Gently pull it upwards to free the edge of the panel.
- Remove Fasteners: Locate and remove any Phillips screws or plastic "fir tree" style clips holding the panel down. There may be a small plastic cover over the battery tender port that needs to be unscrewed first.
- Disconnect Lighting: If your panel has an integrated trunk light, carefully pull the panel back, reach behind it, and disconnect the electrical connector. This is often a simple twist-and-pull socket.
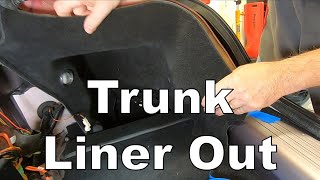
- Remove the Panel: With all fasteners and connections free, carefully maneuver the panel out of the trunk. It may tuck under the side trim panels, so you may need to gently flex it to pull it free. 🎬 See this step-by-step trunk liner removal guide
- Installation: Installation is the reverse of removal. Start by connecting the trunk light, then position the panel. Secure any clips or screws, and finally, press the trunk seal back into place.
Frequently Asked Questions
Will this trunk trim panel fit my Vantage Coupe?
No. This specific part (6G33-45456-BC) is designed only for the Vantage Roadster (convertible). The Coupe has a different hatch area and requires a different set of trim panels.
I have a rattle in my trunk. Is it this panel?
It could be, but rattles in the Vantage can come from many sources. Before replacing the panel, check the trunk lid bump stops, the exhaust heat shields, and ensure the rear light clusters are tight. Press down firmly on the trunk panel while driving (or have a passenger do so) to see if the noise stops. If it does, the panel or its clips are the likely culprit.
Do I need to replace this panel to fix my convertible top?
Not directly, but you may need to remove it for diagnosis. The Convertible Roof Module (CRM), a common source of top-related issues, is located in the rear of the car, and accessing it requires removing interior trim panels. If your existing panel is brittle or damaged, it may break during this process, necessitating a replacement.
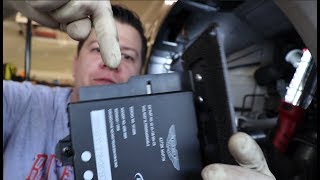
🎬 Watch: How to access and replace the CRMCan a stained or dirty trunk panel be cleaned?
Yes, to an extent. Standard automotive carpet and upholstery cleaners can be effective for light dirt and some stains. For heavy staining or water damage, replacement is often the best option to restore the appearance and prevent musty odors.
Helpful Videos
Technical Specifications
OEM Part Numbers: 6G33-45456-BC
Carpeted trunk floor panel
We Have This Part in Stock



The information in this article is provided for general reference and educational purposes only. Vehicle specifications, procedures, and part compatibility can vary by production date, trim level, and region. Always consult your vehicle's factory service manual and verify part numbers before purchasing or performing repairs. Safety-critical components such as airbags, seat belts, and braking systems should be installed by a qualified professional.
- Aston Martin Vantage:
- 🎬 Helpful Videos
- 🛍️ Shop This Part
- Symptoms of a Failing Trunk Trim Panel
- Rattling or Buzzing From the Trunk Area
- Poor Fit and Visible Gaps
- Cosmetic Damage
- Buying a Used Trunk Trim Panel: Inspection Guide
- 1. Inspect All Mounting Points
- 2. Verify Structural Integrity
- 3. Assess Cosmetic Condition
- 4. Confirm Part Number and Vehicle Fitment
- Cost of Aston Martin Vantage Trunk Trim Panel
- Replacement Overview
- Frequently Asked Questions
- 🎟️ Get 5% Off