

2014-2020 Acura MDX Cargo & Trunk Trim Panels: Rattles, Colors, and Replacement
Your complete guide to identifying, inspecting, and replacing the various rear cargo area trim panels in your third-generation Acura MDX.
- "Trunk Trim Panel" refers to multiple parts; you must identify the specific panel you need (liftgate, left/right side, floor).
- Always verify your vehicle's interior color code (from the driver's door jamb sticker) before buying a replacement panel.
- Confirm if your MDX has the premium audio system, as the passenger-side cargo panel has a required subwoofer cutout.
- When buying a used panel, the most critical inspection is checking the back for intact mounting tabs and clips; broken tabs will result in a poor fit and rattles.
Identifying Your MDX Cargo Trim Panels
When searching for a "Trunk Trim Panel" for a 2014-2020 Acura MDX, it's important to know that this is a broad term for several different parts in the rear of the vehicle. Breakage, rattling, or cosmetic damage usually requires replacing a specific panel. Here are the main components you'll encounter:
- Liftgate Trim Panels: These are the plastic panels attached to the inside of the rear hatch. There is typically a large lower panel and a smaller upper panel. Part numbers like 84433-TZ5 are associated with the lower liftgate panel.
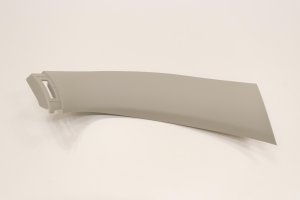
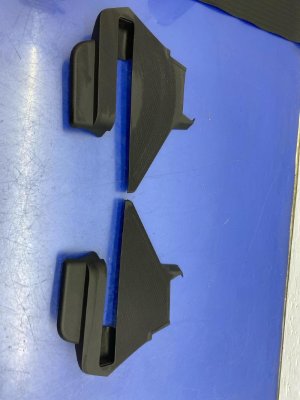
- Cargo Area Side Trim (Quarter Panels): These are the large, molded panels on the driver's and passenger's sides of the cargo area. These are a common point of variation, as models with the premium ELS Studio audio system have a subwoofer integrated into the passenger-side panel, requiring a specific cutout.
- Cargo Floor Panels: This includes the main foldable floor panel and the underlying trays or foam inserts that hold the vehicle's jack and tool kit. Rattles can often originate from loose items in these compartments.
- Rear Sill Plate Trim: This is the plastic scuff plate that covers the latch area at the very back of the cargo floor. You often need to remove this piece to access and replace the side panels.
Compatibility Warning: Acura produced these interior panels in several colors, including Beige (Parchment, Sandstorm), Gray (Graystone), and Black (Ebony). Additionally, the right-side cargo panel is different for vehicles with and without the premium audio system's subwoofer. Always verify color and audio options before purchasing.
Symptoms of Failure
Failure of a trunk trim panel is almost always related to physical damage or wear, rather than mechanical or electrical issues. The symptoms are usually straightforward:
- Rattling or Buzzing Noises: This is the most common complaint. Noises from the rear of the vehicle are often caused by loose panels with broken or weakened mounting clips. Before blaming a panel, check that the spare tire, jack, and tools are securely fastened, as they are frequent culprits. 🎬 Watch this video to diagnose rear trunk latch noises.
- Visible Damage: Scratches, scuffs, and gouges from loading and unloading cargo are common. More severe impacts can cause the plastic to crack or break entirely.
- Poor Fitment: A panel that is warped, bowed, or doesn't sit flush with adjacent panels likely has broken mounting tabs on the back. This prevents it from seating securely.
Known Issues, TSBs, and Recalls
While there are no recalls or Technical Service Bulletins (TSBs) specifically for the plastic interior cargo panels, there are related issues for the 2014-2020 MDX that owners should be aware of:
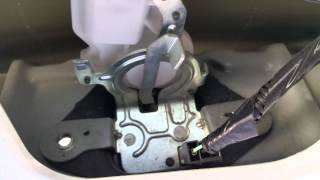
- Power Tailgate Strut Failure (TSB 16-056): For 2014-2016 models, a TSB was issued for a condition where the power tailgate motor runs but the gate doesn't open. 🎬 See how to diagnose a tailgate that won't open. This is caused by a dislodged spindle nut in the left tailgate strut motor and requires replacing the motor assembly. 🎬 Watch this step-by-step power liftgate strut installation guide. Accessing this strut requires removing the tailgate interior trim panel.
- Tailgate Light Failure Recall (NHTSA #25V259): Moisture can enter the tailgate lid light assembly, potentially causing various exterior and interior lights to fail. The dealer repair involves inspecting wiring and potentially replacing components, which requires removing the interior liftgate trim.
- Rear Subframe Corrosion Recall: On vehicles sold in salt-belt states, the rear subframe can corrode prematurely, which could lead to suspension failure. This is unrelated to the trim panels but is a critical safety issue for this vehicle generation.
Buying a Used Trunk Trim Panel
Buying a used OEM trim panel is often the most cost-effective way to get a perfect fit and color match. Aftermarket interior panels are rare and often suffer from poor fitment and inexact color/texture matching. Here’s what to check when buying used:
- Verify the Exact Panel: Confirm if you need the liftgate panel, left or right side panel, or a floor piece. Get a photo of the part number if possible.
- Check All Mounting Clips and Tabs: This is the most critical inspection. Ask the seller for clear photos of the back of the panel. The small plastic tabs and clip receivers molded into the panel are fragile. If they are broken, the panel will not install securely and will likely rattle.
- Confirm the Color: The interior color code for your MDX is located on the manufacturer's sticker inside the driver's side door jamb. Match this code with the part you intend to buy. Common colors include Parchment, Graystone, and Ebony. Don't rely on photos alone, as lighting can be deceptive.
- Check for Subwoofer Cutouts: If you are buying the right-side (passenger-side) cargo panel, confirm whether your MDX has the premium ELS audio system. If it does, you need a panel with the grille and cutout for the subwoofer.
- Inspect for Physical Damage: Look for deep scratches, cracks, and any signs of warping or water staining, which could indicate the donor vehicle had a water leak.
Cost of Replacement
Prices for cargo trim panels can vary widely depending on which specific piece you need. Large side panels are typically more expensive than smaller floor or sill pieces.
| Part Type | New OEM | Used OEM |
|---|---|---|
| Liftgate Upper Trim Panel (e.g., 84443-TZ5-A00ZA) | $25 - $40 | $15 - $30 |
| Liftgate Lower Trim Panel (e.g., 84433-TZ5) | $150 - $200 | $70 - $120 |
| Cargo Side Trim Panel (Quarter Panel) | $250 - $400 | $100 - $180 |
| Cargo Floor/Tool Tray | $80 - $150 | $50 - $90 |
| Shop Labor | $75 - $150 (typically 0.5-1.0 hours) | |
Replacement Guide
Replacing a cargo area trim panel is a straightforward job suitable for a DIYer with basic tools. The key is to be patient and use the correct tools to avoid breaking clips.
Tools Needed:
- Plastic trim removal tool kit
- Phillips head screwdriver
- Needle-nose pliers (optional, for stubborn clips)
General Steps (for a side panel):
- Empty the Cargo Area: Remove the cargo floor panels and any personal items.
- Remove the Sill Plate: The rear sill plate trim usually pops straight up. Use a plastic pry tool to gently lift it and release the clips.
- Locate and Remove Screws: Look for any visible screws, often hidden under small covers or near cargo tie-down hooks.
- Pry the Panel Loose: Start at an edge and use a plastic trim tool to gently pry the panel away from the body. You will hear clips popping as they release. Work your way around the panel.
- Disconnect Electronics: If your panel has a speaker, 12V power outlet, or light, carefully disconnect the electrical connectors before fully removing the panel.
- Installation: To install the new panel, first reconnect any wiring. Then, carefully align the clips on the new panel with the holes in the vehicle's body and press firmly to snap them into place. Reinstall any screws and the sill plate.
Pro Tip: Before installing the new panel, consider applying small pieces of adhesive-backed felt or foam tape to the contact points on the back of the panel. This is a common trick to prevent future rattles.
Frequently Asked Questions (FAQ)
How do I find my Acura's interior color code?
The interior color code is on the vehicle identification sticker located on the driver's side door jamb. It's usually labeled 'INTERIOR' or 'TRIM' and will be a short code you can provide to a parts seller.
My trunk panel is rattling. Do I need to replace it?
Not necessarily. First, check for any loose items in the cargo area, especially the jack, tools, and spare tire. If the panel itself is loose, a mounting clip may have broken or popped out. Sometimes you can simply press the panel firmly back into place. If the clip's mounting point on the panel is broken, replacement is the best option for a permanent fix.
Can I just replace the broken clips?
Yes, if only the clip itself is broken and the molded base on the panel is intact, you can often buy replacement clips. However, if the plastic base on the panel that holds the clip is what's broken, the clip will have nothing to attach to, and the panel will need to be replaced.
Is it difficult to remove the liftgate trim panel?
No, it is generally easy. It is held on by several push-style clips. Start by prying an edge with a plastic tool to release the first clip, then work your way around. Be sure to disconnect the interior liftgate light before pulling the panel completely away.
Helpful Videos
Technical Specifications
OEM Part Numbers: 74300-TZ5-A01 84443-TZ5-A00ZA 84443-TZ5-A00ZB 84443-TZ5-A00ZC 84540-TZ5-A001 84610TZ5A110M1 84610TZ6A210M1 84660-TZ5-A 74360TZ5A01 83303TZ5A000 84433-TZ5
Varies by specific panel. Materials are typically molded ABS plastic. Colors include Parchment (Beige), Graystone (Gray), and Ebony (Black).
We Have This Part in Stock


The information in this article is provided for general reference and educational purposes only. Vehicle specifications, procedures, and part compatibility can vary by production date, trim level, and region. Always consult your vehicle's factory service manual and verify part numbers before purchasing or performing repairs. Safety-critical components such as airbags, seat belts, and braking systems should be installed by a qualified professional.
- Acura MDX: