

2017-2024 MINI Countryman Trunk Hinge: Diagnosing Creaks, Pops, and Misalignment
This guide covers the common failure symptoms, replacement costs, and inspection tips for the trunk lid hinges on the F60 MINI Countryman.
- The most common failure symptom is a creaking or popping noise when opening/closing the trunk.
- Left (41007389405) and Right (41007389406) side hinges are different and not interchangeable.
- Many trunk issues like random opening or rattling are NOT caused by the hinges; check for software TSBs and adjustable bump stops first.
- Replacement is moderately difficult (3/5) as it requires removing interior trim and carefully aligning the heavy liftgate.
Symptoms of a Failing Trunk Lid Hinge
When a trunk hinge on a MINI Countryman starts to fail, the symptoms are usually noticeable. While complete failure is uncommon, wear and tear can lead to annoying noises and alignment problems. It's also important to distinguish hinge problems from more common issues with the power liftgate system.
Creaking, Popping, or Grinding Noises
This is the most common sign of a worn or failing hinge. You may hear a distinct metallic creak, pop, or grinding sound when you open or close the trunk lid. This noise is caused by wear in the hinge's pivot point, corrosion, or a lack of lubrication. The sound is often most pronounced at the beginning or end of the liftgate's travel.
Liftgate Misalignment or Sagging
A worn hinge can develop excessive play, causing the trunk lid to sag or sit unevenly when closed. You might notice that the gaps between the liftgate and the rear quarter panels are wider on one side than the other. This misalignment can break the weather seal, potentially allowing water to leak into the trunk. In severe cases, it can also make the trunk difficult to latch properly.
Binding or Difficulty Moving
If a hinge is bent or severely corroded, it can cause the liftgate to bind as it moves. You might feel resistance or a sticking sensation when trying to open or close the trunk manually. This puts extra strain on the liftgate struts or power actuators.
What It's Probably NOT: Common Countryman Trunk Issues
Many trunk problems on the F60 Countryman are not related to the hinges. Before replacing your hinges, check for these more common issues:
- Tailgate Opens By Itself: If your power liftgate opens randomly, this is a known issue often caused by a sensitive foot sensor or a software glitch. MINI has issued a Technical Service Bulletin (TSB) to address this with a software update. Replacing the hinges will not fix this.
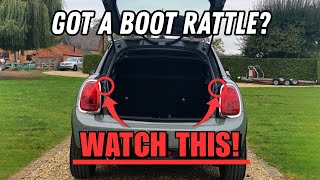
- Rattling Over Bumps: A rattling noise from the rear is frequently caused by the adjustable rubber bump stops on the body of the car being out of adjustment. Try unscrewing them 🎬 Watch: How to fix a rattling rear boot a turn or two to create more tension against the closed liftgate before suspecting a hinge problem.
- Power Liftgate Struggles or Reverses: If your power liftgate moves slowly, stops part-way, or reverses direction while closing, this usually points to a failing power strut (spindle drive) or a problem with the latch mechanism, not the hinge itself.
Warning: While rare, a seized hinge can put immense stress on its mounting points. On some older MINI models, seized hinges have been known to snap, causing the heavy tailgate to fall unexpectedly. If your hinge is binding severely, address it immediately.
Buying a Used Trunk Lid Hinge
Since aftermarket hinges for this model are not common, a quality used OEM hinge is an excellent, cost-effective choice. The original factory parts are built to a high standard of strength and fitment. Here’s what to look for when buying used.
Physical Inspection
- Check for Cracks: Carefully inspect the entire hinge for hairline cracks, especially around the pivot pin and the bolt holes. Do not buy a hinge with any visible cracks.
- Test the Pivot: The hinge should pivot smoothly by hand without binding or excessive looseness. Some resistance is normal, but a gritty feeling or significant side-to-side play indicates wear.
- Look for Bending: Lay the hinge on a flat surface. It should sit flat without any obvious bends or twists. Compare it to photos of new parts to ensure its geometry is correct. Avoid any hinge from a vehicle that had a severe rear-end collision.
Verify Compatibility
The most critical step is ensuring you get the correct part for your vehicle's side. The left and right hinges are not interchangeable.
- Left (Driver Side) Part Number: 41007389405 (or 7389405)
- Right (Passenger Side) Part Number: 41007389406 (or 7389406, 7389430)
The hinges are the same for models with a manual liftgate and those with the optional power liftgate. The difference between those systems is the struts, not the hinges.
Known Issues, TSBs, and Recalls
As of mid-2026, there are no specific recalls or widespread known failure patterns for the trunk lid hinges on the 2017-2024 MINI Countryman. Most issues are related to normal wear and tear. However, it is important to be aware of Technical Service Bulletin (TSB) #510916, which addresses the power liftgate opening unintentionally. This is a software issue and is not caused by a faulty hinge.
Cost Comparison for Trunk Lid Hinge Replacement
Prices are for a single hinge. If one has failed due to wear, it's wise to inspect the other and consider replacing them as a pair.
| Part Type | Estimated Cost (Per Hinge) | Notes |
|---|---|---|
| New OEM | $120 - $150 | Genuine MINI part from a dealer or online OEM supplier. |
| New Aftermarket | Not commonly available | Structural body parts like hinges are rarely produced by the aftermarket. |
| Used OEM | $35 - $75 | A cost-effective option from a reputable auto recycler. Price varies by condition and source. |
| Shop Labor | $150 - $375 | Labor includes supporting the liftgate, removing interior trim, replacing the hinge, and aligning the panel. Expect 1.5-2.5 hours. |
Replacement Overview & Difficulty
- Difficulty Rating: 3 out of 5 (Moderate)
- Estimated Time: 1.5 - 2.5 hours
- DIY Feasible: Yes, for experienced DIYers
Replacing a trunk hinge is manageable for someone comfortable with removing interior panels, but it requires care and precision. The main challenges are safely supporting the heavy liftgate and properly aligning it after installation.
Brief Steps:
- Open the liftgate and support it securely with a brace or a helper. This is critical for safety.
- Disconnect the gas struts or power liftgate actuators from the liftgate.
- Inside the car, remove the C-pillar trim and partially pull down the headliner to gain access to the hinge mounting bolts.
- Use a marker to trace the outline of the old hinge's position on both the body and the liftgate. This will be a crucial reference for aligning the new part.
- Carefully unbolt and remove the old hinge.
- Install the new hinge, leaving the bolts slightly loose.
- Adjust the liftgate position to match your reference marks and ensure even gaps all around. This is the 🎬 Watch: How to adjust and align a trunk lid most time-consuming step.
- Once aligned, torque the bolts to the manufacturer's specification.
- Reinstall all trim panels and reconnect the struts.
Pro Tip: Loosen the bolts for both hinges slightly when aligning, even if you are only replacing one. This allows for easier adjustment to get the panel gaps perfect before final tightening.
Frequently Asked Questions (FAQ)
Can I just lubricate a noisy hinge instead of replacing it?
Sometimes, yes. If the noise is a simple squeak and there is no visible wear, looseness, or alignment issues, you can try cleaning the pivot point and applying a spray-on white lithium grease or silicone lubricant. However, if the noise is a loud pop or grind, or if the liftgate is misaligned, lubrication is only a temporary fix for a worn-out part.
Do I need to replace both hinges at the same time?
It is not strictly necessary, but it is recommended. Hinges wear at a similar rate. If one has failed from wear, the other is likely not far behind. Replacing them in pairs ensures proper alignment and prevents you from having to do the job twice.
Is the trunk hinge the same for the power liftgate and manual liftgate?
Yes, the physical hinge that bolts to the body and trunk lid is the same for both systems. The difference is in the support struts—manual liftgates use simple gas struts, while power liftgates use motorized spindle drives.
My trunk is misaligned. How do I know if it's the hinge or just needs adjustment?
First, open the liftgate and try to wiggle it up and down and side-to-side at the hinge point. If you feel significant play or hear clunking, the hinge pivot is worn. If it feels solid, the hinge itself may be fine and the liftgate may just need a professional alignment, which involves loosening the hinge bolts and repositioning the panel.
Helpful Videos
Technical Specifications
OEM Part Numbers: 41007389405 7389405 41007389406 7389406 7389430
Material: Coated Steel. Mounting: Bolted to vehicle body and liftgate panel. Compatibility: Fits both manual and power liftgate models.
We Have This Part in Stock



The information in this article is provided for general reference and educational purposes only. Vehicle specifications, procedures, and part compatibility can vary by production date, trim level, and region. Always consult your vehicle's factory service manual and verify part numbers before purchasing or performing repairs. Safety-critical components such as airbags, seat belts, and braking systems should be installed by a qualified professional.
- MINI Countryman:
- 🎬 Helpful Videos
- 🛍️ Shop This Part
- Symptoms of a Failing Trunk Lid Hinge
- Creaking, Popping, or Grinding Noises
- Liftgate Misalignment or Sagging
- Binding or Difficulty Moving
- What It's Probably NOT: Common Countryman Trunk Issues
- Buying a Used Trunk Lid Hinge
- Physical Inspection
- Verify Compatibility
- Known Issues, TSBs, and Recalls
- Cost Comparison for Trunk Lid Hinge Replacement
- Replacement Overview & Difficulty
- Frequently Asked Questions (FAQ)
- 🎟️ Get 5% Off