

2013 Buick Verano 6T40 / 6T45 Transmission: Problems, Identification, and Used Replacement
Identify the exact MH8 transaxle for your 2.4L Verano, understand common fluid pump and TEHCM failures, and learn when a used OEM replacement is the smartest fix.
- Before purchase, you must verify fitment using the VIN (8th digit 'K'), RPO codes (MH8, LEA), and the transmission ID tag (3HCW or 3JEW).
- Mandatory TEHCM programming is required after installation; failure to reprogram the donor unit or swap your original will result in a no-start or limp mode condition.
- Always flush the transmission cooler and lines before installing a replacement unit to prevent contamination from the old unit causing immediate failure.
- The torque converter must be fully seated in three distinct stages during installation to avoid cracking the internal pump gear when tightening bellhousing bolts.
- This transmission has no dipstick; fluid level must be checked via a side plug with the engine running and fluid at operating temperature (158-230°F).
Is This the Right Transmission for Your 2013 Verano?


The 2013 Buick Verano with the 2.4L engine uses a specific version of the GM 6T40 / 6T45 family of six-speed automatic transaxles. A transaxle combines the transmission and differential into a single unit for front-wheel-drive vehicles. This specific unit is identified by the regular production option (RPO) code MH8.
Confirming Fitment on Your Vehicle
Before purchasing a used transmission, it is critical to verify that it is the correct unit for your car. Mismatched parts can lead to installation problems and electronic failures. Use these steps to confirm compatibility:
- Check Your VIN: The 8th digit of your Vehicle Identification Number (VIN) should be K. This designates the 2.4L LEA Ecotec engine that this transmission is paired with.
- Find the RPO Sticker: Look for the "Service Parts Identification" sticker, typically located in the glove box or trunk. It should list the codes MH8 (for the 6-speed automatic transmission) and LEA (for the 2.4L engine).
- Inspect the Transmission Tag: The transmission itself has a metal ID tag on the left-hand side (driver's side) of the case, behind the shift selector cable bracket, just above the oil pan rail. This tag must show the code 3HCW or 3JEW.
Why Other GM Transmissions Won't Fit
While many GM vehicles use 6T40/6T45 transmissions, they are not interchangeable. A unit from a Chevrolet Cruze, Malibu, Equinox, GMC Terrain, or Buick Regal will not work in your 2013 Verano. This is due to critical differences in:
- Engine Bellhousing Patterns: The transmission case won't bolt up to the Verano's 2.4L engine correctly.
- Internal Gear and Final Drive Ratios: This specific Verano unit uses a 3.23 final drive ratio (RPO code F82). Using a transmission with a different ratio will cause incorrect shift points and performance issues.
- Electronic Calibrations: The internal computer is programmed specifically for the Verano's weight, engine, and tire size.
Warning: Ordering a transmission based only on the "6T40" family name is a common mistake. You must match the exact year, model, and engine to ensure compatibility.
Common Failure Symptoms
Transmission failure can manifest in several ways. If you experience any of the following, it may be time to have your transmission inspected by a professional.
- Delayed or harsh shifting between gears.
- Slipping, where the engine RPMs increase but the car doesn't accelerate properly.
- The vehicle won't move when placed in Drive or Reverse.
- A transmission warning light is illuminated on the dashboard.
- Grinding noises or a burning smell coming from under the hood.
- Leaking reddish or dark brown transmission fluid under the vehicle. 🎬 Watch: How to check fluid levels on dipstick-free 6T40 transmissions
Diagnostic Flowchart

Known Issues, Recalls, and Technical Service Bulletins (TSBs)
Several documented issues affect the 2013 Verano's transmission and related components. Always check with a dealer or use your VIN to see if these recalls or service campaigns apply to your vehicle.
| Issue / TSB / Recall | Description | Severity |
|---|---|---|
| No Forward, Reverse, or Crank (TSB PI0324E) | This severe issue affects 2012-2013 models and is often caused by a damaged transmission fluid pump, resulting in low or no line pressure. The vehicle will not be able to move and may not even crank the engine. This has been observed even on very low mileage vehicles (under 10,000 miles). | Critical |
| Shift Cable Disengagement (Recall 14V372000 / GM Campaign 14233) | A severe recall was issued because the clip on the shift cable adjuster could fail, causing the cable to detach from the transmission. This can lead to a situation where the gear shifter position doesn't match the actual gear the transmission is in, creating a rollaway risk. | Critical |
| Intermittent Shift Flare (TSB 21-NA-041) | Drivers may experience an intermittent shift flare (engine RPMs jumping up) during 2-3 or 3-4 upshifts, typically after a cold start. This moderate issue is often linked to the transmission's adaptive learning process or degraded fluid. | Moderate |
| Driver's Side Axle Seal Leaks | A persistent leak from the driver's side axle seal is often caused by a worn-out inner axle bushing in the transmission case. The proper fix is to replace the bushing with an upgraded Teflon-coated version rather than just replacing the rubber seal. | Moderate |
| Ignition Key Removal Defect (Recall 16V-502 / GM #50490, 50491) | A defect in the key cylinder lock housing could allow the key to be removed when the transmission is not in Park. This poses a significant rollaway risk. Dealers will inspect and replace the key cylinder lock housing if necessary. | Critical |
| 3-5-R Clutch Wave Plate Failure | A well-known issue in the broader 6T40/6T45 family is the fracturing of the 3-5-Reverse clutch wave plate. When this part breaks, it sends metal debris throughout the transmission, leading to a loss of 3rd, 5th, and Reverse gears. However, the 2013 Verano uses a "Gen 2" unit with an updated design, making this specific failure rare. | Serious |
What Fails at Every Mileage Band
Pro Tip: The mileage bands below describe used replacement units of that mileage. The checklists are things to do WHILE INSTALLING the purchased unit, not maintenance for your current transmission.
Under 60,000 Miles
Even low-mileage units can suffer from early component failures. Transmission fluid pump failure (TSB PI0324E) can cause a sudden loss of line pressure. External issues like shift cable disengagement (Recall 14V372000) and the electronic park lock lever defect (Recall 16V-502) are also present in this band.
- ✓Do during install (required): Mandatory Cooler Flush: Debris from the original failed unit must be completely flushed from the cooler and lines to prevent immediate contamination of the replacement. TEHCM Programming: The internal TEHCM must be reprogrammed by a dealer, or the original TEHCM must be swapped. A 'Service Fast Learn' is required afterward.
- ✓Do during install (recommended): Fluid and Filter Service: Even on a low-mileage unit, it is wise to replace the transmission filter and pan gasket, and fill with fresh, specified DEXRON VI fluid.
- ✓Cheap insurance while the engine is out: Replace All External Seals: Install a new torque converter (front pump) seal and new left/right CV axle seals. This is inexpensive insurance against leaks.
60,000 - 100,000 Miles
In this range, wear and tear become more apparent. Torque Converter Clutch (TCC) shudder is a common complaint, often felt as a vibration during light acceleration. Harsh or flaring shifts can occur due to valve body wear or sticky solenoids. Driver's side axle seal leaks also become frequent due to inner bushing wear.
- ✓Do during install (required): All items from the 'Under 60K' band apply.
- ✓Do during install (recommended): Install an Auxiliary Transmission Cooler: Overheating is a primary cause of failure for these transmissions. Adding an external cooler is one of the best ways to extend the life of the replacement unit.
- ✓Cheap insurance while the engine is out: Consider a New Torque Converter: If the used transmission has over 80,000 miles, replacing the torque converter during the swap is a wise preventative measure. Replace Axle Bushing: If there is any evidence of a driver-side axle leak, proactively replace the inner case bushing with the upgraded Teflon part.
100,000 - 150,000+ Miles
This mileage approaches the expected service life of 150,000 to 200,000 miles. Accumulated wear leads to significant internal component failure, such as worn clutch packs, complete torque converter failure, or severe valve body wear, resulting in slipping, delayed engagement, or total loss of movement.
- ✓Do during install (required): Mandatory Torque Converter Replacement: Do not reuse the torque converter from a high-mileage used transmission. Install a new or remanufactured unit.
- ✓Do during install (recommended): Strongly Recommend Auxiliary Cooler: A high-mileage unit has a lower tolerance for heat. An auxiliary cooler is critical for reliability.
- ✓Cheap insurance while the engine is out: Replace all accessible external seals and gaskets.
Real Owner Experiences
Here is what real owners and mechanics report regarding failures and repair costs for this transmission family.
| Source | Mileage | What Happened | Cost |
|---|---|---|---|
| RepairPal, Firestone Complete Auto Care | Any, but can occur early | Owners report early signs of trouble such as shifting delays, grinding or jumping during acceleration, a burning smell, or whistling sounds. Fluid leaks from worn seals or damaged pans are also a possibility. | Varies from minor (seal replacement) to major (transmission replacement). |
| Reddit MechanicAdvice Forum | ~68,000 | An owner of a similar vehicle with the same transmission family reported RPMs flaring up by 300-500 when slowing down. The transmission fluid was noted to be dark. This behavior is often linked to degraded fluid or sticky solenoids. | A fluid drain-and-fill is the first step. If unsuccessful, it may require solenoid replacement or valve body work. |
| CoPilot, CarComplaints.com | 100,000+ | This mileage is approaching the vehicle's expected service life, and reports of complete transmission failure requiring replacement become more common. Symptoms often start as slipping, harsh shifting, or loud grinding noises that progress to a complete loss of power. | Typically requires a full transmission replacement or rebuild, which is a multi-thousand dollar repair. |
| Car Talk Community | Unknown (2006 similar GM FWD) | Owner's son had a Pontiac G6 (which uses a similar transmission family) that lost overdrive. Repair was done by a friend who owns a shop. Acknowledges this is a discounted price. | $650 |
Repair or Replace?
Deciding whether to repair your existing transmission or replace it entirely depends on the specific failure mode.
- Transmission Control Module (TEHCM) Failure: Typical repair cost is $200 - $750. This is a strong candidate for repair if the transmission hardware is healthy. A VIN-programmed, plug-and-play remanufactured TEHCM can be purchased for $200-$450 for DIY installation. An independent shop repair may cost $500-$1,200. Repair makes sense when the vehicle has no other shifting issues, no metal debris in the fluid, and the failure is purely electronic (e.g., limp mode).
- 3-5-R Clutch Wave Plate Failure: Typical repair cost is $650 - $2,000+. If caught very early before significant debris contaminates the entire unit, a minor rebuild could be cost-effective. However, if there is widespread internal damage, replacement is better.
- Shift Cable Disengagement: Typical repair cost is $100 - $300. Always repair. This is a minor external repair involving replacing a clip.
- Driver's Side Axle Seal Leak: Typical repair cost is $250 - $500. Always repair. Replace the inner axle bushing at the same time as the seal to prevent a recurring leak.
When Replacement is Smarter: Replacement with a used or remanufactured unit is the smarter choice when there is catastrophic internal failure, such as a cracked pump gear from improper torque converter installation, or when metal debris has circulated throughout the entire transmission. In these cases, the cost of a complete teardown will quickly exceed the cost of a replacement unit. Given the low cost of used units, replacement is often more economical than a major rebuild.
Replacement Cost Comparison
Replacing the transmission is a major repair. The labor for this job is significant, estimated between 6.0 and 12.0 hours, requiring advanced to expert DIY skills.
| Part / Service | Estimated Cost Range (USD) |
|---|---|
| New OEM | $4,500 - $6,000+ (Part only - generally not sold, replaced with reman) |
| Remanufactured OEM | $2,500 - $4,100 (Part only) |
| Used OEM | $235 - $1,100 (Part only) |
| Installation Labor | $900 - $1,800 |
What's Included in a Used Assembly?
When you buy a used transmission from a recycler, it's important to know what parts are included. Based on industry standards, here is what you should expect:
- What's Typically Included: The main aluminum transmission case, all internally lubricated parts (gears, shafts, clutches, planetary sets), the valve body and integrated solenoids, the front control cover (side pan), the bottom oil pan, and the torque converter.
- What's Not Included: External shift linkage, brackets, selector cables, external sensors, wiring harnesses, transmission cooler lines, and the engine flexplate/flywheel. These parts should be transferred from your old transmission or replaced new.
Freight and Delivery Reality

A used 6T40 transmission is not shipped in a cardboard box via standard parcel service. It is a heavy industrial component that requires specialized shipping.
- Size and Weight: The assembly weighs approximately 203 lbs and measures roughly 34" x 23" x 18" before crating.
- LTL Freight: It ships as Less-Than-Truckload (LTL) freight strapped to a wooden pallet.
- Delivery Requirements: You will need a commercial address with a loading dock or forklift, or you must request residential liftgate service (which often carries an extra fee).
- Inspect Before Signing: Always inspect the transmission for physical damage (cracked case, broken sensors, crushed pans) before signing the driver's delivery receipt. Once you sign, you accept it in its current condition.
- Pre-Purchase Verification: Expect a reputable seller to conduct a pre-purchase verification interview to confirm your VIN, engine size, and RPO codes before shipping to ensure you get the correct unit.
Critical Installation and Programming Steps

Proper installation is key to the longevity of a replacement transmission. This is not a simple plug-and-play job. You will need specialized tools, including an engine support bar, a transmission jack, a GM-compatible scan tool (GM MDI with Techline Connect / Tech 2), and torque converter lifting handles (GM tool DT-46409).
Mandatory ECU/TCM Programming
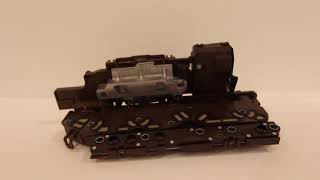
The 6T40 transmission contains an internal computer called the TEHCM (Transmission Electro-Hydraulic Control Module). This module is the brain of the transmission, controlling all shifting and electronic functions. The TEHCM is VIN-locked, meaning it is electronically tied to the original vehicle it came from.
Warning: If you install a used transmission without addressing the TEHCM, the vehicle will not start or will enter a "limp mode" with limited function. You have two options: have a dealer reprogram the donor TEHCM with your car's VIN, or carefully swap the original TEHCM from your old transmission into the replacement unit.
After installation, a Transmission Fast Learn (Adaptive Relearn) procedure is mandatory. This must be done with a GM-compatible scan tool to calibrate the solenoids and ensure proper shift quality.
Installation Best Practices & "Gotchas"
- Torque Converter Seating:
Warning: Ensure the torque converter is fully seated into the front pump. You should feel three distinct stages or "clunks" as you rotate it. Failure to do so will crack the internal pump gear upon tightening the bellhousing bolts.
- Engine Alignment Dowels: Verify metal alignment dowel pins on the engine block are present and undamaged to prevent misalignment, pump failure, and chronic axle leaks.
- Transmission Cooler Flush:
Warning: It is mandatory to flush the transmission cooler and lines before connecting them to the replacement unit. Debris from the old, failed transmission can contaminate the new unit and cause immediate failure.
- Fluid Level Check Procedure:
Warning: The 6T40/6T45 has no dipstick. Check the fluid level with the vehicle level, engine running in Park, and fluid at operating temperature (158-230°F), by removing the check plug on the side of the case. Checking cold or with the engine off will result in severe underfilling or fluid loss.
Required Parts and Fluids
- ATF Type: GM DEXRON VI (6) Automatic Transmission Fluid.
- Quantity: A full dry fill/overhaul requires approximately 8.5 to 9.0 quarts. A standard drain and fill uses 4.2 to 6.3 quarts.
- Gaskets & Seals: Plan on replacing the front control cover gasket (GM Part #24231188) if swapping the TEHCM, the torque converter seal (front pump seal), and both left and right CV axle seals.
Arrival Inspection: What to Check Before Installation
When your used 6T40 or 6T45 transmission arrives, inspect it immediately. Catching problems now saves you from installing a bad unit.
Fluid Color and Smell
The 6T40 and 6T45 transaxles do not have a traditional bottom oil pan. To check the fluid, remove the drain plug located on the bottom of the main case. Let a few drops of the leftover fluid fall onto a white paper towel.
- Good: Red, pink, or light brown fluid.
- Bad: Pitch black fluid or fluid that smells like burnt toast. This means the internal clutches are burnt.
Drain Plug Magnet Inspection
The drain plug acts as a magnet to catch loose metal inside the transmission. Wipe the plug with a clean rag.
- A small amount of fine, dark gray paste is normal.
- Large metal flakes, curly metal shavings, or hard plastic pieces mean internal gears or thrust washers are broken. Do not install the unit.
Torque Converter Hub
The torque converter is the large, heavy metal bowl that connects the engine to the transmission. Look at the converter hub. The hub is the smooth metal tube sticking out of the back of the converter that slides into the transmission.
Run your fingernail across the outside of this hub. It must be perfectly smooth. If you feel deep scratches or grooves, the hub will tear the front pump seal and leak fluid.
Input Shaft Splines
The input shaft is the metal rod sticking out of the front of the transmission. The splines are the straight metal teeth cut into this shaft. They lock into the torque converter to transfer power.
Inspect these teeth closely. They should be straight and evenly spaced. If the teeth look twisted, rusted, or have chipped edges, the transmission will slip or fail to move the car.
Frequently Asked Questions (FAQ)
Can I use a transmission from a Chevy Cruze or Malibu in my 2013 Verano?
No. Transmissions from other GM models, even if they are also designated 6T40, are not compatible. They have different electronic programming, gear ratios, and case designs that will not bolt up or function correctly in a 2013 Verano 2.4L.
Do I have to get the replacement transmission programmed?
Yes, programming is mandatory. The internal transmission computer (TEHCM) is locked to the donor car's VIN. It must be reprogrammed to your vehicle's VIN by a professional with a GM scan tool, or you must swap the TEHCM from your original transmission. Skipping this step will result in a no-start condition or the transmission being stuck in limp mode.
How do I check the transmission fluid level on a 2013 Verano?
This transmission does not have a dipstick. The level must be checked via a plug on the side of the transmission case while the engine is running, the transmission is in Park, and the fluid is at full operating temperature (158-230°F). This procedure should be performed by a qualified technician to avoid incorrect fluid levels.
What is a TEHCM?
TEHCM stands for Transmission Electro-Hydraulic Control Module. It is the integrated computer, valve body, and solenoid assembly located inside the transmission that controls all shift operations. It is the component that requires reprogramming during a swap.
What special tools do I need to replace this transmission?
Due to the complexity of the job, you will need an engine support bar to hold the engine in place, a transmission jack, torque converter lifting handles (GM tool DT-46409), and a GM-compatible scan tool (like a GM MDI with Techline Connect or a Tech 2) to perform the mandatory Service Fast Learn procedure.
How much fluid does the 6T40 transmission take?
If you are doing a complete overhaul or installing a dry unit, it takes approximately 8.5 to 9.0 quarts of GM Dexron VI fluid. If you are just doing a standard drain and fill, it will take between 4.2 and 6.3 quarts.
Helpful Videos

Technical Specifications
Family: GM 6T40 / 6T45; Type: Six-speed automatic transaxle; RPO Code: MH8; Engine Compatibility: 2.4L LEA Ecotec (VIN 8th digit 'K'); Transmission ID Codes: 3HCW, 3JEW; Final Drive Ratio: 3.23 (RPO F82); Fluid Type: GM DEXRON VI; Dry Fill Capacity: 8.5 to 9.0 quarts; Weight: ~203 lbs; Control Module: TEHCM (Transmission Electro-Hydraulic Control Module)
We Have This Part in Stock


The information in this article is provided for general reference and educational purposes only. Vehicle specifications, procedures, and part compatibility can vary by production date, trim level, and region. Always consult your vehicle's factory service manual and verify part numbers before purchasing or performing repairs. Safety-critical components such as airbags, seat belts, and braking systems should be installed by a qualified professional.
- Buick Verano:
- 🎬 Helpful Videos
- 🛍️ Shop This Part
- Is This the Right Transmission for Your 2013 Verano?
- Confirming Fitment on Your Vehicle
- Why Other GM Transmissions Won't Fit
- Common Failure Symptoms
- Diagnostic Flowchart
- Known Issues, Recalls, and Technical Service Bulletins (TSBs)
- What Fails at Every Mileage Band
- Under 60,000 Miles
- 60,000 - 100,000 Miles
- 100,000 - 150,000+ Miles
- Real Owner Experiences
- Repair or Replace?
- Replacement Cost Comparison
- What's Included in a Used Assembly?
- Freight and Delivery Reality
- Critical Installation and Programming Steps
- Mandatory ECU/TCM Programming
- Installation Best Practices & "Gotchas"
- Required Parts and Fluids
- Arrival Inspection: What to Check Before Installation
- Fluid Color and Smell
- Drain Plug Magnet Inspection
- Torque Converter Hub
- Input Shaft Splines
- Frequently Asked Questions (FAQ)
- 🎟️ Get 5% Off