

1989-1991 Sidekick & Tracker Temp Control: A Guide to Failures and Compatibility
This guide covers the common failures, critical compatibility differences, and replacement tips for the early first-generation Suzuki Sidekick and Geo Tracker heater and A/C control unit.
- Compatibility is the biggest challenge; you must match your vehicle's A/C or non-A/C setup and compare electrical plugs before buying.
- The most common failure, a fan that only works on high, is usually caused by the separate blower motor resistor, not the control unit itself.
- When buying used, physically inspect for cracked plastic around lever pivots and ensure the fan switch clicks firmly into each position.
- Stiff or inoperable levers are often caused by binding control cables, which should be checked before condemning the control unit.
Key Differences & Compatibility Warnings

Warning: Not all 1989-1991 Temp Control units are the same. Ordering the wrong one is a common and frustrating mistake. Before purchasing, you must verify two key things: whether your vehicle has factory Air Conditioning (A/C) and its specific production date, especially for 1989 models.
The primary differences are in the electrical switches and wiring connectors on the back of the unit. A/C models include an extra push-button switch and different wiring compared to non-A/C models. There are also known variations in the fan speed switch and electrical plug pin counts between model years and even within the same year based on production runs. Always compare the front and, most importantly, the back of your original unit with photos of the part you intend to buy.
Symptoms of a Failing Temp Control Unit

Problems with the Temp Control unit can range from minor annoyances to a complete loss of heating or cooling function. Here are the most common signs of failure:
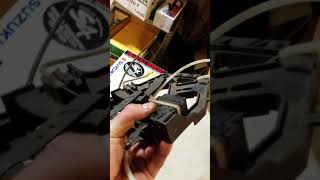
- Fan Only Works on High Speed: This is a classic symptom. While it can be caused by a failed fan switch within the control unit, it is more commonly due to a failed blower motor resistor. 🎬 Watch this step-by-step blower motor resistor replacement guide The resistor is a separate part located under the dashboard in the heater box housing. If the fan switch feels 'limp' or doesn't click firmly between settings, the switch itself is likely bad.
- Levers are Stuck, Stiff, or Ineffective: The plastic levers or the points where the control cables attach can break. More often, the control cables themselves become kinked, bind up, or detach from the blend doors they operate. This can result in being stuck on one temperature, or air that only blows from one set of vents (e.g., only defrost).
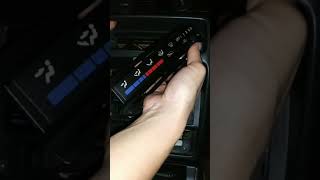
- Fan Speed Switch Feels 'Mushy' or Loose: The internal plastic housing of the fan switch can separate, causing a loss of contact and a 'mushy' or limp feel when you try to change speeds. This is a very common failure point. Some owners have successfully used zip ties or wire to clamp the switch housing back together as a temporary fix. 🎬 See how to repair a loose fan speed switch
- A/C Button Fails to Engage: The push-button switch for the air conditioning can fail, preventing the A/C compressor from turning on.
- No Backlighting: A simple burned-out bulb will cause the control faceplate to be dark at night. This single bulb illuminates the lever positions and icons.
Buying a Used Temp Control: What to Check

Given that new OEM units are largely discontinued and aftermarket options are scarce, a used OEM part is often the only choice. Here’s how to buy a good one:
- Verify Compatibility First: This is the most critical step. Confirm if you need an A/C or non-A/C version. Get clear photos of the back of the seller's unit and compare the electrical connector and pin layout to your original part. Do not rely on year alone.
- Inspect the Plastic Housing: Look for any cracks, especially around the lever pivot points and the mounting tabs for the control cables. These are common stress points.
- Test the Levers and Switches: Ask the seller to confirm that all levers slide smoothly from end to end and that the fan switch clicks positively into each position. A loose or mushy fan switch indicates it's failing.
- Check the Cable Clips: Ensure the small clips that hold the outer sheath of the control cables are intact. If these are broken, the cable will not operate the blend doors correctly.
- Why Used OEM is a Good Choice: Original Suzuki/GM parts were built to a higher quality standard than many of the cheap, no-name aftermarket parts that may have appeared over the years. An OEM unit, even used, is more likely to have the correct fit, proper cable attachment points, and more durable plastic, ensuring it will install correctly and last.
Pro Tip: If your levers are stiff, the problem might not be the control unit itself, but the cables or the blend doors they connect to. Before replacing the whole unit, try disconnecting the cables at the heater box end to see if the levers move freely. If they do, the issue is further down the line.
Replacement Overview
Replacing the Temp Control unit is manageable for a DIYer with basic tools but requires patience due to the tight confines of the dashboard.
Difficulty: 3 out of 5
Estimated Time: 1-2 hours
The general steps involve:
- Disconnect the negative battery terminal.
- Carefully pry off the lever knobs and the center dash bezel that surrounds the radio and temp controls.
- Remove the radio to gain better access.
- Unscrew the Temp Control unit from the dash frame.
- Maneuver the unit to access the back. Disconnect the main electrical connector and the illumination bulb.
- Carefully unclip the metal control cables from the back of the unit. It is highly recommended to label each cable to ensure correct reinstallation.
- Installation is the reverse of removal. Pay close attention to routing the cables correctly to avoid kinks or binding.
Known Issues, TSBs, and Recalls
For vehicles of this age, formal Technical Service Bulletins (TSBs) are rare and often integrated into general repair manuals. The most significant 'known issue' is the compatibility variance between A/C and non-A/C models and across production years. There are no major recalls specifically for the HVAC control unit on 1989-1991 Sidekick or Tracker models. Any recalls issued were for other systems, such as seat belts or fuel tanks.
Cost Comparison
| Part Type | Estimated Cost |
|---|---|
| New OEM | $200+ (Largely discontinued, very limited availability) |
| New Aftermarket | $50 - $150 (Very rare, quality varies) |
| Used OEM | $75 - $190 |
| Shop Labor | $120 - $250 |
Frequently Asked Questions (FAQ)
Why does my fan only work on the highest speed?
This is almost always caused by a failed blower motor resistor, not the control unit itself. The highest fan setting sends full battery voltage directly to the blower motor, bypassing the resistor. The lower speeds use the resistor to reduce voltage, and when it fails, those speeds stop working. The resistor is a cheap and easy part to replace, located under the glove box.
Can I install an A/C control unit in my non-A/C Sidekick to add air conditioning?
No, simply swapping the control unit will not add A/C. A full A/C system includes a compressor, condenser, evaporator, refrigerant lines, and different wiring, none of which are present on a non-A/C vehicle. The control unit is only one small part of a much larger system.
My temperature lever is hard to move. What should I do?
Stiffness is usually caused by the control cable binding or an issue with the blend door it operates inside the heater box. First, check that the cable's outer sheath is securely clamped at both the control unit and the heater box. If it's loose, the cable won't work properly. You can also disconnect the cable from the heater box and see if the lever moves freely. If it does, the problem is with the blend door; if it's still stiff, the cable itself likely needs to be lubricated or replaced.
How do I replace the bulb that lights up the heater controls?
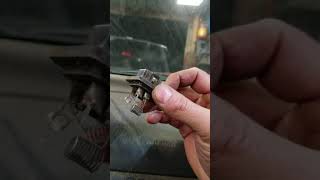
The illumination bulb can be accessed by removing the radio and the center dash trim. You can then reach behind or partially remove the control unit to access the bulb holder on top. It typically twists a quarter-turn to release. 🎬 Watch how to replace the heater control light bulb It is often a dealer-specific part, but compatible bulbs may be found at auto parts stores.
Helpful Videos
Technical Specifications
OEM Part Numbers: 30000471 30008933 UB39-61-550 37870-60A01 37870-60A01-000 3787060A01 74400-60A11 7440060A11 95571-60A50 9557160A50
System is operated by mechanical cables. Fan switch is a 4-position electrical switch. A/C models include an additional push-button switch. Illumination is provided by a single, top-mounted twist-in bulb.
We Have This Part in Stock


The information in this article is provided for general reference and educational purposes only. Vehicle specifications, procedures, and part compatibility can vary by production date, trim level, and region. Always consult your vehicle's factory service manual and verify part numbers before purchasing or performing repairs. Safety-critical components such as airbags, seat belts, and braking systems should be installed by a qualified professional.
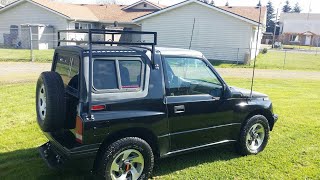
- Suzuki Sidekick: