

1999-2002 Lincoln Continental Temp Control: Fixing Blank Displays & Airflow Problems
A complete guide to diagnosing, replacing, and buying a used Electronic Automatic Temperature Control (EATC) module for your ninth-generation Lincoln Continental.
- The most common failure is a blank display, often caused by bad internal solder joints.
- Airflow stuck on the defrost setting is almost always due to a vacuum leak, typically from bad o-rings inside the unit, which is a repairable issue.
- When buying a used unit, you must match the part number prefix (XF3H or 1F3H) and the visual style of the faceplate trim.
- Replacement is a simple DIY job that takes less than an hour and requires only basic tools.
Common Symptoms of a Failing Temp Control Module

When the EATC module in a 1999-2002 Lincoln Continental begins to fail, it can cause a range of confusing issues. Because it's an electronic component, symptoms can be intermittent at first. Here are the most common signs that your module is faulty:
- Blank or Flickering Display: This is one of the most frequent failures. The digital screen that shows temperature and fan speed may go completely dark, flicker, or show partial information. This is often caused by failing solder joints on the internal circuit board due to age and heat cycles.
- A/C or Heat Doesn't Work: The module may fail to send the signal to engage the A/C compressor or to properly command the blend door, which mixes hot and cold air. This can leave you with air that's always hot, always cold, or just ambient temperature.
- Air Blows from the Wrong Vents: A classic symptom is having air stuck blowing out of the defrost vents, regardless of the setting you choose. This is often caused by a failure of the o-rings inside the EATC unit's vacuum solenoid block, which prevents it from directing vacuum to the actuators that control the vent doors.
- Unresponsive Buttons: The buttons on the face of the unit may stop working or only work sometimes. You might press the fan speed or temperature buttons with no effect.
- Fan is Stuck on One Speed: The module may lose its ability to regulate the blower motor, causing the fan to be stuck on high, low, or not work at all.
Pro Tip: Run the EATC self-test before replacing parts. 🎬 Watch how to run the EATC self-diagnostic test With the car running, press the 'OFF' and 'FLOOR' buttons simultaneously, then release and press the 'AUTO' button within two seconds. The unit will perform a diagnostic check and display any stored trouble codes on the screen, which can help pinpoint the problem.
Known Issues, TSBs, and Recalls

For the 1999-2002 Lincoln Continental, there are no specific recalls or Technical Service Bulletins (TSBs) from the National Highway Traffic Safety Administration (NHTSA) directly targeting the EATC module itself. However, the climate control system is complex, and issues with related parts are common.
- Vacuum Leak (Stuck on Defrost): The most common issue misdiagnosed as a bad EATC module is a vacuum leak. The system is designed to default airflow to the windshield defrost vents when a loss of vacuum is detected. This is a safety feature. The leak is often caused by dried-out rubber o-rings inside the EATC unit's solenoid block. This is a repairable issue for those comfortable with disassembling the unit.
- Blend Door Actuator Failure: A clicking sound from the dashboard accompanied by an inability to change air temperature is often a failing blend door actuator, not the control unit. The EATC tells the actuator to move, but the plastic gears inside the actuator strip and fail. 🎬 See how to replace the blend door actuator
Buying a Used 1999-2002 Continental Temp Control

A used OEM temp control module is often a reliable and cost-effective solution. Since new OEM units are scarce and aftermarket electronics can be problematic, a quality recycled part is a great choice. Here’s what to look for:
- Verify the Part Number Series: The most critical step is to match the part number prefix. For this generation of Continental, you are looking for units that start with XF3H or 1F3H. The full part number might be something like XF3H-19C933-AE. While the suffix letters (AA, AB, AC, etc.) indicate small revisions, the prefix is the key to basic compatibility.
- Match the Faceplate and Trim: Lincoln offered different interior trim packages. The faceplate of the EATC unit has a specific trim finish (e.g., woodgrain pattern and color). Ensure the unit you are buying has the exact same visual appearance as your original one to maintain the correct interior look.
- Inspect the Connectors: Look at the photos of the back of the unit. The electrical and vacuum connector ports should be clean, with no bent, broken, or corroded pins. Any sign of heat damage or melting on the plastic connectors is a major red flag.
- Ask About Testing: Ask the seller if the unit was tested. Specifically, ask if the display was confirmed to be bright and fully functional. Since blank displays are the most common failure, this is a key question.
- Why Used OEM is a Good Choice: Original Ford/Lincoln electronics from this era are generally robust, with known failure points that can often be repaired. A used OEM unit that has been tested is often more reliable than a new, unproven aftermarket module which may have software or component quality issues.
Warning: This is a digital control unit for models with Electronic Automatic Temperature Control (EATC) only. It will not work in a vehicle equipped with a manual (knob-style) climate control system.
Cost Comparison for a Temp Control Module
Prices can vary based on condition and availability. Here is a general cost breakdown:
| Part Type | Estimated Cost |
|---|---|
| New OEM | $400 - $650+ (Largely discontinued, very hard to find) |
| New Aftermarket | $150 - $300 |
| Used OEM | $50 - $125 |
| Remanufactured | $100 - $250 (Often includes fixes for common failures) |
| Shop Labor | $100 - $185 |
Replacement Guide

Replacing the EATC module is a straightforward job that most DIY mechanics can complete in under an hour.
- Difficulty: 2 out of 5
- Estimated Time: 0.5 - 1 hour
Step-by-Step Instructions:
- Disconnect the Battery: Before working on any electronic components, disconnect the negative terminal of the car battery to prevent electrical shorts.
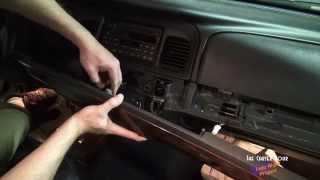
- Remove the Dash Trim: The trim piece surrounding the radio and climate control is held in by clips. Use a plastic trim removal tool to gently pry around the edges of the panel until it pops loose. Start from the bottom and work your way up.
- Unscrew the EATC Module: The control unit is typically held in place by four 7mm or 8mm screws. Remove these screws.
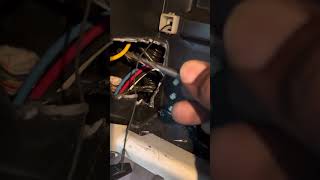
- Disconnect the Module: Carefully pull the unit out of the dash. On the back, you will find one or two electrical connectors and a vacuum line connector. Press the release tabs on the electrical connectors to unplug them. The vacuum connector pulls straight off.
- Install the New Unit: Connect the electrical and vacuum lines to the replacement module. You should hear a click as the electrical connectors lock into place.
- Test the Unit: Reconnect the battery and turn the key to the 'On' position. Test all functions of the new EATC unit—fan speed, temperature change, vent modes, and display—before you reinstall it.
- Reassemble the Dash: If everything works correctly, slide the unit back into place, secure it with the screws, and snap the dash trim panel back on.
My display is blank, but the fan and heat still seem to work. Is the unit bad?
Yes, this is a classic sign of internal failure. The power supply circuit for the vacuum fluorescent display (VFD) inside the unit has likely failed, often due to cracked solder joints. Even if the logic board that controls the HVAC functions still works, the display portion is broken and the unit needs to be repaired or replaced.
Do I need to program a replacement EATC module?
No. For the 1999-2002 Lincoln Continental, the EATC module is a plug-and-play component. It does not require any special programming or calibration by a dealer.
The air only blows out of my defrost vents. Is this an expensive fix?
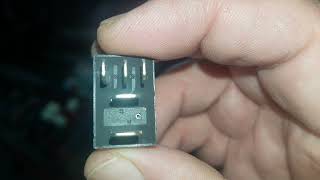
This is usually not an expensive fix. The problem is almost always a vacuum leak, not a completely failed module. The most common cause is deteriorated o-rings inside the EATC unit's vacuum solenoid block. 🎬 Watch this step-by-step video on replacing EATC o-rings A repair kit with new o-rings can be purchased for a few dollars, and a person with basic soldering/disassembly skills can often fix the original unit in about an hour.
Can I fix my original temp control unit myself?
It depends on the failure. If the issue is air stuck on defrost, the internal o-rings can be replaced by someone comfortable disassembling electronics. If the display is blank, it often requires re-soldering very small connections on the circuit board, which is a more advanced repair. Given the low cost of used OEM units, replacement is often the faster and easier option.
Helpful Videos
Technical Specifications
OEM Part Numbers: 1F3H19C933AA F80H19C933AC F8OZ19980AA XF3H18C612AB XF3H19C933AB XF3H19C933AC XF3H19C933AD XF3H19C933AE XF3HAB XF3Z19980AA
Digital Electronic Automatic Temperature Control (EATC) with vacuum solenoid block.
We Have This Part in Stock


The information in this article is provided for general reference and educational purposes only. Vehicle specifications, procedures, and part compatibility can vary by production date, trim level, and region. Always consult your vehicle's factory service manual and verify part numbers before purchasing or performing repairs. Safety-critical components such as airbags, seat belts, and braking systems should be installed by a qualified professional.
- Lincoln Continental: