

2003-2005 Kia Rio Temp Control: Solving Cable, Knob, and AC/Non-AC Issues
This guide covers common failures, part number differences, and replacement tips for the first-generation Kia Rio's manual climate control panel.
- The most critical step before buying is to verify if your Rio has factory A/C. The control panels are different and not interchangeable.
- If your fan only works on the highest speed, the problem is almost certainly the blower motor resistor, not the control panel.
- Common failures are mechanical: broken cables that control temperature/vent direction, or cracked knobs.
- When buying a used unit, inspect the plastic clips on the back that hold the control cables, as they are a common weak point.
Known Issues & Recalls for 2003-2005 Kia Rio

Vehicle-Specific Known Issues
The HVAC control system in the 2003-2005 Kia Rio is relatively simple, with most problems stemming from its mechanical components. The control cables for the temperature blend door and the mode (vent direction) door are known to stretch, break, or become disconnected. This can leave you stuck with only hot or cold air, or with air that only blows from one set of vents. The plastic knobs can also crack or strip internally, causing them to spin freely without moving the control shafts.
Pro Tip: A very common issue that is often misdiagnosed as a bad control panel is when the fan only works on the highest setting. This is almost always caused by a failed blower motor resistor, which is a separate part located near the blower motor fan itself, typically behind the glove box. The control panel sends the signal, but the resistor is what actually adjusts the fan speed.
Recalls and Technical Service Bulletins (TSBs)
As of this writing, there are no specific recalls or Technical Service Bulletins (TSBs) from the National Highway Traffic Safety Administration (NHTSA) for the HVAC temperature control panel on 2003-2005 Kia Rio models. The only major safety recall for this vehicle generation concerns child seat anchors.
Symptoms of a Failing Temp Control Panel

Diagnosing a faulty temp control panel is usually straightforward. Here are the most common symptoms:
- Knobs Spin Freely or Are Cracked: The plastic knobs can break internally, preventing you from making adjustments.
- Air Blows from the Wrong Vents: If you turn the mode knob but the air direction doesn't change, the mode door cable is likely broken, disconnected, or the clip on the back of the panel has failed.
- Temperature is Stuck on Hot or Cold: If turning the temperature knob has no effect, the blend door cable is the most probable cause. This prevents the system from mixing hot and cold air.
- Fan Speed Cannot Be Changed: If the fan is stuck on one speed (that isn't high) or doesn't work at all, the electrical fan switch inside the control unit may have failed.
- A/C Button Doesn't Work: On models with air conditioning, a faulty button or internal switch can prevent the A/C compressor from engaging.
- No Backlighting: The small bulbs that illuminate the panel for night driving can burn out. These can often be replaced without replacing the entire unit.
Buying a Used 2003-2005 Kia Rio Temp Control

A used OEM temp control is often a reliable and cost-effective choice, as the original factory parts are typically of good quality. However, careful inspection is key to getting a good part.
1. Verify Compatibility: A/C vs. Non-A/C
This is the most critical step. The 2003-2005 Rio was available with and without factory air conditioning, and the control panels are different and not interchangeable.
- With A/C: The panel will have a push-button in the center of the fan speed knob with an "A/C" logo. The primary part number series for these units is 97250-FD3xx.
- Without A/C: The panel will have a blank spot or a recirculation button, but no A/C button. The primary part number series for these units is 0K32B-61190x.
Warning: You cannot install a non-A/C unit in a vehicle with A/C and expect it to work, as it lacks the necessary switch and wiring. Always match the unit to your vehicle's original options.
2. Inspect the Part Physically
- Check the Knobs: Turn each knob. They should move smoothly with a slight amount of resistance. They should not feel loose, gritty, or spin freely.
- Inspect the Cable Mounts: Look at the back of the unit. The control cables snap into plastic clips. Ensure these clips are not cracked, broken, or stressed. This is a common failure point.
- Examine the Electrical Connector: Check the electrical plug and pins for any signs of corrosion, melting, or discoloration. A burnt pin can indicate a more serious electrical issue in the vehicle.
- Look for Part Number Updates: For units with A/C, part number 97250-FD302 is an updated version that replaces older 97250-FD300 and 97250-FD301 units. If possible, choose the newest revision. For non-A/C units, 0K32B61190A replaces the older 0K32B61190.
Cost Comparison
Prices for a replacement temp control panel can vary significantly based on the source.
| Part Source | Estimated Cost |
|---|---|
| New OEM | $220 - $330 (Many are now discontinued) |
| New Aftermarket | $20 - $50 (For individual switches, not complete units) |
| Used OEM (Recycled) | $50 - $95 |
| Shop Labor | $95 - $150 |
Replacement Guide

Replacing the temp control panel in a 2003-2005 Kia Rio is a manageable DIY job for most people with basic tools. A video guide shows the process in detail.
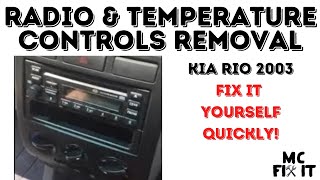
🎬 Watch this 2003 Kia Rio dash trim and control removal video- Difficulty: 2 out of 5
- Estimated Time: 45-60 minutes
- Tools Needed: Phillips screwdriver, plastic trim removal tool.
Step-by-Step Overview
- Remove Center Dash Trim: Carefully pry off the plastic trim piece surrounding the radio and climate controls. Start from the bottom near the ashtray and work your way up.
- Unscrew the Control Unit: The temp control panel is held in place by four Phillips head screws. Remove them.
- Disconnect Electrical Plug: Pull the unit forward and disconnect the single electrical connector from the back.
- Disconnect Mechanical Cables: This is the trickiest part. There are two cables connected to levers on the back of the unit. You need to unclip the outer sheath of the cable from its retaining clip, and then slide the inner wire's loop off of the post on the control arm. It can be helpful to reach from underneath the dash to get a better angle.
- Install the New Unit: Installation is the reverse of removal. Connect the cables first, ensuring they are routed correctly and not kinked. Then, plug in the electrical connector. Before screwing everything back together, test all functions—fan speed, temperature change, and vent direction—to ensure the cables are attached and working correctly.
Frequently Asked Questions (FAQ)
Why does my fan only work on the highest speed?
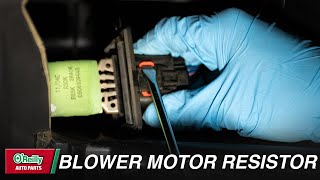
This is a classic symptom of a failed blower motor resistor, not the control panel itself. The highest fan setting bypasses the resistor, which is why it's the only one that works. The resistor is a separate, inexpensive part usually located behind the glove compartment.
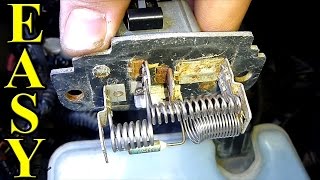
🎬 Watch how to replace a faulty blower motor resistorCan I just replace a broken knob?
Yes, if only the knob is broken, you can often pull it straight off and replace it with a new or used one. However, if the shaft that the knob attaches to is broken, you will need to replace the entire control unit.
I replaced the control panel, but the temperature still won't change. What's wrong?
The most likely cause is that the temperature blend door cable is not connected properly at the other end. The cable runs from the back of the control panel to a lever on the heater box, deep under the dashboard. Check to make sure the cable is attached and operating the lever at that end. It's also possible the blend door itself is stuck.
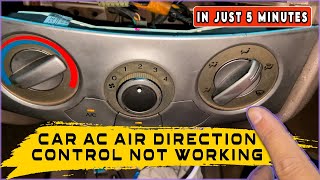
🎬 Watch this guide to fix AC temp and air direction issuesIs it difficult to replace the light bulbs in the panel?
Replacing the illumination bulbs typically requires removing the control unit from the dash. Once removed, you can usually access the small, twist-in bulb holders on the back or top of the unit. These can be replaced without soldering, but it does require the same disassembly as replacing the whole unit.
Helpful Videos
Technical Specifications
OEM Part Numbers: 0K32B61190 0K32B61190A 97250FD200 97250FD201 97250FD202 97250FD300 97250FD301 97250FD302
Manual control via 3 rotary knobs. Operates 2 mechanical cables for temperature and mode control. Includes a 4-speed electrical fan switch. A/C models include an integrated push-button compressor switch.
We Have This Part in Stock


The information in this article is provided for general reference and educational purposes only. Vehicle specifications, procedures, and part compatibility can vary by production date, trim level, and region. Always consult your vehicle's factory service manual and verify part numbers before purchasing or performing repairs. Safety-critical components such as airbags, seat belts, and braking systems should be installed by a qualified professional.
- Kia Rio:
- 🎬 Helpful Videos
- 🛍️ Shop This Part
- Known Issues & Recalls for 2003-2005 Kia Rio
- Vehicle-Specific Known Issues
- Recalls and Technical Service Bulletins (TSBs)
- Symptoms of a Failing Temp Control Panel
- Buying a Used 2003-2005 Kia Rio Temp Control
- 1. Verify Compatibility: A/C vs. Non-A/C
- 2. Inspect the Part Physically
- Cost Comparison
- Replacement Guide
- Step-by-Step Overview
- Frequently Asked Questions (FAQ)
- 🎟️ Get 5% Off