

1988-1991 Honda Civic & CRX Temp Control: Fixing Stuck Sliders & Cracked Faceplates
Your definitive guide to diagnosing, replacing, and buying a used heater and A/C control unit for the EF-generation Honda Civic and CRX.
- The #1 issue is a cracked faceplate and broken mounting tabs; inspect any used unit meticulously before purchase.
- Verify if your car has A/C before buying a replacement, as the control units are different and not directly interchangeable.
- If the fan only works on its highest speed, the problem is the blower motor resistor, not the temp control unit itself. This is a separate, inexpensive fix.
- Stiff sliders are often caused by binding cables or stuck heater box flaps; forcing them will break the fragile plastic levers on the control unit.
Diagnosing a Faulty 1988-1991 Civic Temp Control Unit


Problems with the EF-generation Civic and CRX temp control unit are common due to its age and plastic construction. Symptoms can range from minor annoyances to a complete loss of climate control.
No Control Over Air Temperature
If sliding the temperature lever from hot to cold does nothing, the issue is often a stuck or disconnected control cable. One cable runs from the back of the control unit to a heater control valve near the firewall in the engine bay. Another cable often controls the air mix door behind the dashboard. If the lever is stuck, the problem could be a seized valve or a binding door, which can cause the plastic levers on the control unit to break if forced.
Air Blows From the Wrong Vents
When you can't switch the airflow between the defrost, dash vents, and floor, it points to an issue with the mode control cable or the doors it operates within the heater box. On some CRX models, this function is controlled electronically. You might hear a pop or feel a sudden lack of resistance in the slider if the cable has become detached from the control unit or from the heater box assembly.
Fan Speed Selector Not Working Correctly
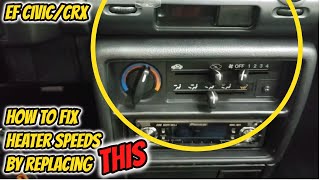
Common Issue: If your fan only works on the highest setting (speed 4), the problem is almost certainly a failed blower motor resistor, not the temp control unit itself.
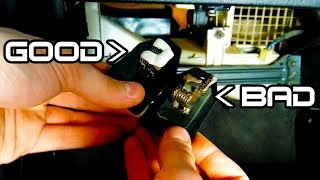
The blower motor resistor is a small, inexpensive part located behind the glove box that controls the lower fan speeds. Since the highest fan speed setting bypasses the resistor, it will continue to work even when the resistor has failed. Replacing the resistor is a simple fix that usually only requires removing the glove box for access.
🎬 Watch this guide on replacing the EF Civic blower resistorStuck or Broken Control Levers
The plastic levers and sliders on these units become brittle with age. If a control cable becomes stiff or the door it operates gets stuck, forcing the lever will often break the plastic handle or the mounting points inside the unit. This is one of the most common and visible signs of a failed unit.
No Backlighting
If the lights behind the controls have gone out, it's typically due to burned-out incandescent bulbs. These small bulbs can be replaced, though it requires removing the unit from the dashboard to access them. Some owners upgrade to LED bulbs during this process.
Buyer's Guide: What to Check on a Used EF Civic Temp Control

Because new OEM units are no longer available, buying a good used part is often the only option. These units are fragile, so careful inspection is critical.
1. Inspect the Faceplate for Cracks (The #1 Issue)
The black plastic faceplate is notoriously brittle and prone to cracking, especially around the slider openings and screw holes. Look for hairline fractures or any signs of previous repairs with glue. A mint-condition, crack-free unit is rare and commands a higher price.
2. Check All Four Mounting Tabs
The unit is held into the dash by several plastic tabs. These tabs are easily broken during removal if not done carefully. Inspect all sides of the unit to ensure the mounting points are intact. A unit with broken tabs will not sit securely in the dashboard.
3. Verify A/C vs. Non-A/C Configuration
Before you buy, confirm whether your car has air conditioning. The control units are different. A/C-equipped models have an extra push-button to activate the compressor and may have different cable configurations. A non-A/C unit will have a blank plate where the A/C button would be.
4. Test the Slider and Lever Action
Gently move all the sliders and press any buttons. They should move through their full range of motion without binding or excessive force. If a slider is extremely stiff, the cable or the component it controls may be seized, which could have put stress on the unit.
5. Examine the Cable Connection Points
On the back of the unit, look at the plastic loops and clips where the control cables attach. These are common failure points. Ensure they are not cracked, stressed, or broken. A broken cable clip can render the unit useless for that function.
Pro Tip: Some companies now offer 3D-printed replacement faceplates or repair kits that can restore a cracked or broken unit. This can be a good option if you have a functional unit with cosmetic damage.
Replacement Overview
Replacing the temp control unit is a moderately difficult job for a DIY mechanic, primarily due to the tight space and the need to remove surrounding dash trim. Patience is key to avoid breaking old plastic parts.
Difficulty: 3/5
Estimated Time: 1.5 - 2.5 hours
Step-by-Step Summary
- Disconnect the Battery: Always disconnect the negative battery terminal before working on interior electronics.
- Remove Trim: Carefully remove the center console trim, radio, and any surrounding dashboard bezels to gain access to the temp control unit.
- Unscrew the Unit: Remove the screws holding the control unit in place.
- Disconnect Cables & Connectors: This is the most critical step. Carefully reach behind the unit to disconnect the electrical plugs and mechanical control cables. It's helpful to label the cables or take photos to remember their positions. The cable ends have small clips that must be released gently.
- Installation: Installation is the reverse of removal. Be sure to test all functions (temperature, mode, fan speed) before reassembling the entire dashboard.
Warning: The control cable clips are very fragile. Use a small flathead screwdriver or pick tool to gently release them. Forcing them will cause them to break.
Cost Comparison
Finding a new temp control unit is nearly impossible, making the used market the primary source for this part.
| Part Source | Estimated Cost |
|---|---|
| New OEM | $145+ (No Longer Available/Very Limited) |
| New Aftermarket | Not Available |
| Used OEM | $75 - $250 (depending on condition) |
| Shop Labor | $200 - $350 |
Frequently Asked Questions
Why does my fan only work on the highest setting?
This is a classic symptom of a failed blower motor resistor, a separate part located behind your glove box. 🎬 See how to replace a CRX blower motor resistor The highest fan speed setting bypasses this resistor, which is why it's the only one that works. 🎬 Watch a step-by-step resistor replacement on a 1990 Civic It's a common, inexpensive, and easy part to replace.
Can I use a CRX temp control in my Civic (or vice-versa)?
Generally, yes, as long as you match the A/C configuration and model years (1988-1991). However, CRX models used electronic actuators for some vent controls, while Civic hatches and sedans used cables. If you swap between these types, you may need to swap the underlying heater box components as well, which is a much larger job.
My temperature slider is stuck. What should I do?
Do not force it! First, check the heater control valve on the firewall in the engine bay; it may be seized. Disconnect the cable from it and see if the valve and the slider move freely independently. If they do, the problem may be a binding cable or an issue with the air mix door inside the dash.
How can I fix a cracked faceplate?
For minor cracks, plastic epoxy or super glue can be used for a temporary repair. For a more permanent solution, you can reinforce the back of the unit with epoxy and fiberglass mesh. Several aftermarket companies also sell metal or 3D-printed reinforcement plates and replacement faceplate inserts that can cover the damage and strengthen the unit.
Recalls and Technical Service Bulletins
As of this writing, there are no major safety recalls or technical service bulletins (TSBs) from Honda specifically addressing the failure of the 1988-1991 Civic temp control unit. The known issues are well-documented within the owner community and are generally considered a result of age and material degradation rather than a manufacturing defect.
Part Number Reference

The following OEM part numbers have been associated with this component. The most important factor when buying a replacement is matching the vehicle's options (with or without A/C) and year range, not necessarily finding an exact part number match, as many numbers have been superseded.
| Part Number | Notes |
|---|---|
| 79510-SH3-A01 | Commonly associated with Civic models. |
| 79510-SH5-A00 | Associated with 1988-1989 Civic Wagovan. Superseded by 79510-SH5-A01. |
| 79510-SH5-A01 | Supersedes 79510-SH5-A00. |
| 79550-SH3-A01 | Part number found in database. |
| 79550-SH3-A02 | Part number found in database. |
Helpful Videos


Technical Specifications
OEM Part Numbers: 2789584 3215621 79510-SH3-A01 79510-SH5-A00 79510-SH5-A01 79550-SH3-A01 79550-SH3-A02
System is primarily operated by mechanical cables. A/C models include an electrical switch for the compressor. Illumination is provided by 14V 1.4W incandescent bulbs.

The information in this article is provided for general reference and educational purposes only. Vehicle specifications, procedures, and part compatibility can vary by production date, trim level, and region. Always consult your vehicle's factory service manual and verify part numbers before purchasing or performing repairs. Safety-critical components such as airbags, seat belts, and braking systems should be installed by a qualified professional.
- Honda Civic:
- 🎬 Helpful Videos
- Diagnosing a Faulty 1988-1991 Civic Temp Control Unit
- No Control Over Air Temperature
- Air Blows From the Wrong Vents
- Fan Speed Selector Not Working Correctly
- Stuck or Broken Control Levers
- No Backlighting
- Buyer's Guide: What to Check on a Used EF Civic Temp Control
- 1. Inspect the Faceplate for Cracks (The #1 Issue)
- 2. Check All Four Mounting Tabs
- 3. Verify A/C vs. Non-A/C Configuration
- 4. Test the Slider and Lever Action
- 5. Examine the Cable Connection Points
- Replacement Overview
- Step-by-Step Summary
- Cost Comparison
- Frequently Asked Questions
- Recalls and Technical Service Bulletins
- Part Number Reference
- 🎟️ Get 5% Off