

2019 Chevrolet Volt Climate Control: Decoding Heated Seat vs. Non-Heated Seat Models
This guide details the critical differences between the 2019 Chevy Volt's climate control units, focusing on the all-important heated seat option to ensure you buy the right part.
- Compatibility is determined by the heated seat option (RPO code KA1); you must buy a unit that matches your car's features.
- Part number 84413274 is for Volts WITH heated seats, while 84413273 is for those WITHOUT.
- Failure symptoms include unresponsive buttons, incorrect temperature, erratic fan speed, and air blowing from the wrong vents.
- Replacement is a straightforward DIY task, but the new module may require a calibration procedure to function correctly.
Variant Differences: The Critical Heated Seat Option (KA1)

For the 2019 Chevrolet Volt, the single most important factor when replacing the climate control unit is your vehicle's heated seat option, identified by the Regular Production Option (RPO) code KA1. The control modules are physically and electronically different between cars with and without this feature. Installing the wrong unit will result in incorrect function or complete failure of the climate control system.
Warning: You must match the part number or the heated seat option of your original unit exactly. A control module from a car with heated seats will not work correctly in a car without them, and vice-versa.
Here is the breakdown of known OEM part numbers based on the heated seat option:
| Vehicle Option | Known OEM Part Number | Notes |
|---|---|---|
| With Heated Seats (RPO: KA1) | 84413274 | This is the most common part number for 2019 Volts equipped with the heated seat feature. The face of the unit will have dedicated buttons to activate the driver and passenger heated seats. |
| Without Heated Seats | 84413273 | This unit is specifically for models that do not have heated seats. The faceplate will have blank spots where the heated seat buttons would normally be. |
Other part numbers like 84102014, 84313693, and 84413272 may be superseded or related internal numbers, but the primary replacement parts to look for are 84413274 (With Heat) and 84413273 (Without Heat).
Symptoms of a Failing Temp Control Module

When the climate control module begins to fail, it can cause a range of confusing symptoms. Because it's an electronic component, failure can be sudden or intermittent.
- Unresponsive Buttons or Display: The buttons or knobs do not respond when pressed, or the display screen is blank, flickering, or dim.
- Incorrect Temperature Output: The system blows only hot air or only cold air, regardless of the temperature setting. This can happen if the module fails to command the blend door actuators correctly.
- Fan Speed Issues: The blower fan may be stuck on one speed (often high), not work at all, or change speeds randomly on its own.
- Airflow from Wrong Vents: You try to select the dash vents, but air only comes from the defrost or floor vents. This indicates a failure to control the mode door actuators.
- A/C or Defrost Won't Engage: The button for the A/C or defrost may light up, but the underlying function does not turn on.
Pro Tip: Before blaming the control unit, check for simpler issues. A clogged cabin air filter can restrict airflow, and issues with the blower motor or its resistor can mimic control module failure. Also, some erratic temperature behavior can be related to software; GM has issued software updates for other vehicles to correct similar issues.
Buying a Used 2019 Volt Temp Control

Purchasing a used OEM climate control module is a smart way to save money, as these units are generally reliable. However, careful verification is essential.
How to Verify Compatibility
- Confirm Heated Seats: This is the number one priority. Look at the photo of the used part. Does it have the heated seat buttons? Does your car have heated seats? The buttons must match your vehicle's configuration.
- Match the Part Number: If possible, remove your existing unit to find the exact part number on the sticker. Match this number to the used part you intend to buy. For 2019 Volts, you are most likely looking for 84413274 (with heated seats) or 84413273 (without).
Physical Inspection Checklist
- Check the Faceplate: Look for deep scratches, worn button graphics, or cracks in the plastic. Ensure the display screen is not delaminating or showing signs of internal damage.
- Inspect Mounting Tabs: All plastic mounting tabs should be intact and free of cracks. Broken tabs will result in a loose fit in the dashboard.
- Examine Connectors: The electrical connector ports on the back of the unit should be clean, with no bent or corroded pins. Signs of moisture or corrosion are a major red flag.
- Avoid Water Damage: Never buy a unit with any signs of water intrusion, such as rust on internal components or a musty smell. Water damage can cause unpredictable and permanent electrical failure.
Known Issues, TSBs, and Recalls
As of late 2023, there are no specific recalls or widespread Technical Service Bulletins (TSBs) from GM directly addressing the HVAC control module for the 2019 Chevrolet Volt. Most owner complaints are isolated incidents rather than a systemic design flaw. However, the 2019 Volt was subject to recalls for other issues, including rear brake calipers and seatbelt retractors, which are unrelated to the climate control system. A more well-known issue for the Gen 2 Volt is the "Shift to Park" message (TSB 19-NA-206), but this is related to the shifter wiring harness, not the HVAC controls.
Replacement Information
Replacing the climate control unit is a feasible DIY project for those comfortable with removing interior trim panels.
- Difficulty: 2 out of 5
- Estimated Time: 1 hour
- Tools Needed: Plastic trim removal tools, 7mm socket or screwdriver.
Basic Replacement Steps
While specific steps may vary slightly, the general process is similar to other GM vehicles of the era.
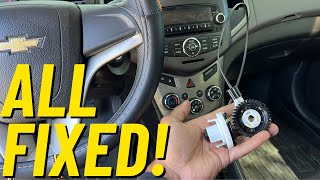
🎬 Watch this GM HVAC climate control repair walkthrough for guidance- Disconnect the Battery: Always disconnect the negative battery terminal before working on vehicle electronics.
- Remove Trim: Using plastic pry tools to avoid scratching, carefully remove the trim pieces surrounding the climate control unit and radio/infotainment screen. These pieces are typically held in by clips.
- Unbolt the Unit: The control unit is usually secured by four 7mm screws. Remove these screws.
- Disconnect and Remove: Gently pull the unit out and disconnect the electrical connectors from the back.
- Installation: Connect the new unit, bolt it into place, re-attach the trim, and reconnect the battery.
Programming Requirements
For many modern GM vehicles, a new HVAC control module requires programming or a calibration procedure to learn the vehicle's specific configuration and communicate with other modules. After installing the replacement unit, turn the vehicle on and test all functions—fan speeds, mode doors (vent, floor, defrost), and temperature blend. If anything behaves incorrectly, a recalibration procedure may be needed, which can sometimes be initiated by a specific sequence of button presses or may require a dealer-level scan tool.
Cost Comparison
| Part Type | Estimated Cost |
|---|---|
| New OEM | $150 - $270 |
| New Aftermarket | Not commonly available |
| Used OEM | $100 - $200 |
| Shop Labor | $110 - $160 |
Frequently Asked Questions (FAQ)
Can I use a control unit from a 2018 Volt in my 2019 Volt?
Possibly, but it is risky. While the Gen 2 Volt (2016-2019) shares many parts, there can be subtle software and hardware changes between model years. To guarantee compatibility, it is always best to use a part from the exact same model year with the exact same options.
Does a replacement climate control module need to be programmed by the dealer?
It might. While some used units are plug-and-play, GM modules often require a calibration sequence to learn the positions of the blend door actuators. If the unit doesn't work correctly after installation, it may need to be programmed or calibrated with a professional scan tool.
My A/C is blowing warm. Is it definitely the control module?
Not necessarily. Warm air from the A/C is most commonly caused by a refrigerant leak. It can also be caused by a bad A/C compressor, pressure sensor, or a stuck blend door. A full system diagnosis should be performed before replacing the control module.
Why do my fan speeds work on high but not on low?
This specific symptom is a classic sign of a failed blower motor resistor, not the control module itself. The resistor controls the lower fan speeds, and when it fails, power bypasses it and only allows the highest setting to work. This is a separate, and often cheaper, part to replace.
Helpful Videos

Technical Specifications
OEM Part Numbers: 84413274 84102014 84313693 84413272 84413273
The control unit is a plastic assembly with push-button controls and a digital display. It connects via electrical harnesses on the rear of the unit.
We Have This Part in Stock



The information in this article is provided for general reference and educational purposes only. Vehicle specifications, procedures, and part compatibility can vary by production date, trim level, and region. Always consult your vehicle's factory service manual and verify part numbers before purchasing or performing repairs. Safety-critical components such as airbags, seat belts, and braking systems should be installed by a qualified professional.
- Chevrolet Volt:
- 🎬 Helpful Videos
- 🛍️ Shop This Part
- Variant Differences: The Critical Heated Seat Option (KA1)
- Symptoms of a Failing Temp Control Module
- Buying a Used 2019 Volt Temp Control
- How to Verify Compatibility
- Physical Inspection Checklist
- Known Issues, TSBs, and Recalls
- Replacement Information
- Basic Replacement Steps
- Programming Requirements
- Cost Comparison
- Frequently Asked Questions (FAQ)
- 🎟️ Get 5% Off