

1983 Chevrolet Malibu Temp Control: Fixing Common Heat & A/C Problems
Your guide to diagnosing and replacing the vacuum-operated HVAC control unit in your 1983 Malibu, with a focus on critical A/C and non-A/C differences.
- The most critical compatibility factor is verifying if your car has factory A/C or is non-A/C; the control units are not interchangeable.
- Most airflow problems, especially air being stuck on defrost, are caused by brittle, cracked vacuum lines, not necessarily the control unit itself.
- When buying a used unit, physically inspect all levers for smooth operation and check the rear plastic housing and vacuum ports for cracks.
- If the fan only works on the 'High' setting, the problem is the separate blower motor resistor, not the main temp control unit.
Symptoms of a Failing Temp Control


Because the 1983 Malibu's climate system is primarily vacuum and cable operated, failures are usually mechanical. Here are the most common symptoms you'll encounter:
Air Blows Only From Defrost Vents
This is the most common symptom and almost always points to a vacuum issue. The system is designed to default to the defrost setting when there is a loss of vacuum. This could be caused by a cracked or disconnected vacuum line anywhere from the engine to the control unit, a leaking vacuum reservoir, or a crack in the vacuum port manifold on the back of the control unit itself.
Cannot Change Vent Modes
If you can't switch the airflow between the floor, dash vents, and defroster, the problem lies with the mode selector lever or the vacuum system it controls. The lever itself could be broken internally, or the vacuum switch it operates has failed. More likely, the vacuum lines connected to it are cracked or have fallen off.
Temperature is Stuck on Hot or Cold
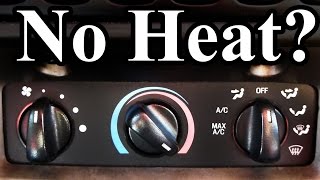
If the air blows but you cannot change how hot or cold it is, the issue is likely with the temperature blend door. The slider on the control unit connects to this door via a metal cable. This cable can stretch, break, or become disconnected at either the control unit or the heater box, 🎬 See how to fix common car heating problems preventing you from mixing air properly.
Control Levers are Stiff, Loose, or Broken
After decades of use, the plastic levers and the internal mechanisms of the control unit can become brittle and break. If a lever feels unusually stiff, the door or cable it operates may be binding. If it's completely loose, the lever or its connection point is likely broken inside the unit.
Fan Only Works on High Speed
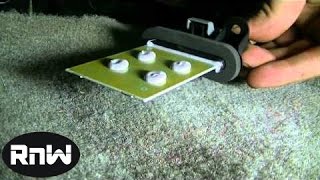
If the blower fan only operates on the highest setting, this is not a fault of the main temp control unit. This specific symptom points to a failed blower motor resistor. This is a separate, inexpensive part typically located in the heater box under the passenger side of the dashboard.
🎬 Watch how to replace a blower motor resistorWarning: The single most important factor when replacing this part is the distinction between models with and without factory air conditioning. The control units are different and are not interchangeable.
Buying a Used 1983 Malibu Temp Control: What to Check


Given the age of the vehicle, a quality used OEM part is often the best and only option, as new old stock (NOS) is rare and aftermarket support is limited. Here’s what to inspect before buying.
1. Verify A/C vs. Non-A/C Configuration
This is the most critical step. The two units have different lever configurations and vacuum port layouts. Before you buy, confirm which system your car has.
- A/C Models: The control panel will have positions for "Max A/C," "Normal A/C," or a blue icon/range on the temperature slider. The OEM part numbers 14039632 and 14052445 are for A/C-equipped models.
- Non-A/C (Heater Only) Models: The control panel will be simpler, often with just "Vent," "Heat," and "Defrost" functions. The OEM part number 16028951 is associated with non-A/C setups.
2. Physical Inspection Checklist
- Levers and Sliders: Gently move all levers and sliders through their full range of motion. They should move smoothly without binding or feeling excessively loose. Ensure none of the plastic lever ends are cracked or broken.
- Housing and Mounts: Inspect the entire plastic housing for cracks, especially around the screw mounting points. A cracked housing can cause the unit to fit loosely in the dash.
- Vacuum Port Manifold: Carefully examine the block of vacuum ports on the back of the unit. This plastic can become brittle and crack, leading to vacuum leaks that are impossible to fix. Look for hairline fractures around each port.
- Cable Connections: Check the attachment point for the temperature blend door cable. Ensure it is intact and not broken or stressed.
- Fan Switch Connector: If the fan switch is integrated, look at the electrical connector pins. Any signs of melted plastic, charring, or heavy corrosion are red flags indicating a past electrical issue.
3. Why Used OEM is Often Better
For a vehicle like the 1983 Malibu, a good used OEM control unit is often superior to a new aftermarket part, if one can even be found. An original GM part was designed for a perfect fit and feel. Aftermarket units can have levers that feel flimsy, graphics that don't match the original, or vacuum ports that are not perfectly aligned, making installation difficult.
Cost Comparison
New OEM units are generally no longer available from dealers. Pricing reflects the market for used and New Old Stock (NOS) parts.
| Part Type | Estimated Cost |
|---|---|
| New OEM (NOS) | $150 - $300+ (if found) |
| New Aftermarket | $100 - $200 (Limited availability) |
| Used OEM | $50 - $100 |
| Shop Labor | $150 - $300 |
Replacement Difficulty: 3/5

Replacing the temp control unit is moderately difficult, mainly due to tight access behind the dashboard. It is feasible for a DIY mechanic with patience and basic hand tools.
- Estimated Time: 1.5 - 2.5 hours
- Tools Needed: Screwdrivers, socket set, trim removal tools.
- Process Overview: The job involves carefully prying off the dash trim surrounding the radio and HVAC controls, unbolting the control unit, and then carefully disconnecting the electrical plugs, vacuum harness, and temperature cable from the back.
Pro Tip: The vacuum lines are connected via a single multi-plug, but they can become brittle. Before disconnecting anything, take a clear photo of the vacuum line colors and their positions on the control unit and the heater control valve under the hood. This will be invaluable if any lines break or get mixed up.
Known Issues, Recalls, and TSBs
For a vehicle of this age, formal documentation is scarce. No specific recalls or Technical Service Bulletins (TSBs) from the NHTSA are on file for the HVAC control unit of the 1983 Chevrolet Malibu. The most well-documented "known issue" in owner forums is the tendency for the vacuum lines to become brittle and crack, causing the system to default to the defrost vents. This is a system-wide problem common to all GM G-body vehicles of the era.
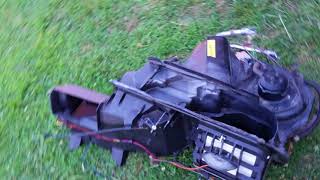
🎬 Watch this video on common G-body HVAC box issuesFrequently Asked Questions (FAQ)
Why does my air only blow out of the defroster vents?
This is the system's default failure mode. It means there is a loss of engine vacuum to the HVAC system. The most likely cause is a cracked, broken, or disconnected vacuum line under the hood or behind the dashboard.
Can I fix my original temp control instead of replacing it?
Sometimes. If the only issue is a detached temperature cable or a simple broken wire on the fan switch, a repair is possible. However, if the main plastic housing is cracked or the vacuum manifold on the back has failed, replacement is the only reliable solution.
Do I need to replace the whole unit if my fan only works on high?
No. When the fan only works on the highest setting, the problem is almost always a failed blower motor resistor, which is a separate part located under the passenger-side dashboard.
How can I be sure I'm buying the right A/C or non-A/C unit?
Look at your current controls. If you have settings for "A/C" or "MAX A/C," you need the air conditioning version (OEM PNs 14039632, 14052445). If your controls are for heat and vent only, you need the non-A/C version (OEM PN 16028951). Do not rely on memory; physically check your dashboard before ordering.
Helpful Videos
Technical Specifications
OEM Part Numbers: 14039632 (With A/C) 14052445 (With A/C) 16028951 (Without A/C)
System is primarily vacuum and cable operated. Compatibility is determined by presence of factory air conditioning.

The information in this article is provided for general reference and educational purposes only. Vehicle specifications, procedures, and part compatibility can vary by production date, trim level, and region. Always consult your vehicle's factory service manual and verify part numbers before purchasing or performing repairs. Safety-critical components such as airbags, seat belts, and braking systems should be installed by a qualified professional.
- Chevrolet Malibu:
- 🎬 Helpful Videos
- Symptoms of a Failing Temp Control
- Air Blows Only From Defrost Vents
- Cannot Change Vent Modes
- Temperature is Stuck on Hot or Cold
- Control Levers are Stiff, Loose, or Broken
- Fan Only Works on High Speed
- Buying a Used 1983 Malibu Temp Control: What to Check
- 1. Verify A/C vs. Non-A/C Configuration
- 2. Physical Inspection Checklist
- 3. Why Used OEM is Often Better
- Cost Comparison
- Replacement Difficulty: 3/5
- Known Issues, Recalls, and TSBs
- Frequently Asked Questions (FAQ)
- 🎟️ Get 5% Off