

1990-1992 Camaro Temp Control: Fixing Vacuum Leaks & Blower Failures
This guide covers the common failure points of the 1990-1992 Camaro's unique vacuum-operated climate control system, including diagnosis, replacement, and what to look for in a used part.
- The most common failure is a vacuum leak, causing air to blow only from the defrost vents.
- Before buying a used unit, verify if your car has A/C or not, as the controls are different and not interchangeable.
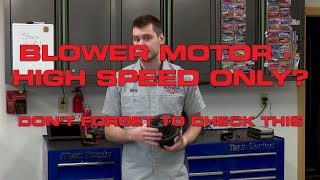
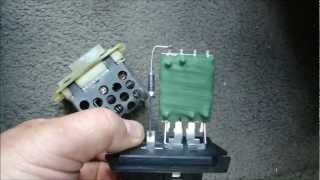
- If the fan only works on high, the problem is the blower motor resistor, not the control unit itself.
- When inspecting a used unit, check for cracks in the plastic, especially the vacuum port manifold, and look for signs of melting on the fan switch connector.
Symptoms of a Failing Temp Control Unit


The 1990-1992 Camaro Temp Control unit is a mix of mechanical, vacuum, and electrical parts, leading to several distinct failure modes. Problems often trace back to brittle plastic and dried-out rubber components after decades of use.
1. Air Blows from the Wrong Vents (or Only Defrost)
This is the most common symptom and almost always points to a vacuum issue. The system is designed to default to the defrost vents when there is no vacuum. You may notice that the vents switch correctly at idle but default to defrost when you accelerate; this happens because the engine produces less vacuum under load. The problem can be a cracked vacuum line under the hood, a leak at the vacuum reservoir (the black plastic 'orb of death' in the fender), or a failure within the control unit itself. A hissing sound from the dash when you move the controls is a clear sign of a vacuum leak inside the control head.
2. Blower Fan Only Works on High Speed
If your fan speeds 1, 2, and 3 have stopped working but the highest setting still functions, the problem is almost certainly a failed blower motor resistor, not the control unit itself. The highest fan setting bypasses the resistor, sending full power directly to the blower motor. While the resistor is a separate part located in the engine bay, its failure is often caused by an old blower motor drawing too much electrical current, which overheats the resistor. It's wise to replace the blower motor and the resistor at the same time to prevent a repeat failure.
🎬 Watch: Tips to fix fan speed issues and prevent repeat failures3. Blower Fan Doesn't Work on Any Speed
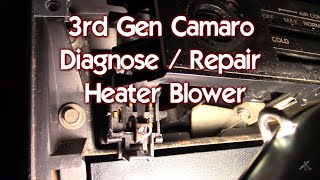
If the fan is completely dead, the issue could be a blown fuse, a failed blower motor, or a bad fan switch inside the temp control unit. The contacts on the fan switch can burn out or melt the plastic connector over time, especially with an aging blower motor drawing excess current. You can often see discoloration or melting on the switch or its electrical connector if this is the case.
🎬 Watch this video to diagnose a dead 3rd Gen Camaro blower fan4. Temperature Slider is Stuck or Doesn't Change Temperature
The temperature slider is connected to a physical cable that operates the blend door, which mixes hot air from the heater core with cool air from outside or the A/C evaporator. If the slider is hard to move or has no effect on the air temperature, the cable may have become disconnected, kinked, or the blend door itself could be jammed. For A/C-equipped cars, the temperature slider also controls a vacuum switch that operates the heater control valve in the engine bay, which stops hot coolant from entering the heater core during A/C operation. A failure here can result in the A/C blowing cool, but not cold, as it fights against a constantly hot heater core.
5. Control Faceplate Illumination is Burnt Out
This is a simple but common issue where the small incandescent bulbs that light up the control panel for night driving have burned out. This does not affect the function of the unit but can make it difficult to operate in the dark.
Warning: The 1990-1992 Camaro uses a unique rectangular dash and control unit design. It is not interchangeable with the earlier 1982-1989 'slider' style controls without extensive modification to the dash and underlying HVAC box.
Buying a Used 1990-1992 Camaro Temp Control

Since new OEM units are discontinued, a quality used part is often the only option. Here’s what to inspect before you buy.
1. Verify A/C vs. Non-A/C Version
This is the most critical step. The two units look similar but are not interchangeable without modification.
- With A/C: Has a blue 'A/C' button and typically features white graphics. This version has more complex vacuum routing. OEM part number may include 16089441.
- Without A/C: Lacks the A/C button and often has yellow or orange graphics. This is a simpler unit. OEM part number may include 16089611.
Always match the unit to your car's factory setup. Do not buy an A/C unit thinking you can add air conditioning later; it requires the entire under-dash HVAC box and engine bay components.
2. Physical Inspection Checklist
- Faceplate and Sliders: Check for deep scratches, cracks, or broken slider tabs. Move all the levers; they should slide smoothly without binding, though some stiffness is normal.
- Mounting Points: Ensure none of the plastic mounting tabs are broken off. These are crucial for a secure fit in the dash.
- Vacuum Switch Manifold: This is the cluster of vacuum ports on the side or back of the unit. Inspect it closely for cracks. This plastic can become very brittle.
- Blower Switch and Connector: Look at the electrical connector for the fan switch. Check for any signs of melting, charring, or blackened terminals. This indicates it may have overheated and could be unreliable.
- Cable Integrity: Check that the temperature blend door cable is still securely attached and isn't frayed or kinked.
Pro Tip: When you get your used unit, it's a good idea to replace the small illumination bulbs before installing it in the dash. It's much easier to do it on the bench than later on.
Known Issues, TSBs, and Recalls
For a vehicle of this age, there are no active recalls or Technical Service Bulletins (TSBs) directly related to the HVAC control head. Most issues are well-documented in owner forums. The primary known issue is the degradation of the vacuum system components. The rubber and plastic lines become brittle, causing leaks that prevent the system from directing air correctly. The rotary vacuum switch inside the control head is also a known failure point, where the internal rubber seal dries out, causing a hissing sound and loss of function.
While not related to the temp control, owners of 1990-1992 Camaros should be aware of recalls for seat belt buckles (NHTSA 90V105000) and potential fuel tank filler neck leaks on 1991-92 models.
Cost & Replacement Info

Replacing the temp control unit is a moderately difficult job for a DIY mechanic due to the tight access behind the dashboard.
- Difficulty: 3 out of 5
- Estimated Time: 1.5 - 2.5 hours
- DIY Feasible: Yes
Replacement Steps Overview
- Disconnect the negative battery terminal.
- Carefully remove the dash bezel surrounding the radio and HVAC controls.
- Remove the screws holding the control unit to the dash.
- Pull the unit out as far as it will go. You will likely need to reach under the passenger side dash to disconnect the temperature blend door cable from the HVAC box to get more slack.
- Once you have access, carefully label and disconnect the main vacuum harness plug, the blower switch electrical connector, and any other wiring.
- Installation is the reverse of removal. Test all functions before reinstalling the dash bezel.
Cost Comparison
| Part Type | Estimated Cost |
|---|---|
| New OEM | Discontinued |
| New Aftermarket | $150 - $250 (Typically faceplate overlays or full digital conversions, not direct replacements) |
| Used OEM | $75 - $150 |
| Shop Labor | $150 - $300 |
Frequently Asked Questions (FAQ)
Why does my A/C blow cool but not ice cold?
If your A/C system is fully charged but the air isn't cold, check the heater control valve. On A/C cars, the temp control unit should send vacuum to this valve (located in the engine bay) when set to full cold, stopping hot coolant from entering the heater core. If the valve fails or doesn't get vacuum, the A/C will be fighting against a hot heater core, resulting in lukewarm air.
🎬 See how to replace a 3rd Gen Camaro heater control valveCan I fix the hissing vacuum leak in my control unit?
Sometimes. The leak is often from a dried-out rubber disc inside the rotary vacuum switch. Some owners have had temporary success by disassembling the switch and soaking the rubber disc in brake fluid to make it swell, or by using silicone grease to help it seal. However, this is often a temporary fix, and replacing the control unit with a good used one is the most reliable solution.
Can I use a control unit from a Pontiac Firebird of the same years?
Yes, the 1990-1992 Pontiac Firebird used a very similar, and often interchangeable, HVAC control unit. The faceplate graphics and button colors may be slightly different to match the Firebird's interior lighting (often red or orange), but the underlying mechanical, vacuum, and electrical functions are typically the same. Always compare the connectors and vacuum ports to be certain.
What is the 'orb of death' people mention in forums?
This is a slang term for the black, spherical plastic vacuum reservoir canister located in the driver's side fender area. Its job is to store vacuum so that the HVAC controls still function when the engine is under load (like during acceleration) and manifold vacuum drops. If this canister or its lines are cracked, it can be a source of the vacuum leak causing your vents to default to defrost.
Helpful Videos
Technical Specifications
OEM Part Numbers: 16089441 16089611
System Type: Vacuum and cable operated. Blower Control: 4-speed electrical switch. Mode Control: Rotary vacuum switch. Temperature Control: Cable-actuated blend door.

The information in this article is provided for general reference and educational purposes only. Vehicle specifications, procedures, and part compatibility can vary by production date, trim level, and region. Always consult your vehicle's factory service manual and verify part numbers before purchasing or performing repairs. Safety-critical components such as airbags, seat belts, and braking systems should be installed by a qualified professional.
- Chevrolet Camaro:
- 🎬 Helpful Videos
- Symptoms of a Failing Temp Control Unit
- 1. Air Blows from the Wrong Vents (or Only Defrost)
- 2. Blower Fan Only Works on High Speed
- 3. Blower Fan Doesn't Work on Any Speed
- 4. Temperature Slider is Stuck or Doesn't Change Temperature
- 5. Control Faceplate Illumination is Burnt Out
- Buying a Used 1990-1992 Camaro Temp Control
- 1. Verify A/C vs. Non-A/C Version
- 2. Physical Inspection Checklist
- Known Issues, TSBs, and Recalls
- Cost & Replacement Info
- Replacement Steps Overview
- Cost Comparison
- Frequently Asked Questions (FAQ)
- 🎟️ Get 5% Off