

2020-2025 Kia Telluride Tailgate Trim: Identifying Panels, Scratches, and Replacement
Your complete guide to identifying the correct interior tailgate trim panels, inspecting for damage, and replacing them on your Kia Telluride.
- The 'tailgate trim' is a multi-piece system; you must identify the exact panel you need (upper, lower, side) as they are sold separately.
- When buying used, the condition of the mounting clips and tabs on the back of the panel is more important than minor surface scratches.
- Rattles are the most common issue and are almost always caused by broken clips, which are inexpensive and recommended to replace during any installation.
- There are no recalls for the interior tailgate trim, but a recall on exterior door trim for similar models suggests paying attention to any trim rattles.
Understanding the Telluride's Tailgate Trim Components
The interior of the Kia Telluride's tailgate is covered by several different trim pieces, which are sold separately. It is crucial to identify the exact panel you need before purchasing a replacement. Using an incorrect part number will result in a part that does not fit. The most common color code suffix for black trim is 'WK'.
Warning: The term 'Tailgate Trim Panel' can refer to several different parts. Verify the specific part number and description before ordering. Many listings for sale are for only one of the panels listed below, not a complete set.
| Part Name | Common OEM Part Number(s) | Description |
|---|---|---|
| Lower Main Trim Panel | 81711S9000WK, 81710S9000WK | This is the largest panel on the tailgate, covering the main lower and middle section. |
| Upper Trim Panel | 81721S9000 | This smaller panel sits at the very top of the tailgate, near the headliner. |
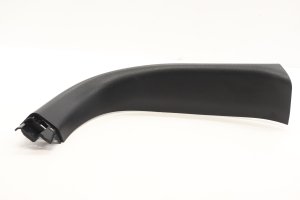
| Right Side Trim Panel | 81740S9000WK | This is the vertical trim piece on the passenger side of the tailgate interior. |
| Left Side Trim Panel | (Varies, e.g., 81730-S9000WK) | This is the vertical trim piece on the driver side of the tailgate interior. A corresponding left-side part to the right-side panel exists. |
| Rear Scuff Plate / Partition Trim | 85720S9000WK | This piece is often confused with tailgate trim, but it is actually located on the floor of the trunk, covering the latch point. It is not attached to the tailgate itself. |
| Tool Kit Case | 09149S9100 | This part number is for the case that holds the vehicle's jack and tools, typically stored in a compartment in the cargo area. It is not a tailgate trim panel. |
Symptoms of Tailgate Trim Failure
Since these panels are not mechanical, 'failure' relates to physical condition and fitment.
- Rattling or Buzzing Noises: The most common complaint is noise from the rear of the vehicle. This is often caused by broken or loose mounting clips, allowing the panel to vibrate against the tailgate's metal frame.
- Visible Damage: Scratches, deep gouges, and cracks are common from loading and unloading cargo. Plastic can become brittle over time, leading to cracks, especially around stress points like the pull handle.
- Poor Fitment and Gaps: If a panel has been removed previously, clips may have been damaged. This can prevent the panel from sitting flush, creating unsightly gaps between trim pieces or with the tailgate itself.
Known Issues, TSBs, and Recalls
As of mid-2024, there are no specific recalls or Technical Service Bulletins (TSBs) for the interior tailgate trim panels on the 2020-2025 Kia Telluride.
However, Kia has issued a recall (NHTSA ID: 25V494 / Kia SC347) for 2023-2025 Tellurides concerning the exterior door belt molding, which can detach from the vehicle while driving. The cause was identified as a supplier quality issue related to insufficient adhesive. The warning signs for this issue include rattling or wind noise. While this recall does not affect the interior tailgate trim, it highlights potential trim quality issues from the period.
Buying a Used 2020-2025 Telluride Tailgate Trim Panel
A used OEM panel is often a great value, as aftermarket options are rare and may not match the color or texture perfectly. However, a thorough inspection is critical.
Inspection Checklist
- All Mounting Points Intact: This is the most important check. Carefully inspect the back of the panel. Look for broken plastic tabs, clips, or clip housings. A panel with broken mounting points will not install securely and will likely rattle.
- Check for Cracks: Flex the panel slightly to reveal any hairline cracks, especially around the handle area or screw holes. What looks like a scratch on the surface could be a crack that goes all the way through.
- Assess Surface Damage: Distinguish between surface scuffs and deep gouges. Light scuffs are typical for a used cargo area trim piece and may be acceptable. Deep gouges that have removed plastic are permanent.
- Verify the Part Number: Match the part number from the used panel to your required number. As shown in the table above, there are multiple similar-looking panels.
Pro Tip: Many of the small plastic clips that hold the panel to the tailgate are designed for one-time use and often break during removal. It is wise to purchase a bag of new clips before you begin installation.
Replacement Guide
Replacing a tailgate trim panel is generally a straightforward DIY task.
- Difficulty: 2 out of 5
- Estimated Time: 0.5 - 1 hour
- Tools Required: Plastic trim removal tool kit, possibly a Phillips head screwdriver or a small socket set.
Basic Steps
The general process involves removing panels in a specific order.
- Begin by prying off any smaller surrounding panels first, such as the upper or side trim pieces. Use plastic trim tools to avoid scratching the panels or the vehicle's paint.
- Remove any visible screws. These may be hidden behind small plastic covers or inside the interior pull handle.
- Once all screws are out, use a trim removal tool to carefully pry the main panel away from the tailgate. You will hear the clips pop as they release. Work your way around the panel slowly.
- If the panel has any electronic components, like a power tailgate switch, carefully disconnect the wiring harness before fully removing the panel.
- To install the new panel, first transfer any necessary components (like the pull handle or switch). Align the new panel's clips with the holes in the tailgate and press firmly to snap it into place. Reinstall any screws and surrounding trim pieces.
Cost Comparison
| Part | Estimated Cost |
|---|---|
| New OEM | $40 - $270, depending on the specific panel. |
| New Aftermarket | Not commonly available. |
| Used OEM | $40 - $200, depending on condition and specific panel. |
| Shop Labor | $75 - $150 |
Frequently Asked Questions (FAQ)
How do I stop my Telluride's tailgate trim from rattling?
A rattle is almost always caused by loose or broken mounting clips. The best solution is to remove the panel, identify any broken clips on the panel or in the tailgate, replace them with new ones, and reinstall the panel securely. Some owners also add foam tape to contact points for extra sound dampening.
Can I repair a cracked tailgate trim panel?
For minor cracks, you can attempt a repair from the back side using a plastic epoxy or adhesive. However, the repair may be visible from the front, and its strength depends on the location and severity of the crack. For large cracks or significant damage, replacement is the best option.
Are all 2020-2025 Telluride tailgate trims the same?
For the most part, the panels are physically interchangeable across these years. However, there can be minor variations in color or texture between trim levels or model years. Always verify the part number to ensure an exact match.
Is the tailgate trim the same as the trunk floor scuff plate?
No. The tailgate trim is attached to the liftgate itself. The scuff plate (Part No. 85720S9000WK) is the plastic trim on the floor of the cargo area that the tailgate latches onto. It is a separate part.
Technical Specifications
OEM Part Numbers: 81711S9000WK 81710S9000WK 81721S9000 81740S9000WK 85720S9000WK
Material: Molded plastic. Color Code Suffix (Black): WK.
We Have This Part in Stock

The information in this article is provided for general reference and educational purposes only. Vehicle specifications, procedures, and part compatibility can vary by production date, trim level, and region. Always consult your vehicle's factory service manual and verify part numbers before purchasing or performing repairs. Safety-critical components such as airbags, seat belts, and braking systems should be installed by a qualified professional.
- Kia Telluride:
- 🛍️ Shop This Part
- Understanding the Telluride's Tailgate Trim Components
- Symptoms of Tailgate Trim Failure
- Known Issues, TSBs, and Recalls
- Buying a Used 2020-2025 Telluride Tailgate Trim Panel
- Inspection Checklist
- Replacement Guide
- Basic Steps
- Cost Comparison
- Frequently Asked Questions (FAQ)
- 🎟️ Get 5% Off