

2012-2020 Jaguar XF Sportbrake Tail Light: Water Leaks, LED Failure & Replacement Guide
This definitive guide covers the common LED failures, water leak sources, and replacement procedures for the 2012-2020 Jaguar XF Sportbrake tail light assembly.
- This guide is ONLY for the XF Sportbrake (wagon); these parts will NOT fit the sedan.
- The most common failures are dead LED turn signals and water leaking into the housing, which shorts the internal electronics.
- Water in the trunk's spare tire well is a known Sportbrake issue, often caused by a leaking body vent under the tail light, not the light's gasket itself.
- Replacement is DIY-friendly, requiring basic tools and about an hour. When buying used, meticulously inspect for cracks and any signs of prior water entry.
Compatibility Warning: Sportbrake Models Only
Warning: The information and part numbers in this guide apply ONLY to the Jaguar XF Sportbrake (wagon) models from 2012-2020. These tail light assemblies will not fit the XF sedan. The sedan uses a different part with a completely different shape.
Symptoms of Failure
When the tail light on your XF Sportbrake begins to fail, the symptoms are typically easy to spot. Because the LEDs are part of an integrated circuit, a single point of failure can affect multiple functions.
- Flickering or Dead Turn Signal: This is one of the most common failures. The turn signal may flash erratically, remain dim, or stop working completely. You may also notice the turn signal indicator on your dashboard blinking rapidly (hyperflashing), which is a sign the system has detected a failed bulb or circuit.
- Water or Condensation Inside the Lens: Finding moisture, fogging, or a visible pool of water inside the tail light is a major red flag. While the owner's manual may state that minor fogging that clears up is normal, any standing water indicates the factory seal has failed. This water ingress is a primary cause of the electrical failures mentioned here.
- Dim or Partially Lit LEDs: Sections of the red running light or brake light may appear dim or go out entirely. This is due to individual LEDs on the internal circuit board failing.
- Intermittent Operation: The light may work correctly sometimes and fail at others. This often points to a loose internal connection, corrosion on the connector pins, or the early stages of water damage.
Known Issues, TSBs, and Recalls
Water Leaks in the Trunk (Boot)
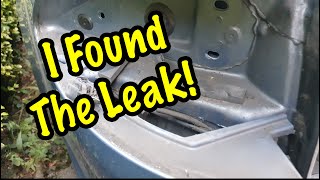
While the tail light assembly itself can leak, a more common and serious issue for XF Sportbrake owners is water collecting in the trunk/boot area, specifically in the spare tire well 🎬 Watch: How to find and fix Sportbrake trunk leaks where critical electronic modules are located. This is often misdiagnosed as a leaking tail light gasket.
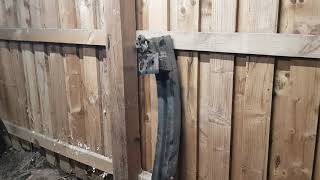
The primary culprit is often the body vent, sometimes called a "slam vent," located behind the rear bumper, 🎬 Watch: Step-by-step guide to removing the rear bumper underneath the tail light assembly. This vent has a rubber seal that can degrade over time, allowing rainwater to seep into the body and drain down into the trunk floor. If you find significant water in your trunk, you should inspect the seal on this vent, 🎬 See how to repair corroded slam vents and bumper bars as simply replacing the tail light will not solve the problem.
LED and Internal Circuitry Failure
The tail light assembly is a sealed unit, and the LEDs are not individually replaceable. A failure of a single LED or a component on the internal circuit board often requires the replacement of the entire assembly. This is frequently caused by either water damage from a failed lens seal or simple electronic component failure over time.
Recalls and Technical Service Bulletins (TSBs)
As of early 2026, there are no specific NHTSA safety recalls for tail light failure on the 2012-2020 Jaguar XF Sportbrake. However, Jaguar Land Rover has issued recalls for similar water ingress and tail light failure issues on other models like the F-PACE and Range Rover Sport, suggesting it can be a problem area for the manufacturer. There is a general TSB (JTB00380NAS1) that addresses condensation in front and rear lamps, noting that some condensation can be normal.
Buying a Used Tail Light
Given the high cost of a new OEM unit, a used or recycled OEM tail light is an excellent value. However, you must inspect the part carefully to avoid buying a part that is already failing.
- Check for Cracks and Seal Integrity: Meticulously inspect the entire lens for hairline cracks. Pay close attention to the seam where the red/clear lens is bonded to the black plastic housing. This is the most common point of failure for the seal.
- Look for Signs of Past Moisture: Hold the light up and look for a "water line," mineral deposits, or dried water spots on the *inside* of the lens. This is a clear sign it has had water inside before and will likely fail prematurely. Do not buy any unit with signs of internal moisture.
- Inspect the Mounting Points: Ensure all mounting studs are intact and the surrounding plastic is not cracked. A damaged mounting point can prevent the light from sealing properly against the body.
- Examine the Electrical Connector: The pins in the connector should be straight and clean, with no signs of green or white corrosion. The plastic connector housing should be free of cracks. Avoid any unit where the seller has cut the wires instead of properly unplugging the harness.
- Verify the Gasket: Ensure the foam or rubber gasket that seals the lamp against the car's body is present and in good condition. A torn or compressed gasket can allow water to leak into the trunk.
Cost Comparison
Prices can vary based on supplier and condition. These are estimates as of late 2025.
| Part Type | Estimated Cost (Per Side) |
|---|---|
| New OEM (Dealer) | $450 - $850 |
| New Aftermarket | $250 - $400 |
| Used OEM (Recycled) | $150 - $300 |
| Shop Labor for Installation | $100 - $200 |
Replacement Guide (DIY)
Replacing the outer tail light on an XF Sportbrake is a straightforward DIY job that can be done in under an hour with basic tools.
- Difficulty: 2/5
- Estimated Time: 0.5 - 1 hour
- Tools Needed: 10mm socket with extension, trim removal tool, flathead screwdriver.
Step-by-Step Process
- Access the Trunk: Open the rear hatch. You will need to remove the side trim panel in the trunk to access the nuts holding the tail light.
- Remove Trim: Carefully pull back the trunk side carpet liner. You may need to remove a few plastic trim clips or a scuff plate to get enough clearance.
- Disconnect and Loosen: Locate the three 10mm nuts on the studs that hold the tail light to the body. Before removing them completely, unplug the single electrical connector going to the lamp assembly.
- Remove the Tail Light: Once the nuts are removed, the tail light assembly can be carefully wiggled and pulled straight back out of the vehicle body.
- Install the New Light: Guide the new tail light into place, ensuring the mounting studs go through the holes in the body. Reconnect the electrical plug.
- Test the Light: Before tightening everything down, have a helper confirm that all functions (running light, brake light, turn signal) are working correctly.
- Secure and Reassemble: Hand-tighten the three 10mm nuts, then snug them down with a socket. Do not overtighten, as you can crack the plastic housing. When tightening, ensure the light is aligned properly with the body panels to maintain even gaps. Reinstall the trunk liner and any trim pieces you removed.
Technical Specifications & Part Numbers
Part Number Warning: Part numbers can be superseded. Always verify fitment with the seller using your vehicle's VIN. The initial part number provided in the prompt, C2Z12877, is for a sedan trunk-mounted fog lamp and is incorrect for this application.
These part numbers are for the outer tail light assembly on the quarter panel.
| Generation | Years | Position | Part Number(s) |
|---|---|---|---|
| X250 | 2012-2015 | Left (Driver) | C2Z25152, CX2313405AC |
| Right (Passenger) | C2Z25151 | ||
| X260 | 2016-2020 | Left (Driver) | T2H22639, T2H18980 |
| Right (Passenger) | T2H22637, T2H18979 |
Frequently Asked Questions (FAQ)
Can I just replace the LED bulb?
No. The LEDs are integrated into a circuit board inside the sealed lamp housing. They are not designed to be replaced like traditional bulbs. A failure of the LEDs requires replacing the entire tail light assembly.
Why is there water in my trunk's spare tire well?
While it could be a leaking tail light gasket, it is more likely caused by a failed seal on the black plastic body vent located behind the rear bumper, just below the tail light. This is a known issue on the XF Sportbrake and requires removing the rear bumper to access and reseal the vent.
Will a tail light from an XF sedan fit my Sportbrake?
No, absolutely not. The sedan and Sportbrake (wagon) models have completely different rear body panels and use tail lights that are shaped differently. They are not interchangeable.
Is a little bit of fog inside the lens normal?
According to Jaguar, a small amount of light fogging or condensation that appears and disappears with changes in temperature and humidity can be normal. However, any visible water droplets, streaking, or pooling of water at the bottom of the lens is a sign of a failed seal, which will eventually lead to electrical failure.
Helpful Videos

Technical Specifications
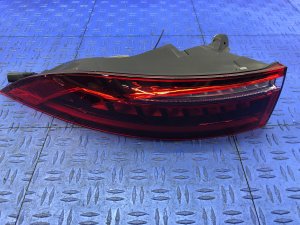
OEM Part Numbers: C2Z25152 C2Z25151 T2H22639 T2H18980 T2H22637 T2H18979
Sealed unit with integrated LED circuit boards for running light, brake light, and turn signal functions. Attaches with three 10mm nuts.
We Have This Part in Stock




The information in this article is provided for general reference and educational purposes only. Vehicle specifications, procedures, and part compatibility can vary by production date, trim level, and region. Always consult your vehicle's factory service manual and verify part numbers before purchasing or performing repairs. Safety-critical components such as airbags, seat belts, and braking systems should be installed by a qualified professional.
- Jaguar XF:
- 🎬 Helpful Videos
- 🛍️ Shop This Part
- Compatibility Warning: Sportbrake Models Only
- Symptoms of Failure
- Known Issues, TSBs, and Recalls
- Water Leaks in the Trunk (Boot)
- LED and Internal Circuitry Failure
- Recalls and Technical Service Bulletins (TSBs)
- Buying a Used Tail Light
- Cost Comparison
- Replacement Guide (DIY)
- Step-by-Step Process
- Technical Specifications & Part Numbers
- Frequently Asked Questions (FAQ)
- 🎟️ Get 5% Off