

2009-2015 Jaguar XF Tail Light: Fixing Water Leaks & Failing LEDs
This guide covers the common causes of failure for your Jaguar XF's outer tail light, from water ingress to flickering LEDs, and shows you how to replace it.
- The most common failure is caused by water leaking into the housing, which shorts out the internal LED circuits.
- Symptoms include flickering or dead LEDs (especially turn signals) and visible condensation inside the lens.
- Replacement is very DIY-friendly, requiring only a 10mm socket and about 30 minutes.
- When buying used, carefully inspect for cracks and signs of prior moisture to avoid purchasing a part that will fail again.
- This part is the OUTER lamp on the quarter panel. Part number C2Z12877 is for the INNER trunk-mounted lamp and will not fit.
Common Failure Symptoms

When the outer tail light on a 2009-2015 Jaguar XF begins to fail, the symptoms are usually quite noticeable. Understanding these signs can help you diagnose the problem quickly.
1. Flickering or Dead LEDs
The most common failure is related to the LED light arrays. You may notice that the turn signal flashes erratically or stops working completely. Similarly, the red running light or brake light may appear dim, have individual LEDs that are out, or fail to illuminate at all. Often, the problem starts as an intermittent issue, working one moment and failing the next, before leading to total failure. This is frequently accompanied by a "Check Rear Lights" warning message on the instrument cluster.
2. Water Inside the Housing (Condensation)
Finding moisture, condensation, or a small pool of water inside the tail light lens is a major red flag. This indicates that the factory seal on the lamp has failed, allowing water to get in. This water ingress is a primary cause of electrical shorts and corrosion that destroys the internal circuit boards and LEDs. While the owner's manual may state a small amount of fogging is normal, any visible accumulation of water droplets or pooling at the bottom of the light is a sign of a bad seal that needs to be addressed.
3. Complete Electrical Failure
In some cases, the entire light unit (turn signal, brake, and tail light) may stop working. While this could be a failed lamp assembly, it can also point to a problem with the vehicle's wiring harness or a poor ground connection. However, given the common issues with water ingress, the root cause is most often a short-circuited lamp assembly.
Compatibility Warning: This guide is for the outer tail light mounted on the rear quarter panel. It is NOT for the inner light mounted on the trunk lid. Many parts suppliers incorrectly list part number C2Z12877 for this vehicle, but that number is for the inner trunk-mounted lamp. Always verify you are buying the correct outer lamp.
Known Issues, Recalls, and Technical Service Bulletins (TSBs)
As of early 2026, there are no official NHTSA safety recalls or widespread Technical Service Bulletins (TSBs) specifically for tail light failure on the 2009-2015 Jaguar XF in the North American market. The most prominent recalls for this vehicle range concern the Takata airbags.
However, owner forums frequently discuss premature LED failure on early 2009-2010 models, with some speculating it was due to a lack of cooling. While some owners reference an early TSB for this, the official document is not publicly available. The most common and well-documented issue remains water ingress due to seal failure, which is not covered by a recall.
Buying a Used 2009-2015 Jaguar XF Tail Light

Given the high cost of a new OEM tail light, a used OEM unit is an excellent value. However, since these lights are known to fail from water damage, careful inspection is key to avoiding a bad part.
What to Inspect Before You Buy:
- Check for Cracks and Hazy Seals: Carefully inspect the entire lens and housing for any cracks, even hairline fractures. Pay close attention to the seams where the clear/red lens is bonded to the black plastic backing. This is the most common failure point for the seal.
- Look for Signs of Moisture: Check for a "water line" or mineral deposits on the inside of the lens. This is a sure sign it has had water in it before and will likely fail again. Avoid any light with internal moisture.
- Inspect the Mounting Points: Ensure the three mounting studs are intact and the plastic surrounding them is not cracked or damaged.
- Examine the Electrical Connector: The connector pins should be clean, straight, and free of any green or white corrosion. The plastic connector housing should be intact. Avoid units where the seller has cut the wires instead of unplugging the harness.
- Verify the Gasket: Make sure the foam or rubber gasket that seals the lamp against the car's body is present and in good condition. A damaged gasket can allow water to leak into the trunk.
Pro Tip: Before installing a used tail light, consider running a thin bead of clear automotive silicone along the main seam where the lens meets the housing. This can add an extra layer of protection against future water leaks. Let it cure completely before installation.
Cost Comparison: New vs. Used
| Part Type | Estimated Price Range | Notes |
|---|---|---|
| New OEM | $350 - $500 | Purchased from a Jaguar dealership or official parts retailer. |
| New Aftermarket | $250 - $350 | Quality can vary. OES (Original Equipment Supplier) brands like Varroc are a good option. |
| Used OEM | $100 - $250 | Best value. Prices vary based on condition and seller (e.g., eBay, salvage yard). |
| Shop Labor | $75 - $150 | Typically 0.5 hours of labor. Replacement is simple, making DIY a great option. |
Installation Guide (DIY)

Replacing the outer tail light is a straightforward job that can be done with basic tools in under 30 minutes.
Difficulty: 2 out of 5
Estimated Time: 0.5 hours
Tools Needed: 10mm socket with extension, trim removal tool (optional)
- Access the Nuts: Open the trunk. On the side with the faulty light, pull back the trunk liner to expose the back of the tail light assembly. You may need to remove a plastic trim piece or cargo net hook first.
- Remove the Three Nuts: You will see three 10mm nuts holding the tail light in place. Use your socket to remove them. Be very careful not to drop them down into the body cavity, as they can be difficult to retrieve.
- Release the Lamp: Once the nuts are off, gently push the tail light's mounting studs from the inside to pop it out of the quarter panel. Pull the lamp away from the body.
- Disconnect the Wiring: The lamp will still be attached by one electrical connector. Press the release tab on the connector and pull it straight out to disconnect it.
- Install the New Lamp: Before installing, clean the area on the car body where the lamp's gasket will sit. Connect the electrical plug to the new lamp and test its function (running lights, brake lights, turn signal) before proceeding.
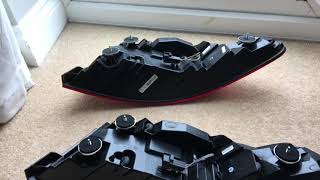
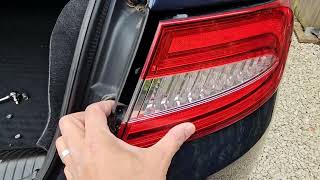
- Seat and Secure: Guide the new lamp's studs into the holes on the quarter panel. While holding the lamp flush and ensuring the gap to the bumper is even, hand-tighten the three 10mm nuts from inside the trunk. Finish by snugging them down with your socket 🎬 Watch a mechanic perform this LED rear light replacement.—do not overtighten.
- Reassemble: Put the trunk liner and any trim pieces back in place.
Frequently Asked Questions (FAQ)
Can I just replace the LEDs or bulbs inside the tail light?
No, not easily. The tail and brake light portions are a sealed LED array that is integral to the lamp housing. They are not designed to be serviced. If the LEDs fail, the entire assembly must be replaced. While some DIY enthusiasts have cut open the housings to solder in new LEDs, this is a complex repair that is not recommended for most people.
My tail light has water in it. Can I just drill a hole to let it drain?
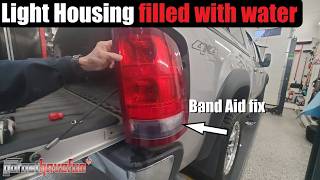
Drilling a small drain hole in the bottom of the housing is a common temporary fix to let water escape and can 🎬 Watch this video to see how to drain trapped water. prevent it from pooling and causing immediate electrical damage. However, this does not fix the original leak and means the housing is no longer sealed, allowing more moisture and dust to enter over time. The correct long-term solution is to replace the faulty unit.
Why is my new tail light's turn signal blinking at a different speed?
This can happen if you mix a pre-facelift (2009-2011) and post-facelift (2012-2015) light, or if there's an issue with the new lamp's internal electronics. The 2012-2015 facelift models have a slightly different design. Always ensure you are buying the correct part for your specific model year. 🎬 See this guide for replacing lights on facelifted models. If the part is correct, the lamp itself may be faulty.
Is it safe to drive with a faulty tail light?
It is unsafe and illegal. A non-functioning brake light or turn signal poses a significant safety risk, as other drivers will not be aware of your intentions to slow down or turn, greatly increasing the risk of a rear-end collision. You can also be ticketed for faulty vehicle equipment.
Helpful Videos
Technical Specifications
OEM Part Numbers: C2Z16257 C2Z3460 CX23-15K273-AA CX2315K273
This is the outer tail lamp assembly mounted on the quarter panel. It features integrated LED technology for the tail and brake light functions. The turn signal may be LED depending on the exact model year and market. It is held in place by three 10mm nuts.
We Have This Part in Stock



The information in this article is provided for general reference and educational purposes only. Vehicle specifications, procedures, and part compatibility can vary by production date, trim level, and region. Always consult your vehicle's factory service manual and verify part numbers before purchasing or performing repairs. Safety-critical components such as airbags, seat belts, and braking systems should be installed by a qualified professional.
- Jaguar XF:
- 🎬 Helpful Videos
- 🛍️ Shop This Part
- Common Failure Symptoms
- 1. Flickering or Dead LEDs
- 2. Water Inside the Housing (Condensation)
- 3. Complete Electrical Failure
- Known Issues, Recalls, and Technical Service Bulletins (TSBs)
- Buying a Used 2009-2015 Jaguar XF Tail Light
- What to Inspect Before You Buy:
- Cost Comparison: New vs. Used
- Installation Guide (DIY)
- Frequently Asked Questions (FAQ)
- 🎟️ Get 5% Off