

Audi A6, A7, A8 & S8 Tail Light Failure (2008-2015): A Guide to Water Leaks, LED Problems, and Part Numbers
Diagnose flickering, dead, or water-filled LED tail lights and learn how to find the correct used replacement for your specific Audi platform.
- These vehicles use three different, non-interchangeable tail lights. You must match the part number for your specific platform (D3, D4, or C7).
- The primary cause of failure is water leaking into the housing due to bad seals, which corrodes the internal electronics.
- These are sealed units and are not designed to be repaired. Failure of any part of the light requires replacing the entire assembly.
- A used OEM part is a cost-effective solution, but inspect it carefully for cracks and signs of prior water entry before buying.
Critical Compatibility Warning: Not All Tail Lights Are the Same

Warning: The vehicles listed do NOT share the same tail light part. They are built on three distinct vehicle platforms, and the tail light assemblies are not interchangeable. Ordering the wrong part will result in it not fitting physically or not working electronically. Always match the OEM part number from your original light to the replacement part.
Before purchasing a replacement, identify your vehicle's platform from the table below to find the correct part number series.
| Platform | Models | Model Years | Part Number Series |
|---|---|---|---|
| D3 (Facelift) | Audi A8, Audi S8 | 2008-2010 | Starts with 4E0 |
| D4 | Audi A8, Audi A8 Quattro, Audi S8 | 2011-2015 | Starts with 4H0 |
| C7 | Audi A6, Audi A7 Quattro, Audi RS7, Audi S6, Audi S7 | 2012-2015 | Starts with 4G |
Note: This guide covers the outer tail light that mounts on the quarter panel, not the inner light mounted on the trunk lid.
Symptoms of Tail Light Failure
A failing Audi tail light will usually make itself known in several ways. You may experience one or more of the following issues:
- Dashboard Warning Light: The most common sign is a "Bulb Out" or similar warning message appearing on your instrument cluster.
- Flickering or Dim LEDs: Sections of the tail light may flicker, appear dim, or work intermittently. This can happen when driving or even when the car is off.
- Partial or Complete Failure: One function may stop working (like the brake light), while others continue to operate. Eventually, the entire unit may go dark.
- Rapid Blinking Turn Signal: When a turn signal LED fails, the indicator on your dashboard may blink much faster than normal.
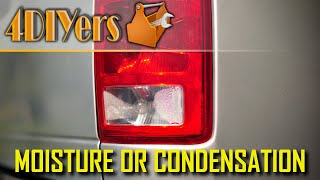
- Condensation or Water Inside: You may see fog, condensation, or even visible water droplets collected inside the tail light lens. This is a sure sign the seals have failed.
The Real Cause: Water Intrusion and Corrosion

The number one cause of failure for these LED tail lights is water getting inside the housing. Over time, the foam or rubber gaskets that seal the light assembly against the car's body dry out, shrink, and crack. It's also possible for hairline cracks to form in the plastic housing itself, often too small to see easily.
Once moisture gets in, it collects on the internal circuit boards that control the LEDs. This leads to corrosion on the electronic components and connector pins, causing short circuits and electrical faults. 🎬 See how to solve tail light moisture and condensation issues At first, this might just cause a flicker, but over time, the corrosion will destroy the circuitry and cause a permanent failure. In forum discussions, owners frequently report that hitting the light can make it temporarily work again, which points to a bad connection caused by this internal corrosion.
Buying a Used Tail Light: What to Check

Since a new OEM tail light can be extremely expensive, a quality used OEM part is often the best value. However, you must inspect it carefully to avoid buying a part that is already failing.
1. Verify the Part Number
This is the most important step. The part number is printed on a sticker or molded into the plastic on the back of the tail light housing. It must exactly match the part number on your old light. Do not rely on visual appearance alone.
2. Inspect the Lens and Housing
Check the entire unit for cracks. Pay close attention to the edges and corners. Even a tiny hairline crack is a path for water to enter. Reject any light with visible cracks in the lens or the black plastic housing.
3. Check for Signs of Water
Hold the light up and look for a "water line" or hazy film on the inside of the lens. This indicates it has had water inside before and is likely compromised. A used light should be perfectly clear and dry inside.
4. Examine the Mounting Points and Seals
Ensure all plastic mounting tabs and studs are intact and not cracked or repaired. Check the condition of the foam gasket on the back. While it's wise to install a new gasket anyway, a crumbling or flattened original gasket suggests a hard life.
5. Inspect the Electrical Connector
Look at the pins inside the electrical connector socket. They should be clean and shiny. Any green or white crusty buildup is a sign of corrosion from water damage, and you should not buy the part.
Pro Tip: Ask the seller if they can provide a video of the tail light connected to a power source to show all functions (running light, brake light, turn signal) are working. Reputable sellers often test their lights before listing them.
Known Issues and Vehicle-Specific Information
2008-2010 Audi A8 / S8 (D3 Platform)
- Common Issue: These facelift models were among the first with full LED tails, and failures from water ingress are common. Some owners with electronics skills have successfully repaired the internal boards, but it requires soldering and is not a simple task. 🎬 Watch this guide on repairing D3 tail light water leaks
- Compatibility Note: For the 2008 model year, a change was made mid-production. This part fits vehicles from VIN 4E-8-002001 onwards. Verify your VIN before ordering.
- Known Part Numbers: 4E0945095J, 4E0945095P (Left); 4E0945096J, 4E0945096N (Right).
2011-2015 Audi A8 / A8 Quattro / S8 (D4 Platform)
- Common Issue: Like the D3, these lights are prone to seal failure and internal moisture damage over time, leading to LED segments failing. The units are sealed and not considered serviceable.
- Known Part Numbers: 4H0945095, 4H0945095A, 4H0945095E, 4H0945095K (Left); 4H0945096A (Right).
2012-2015 A6 / A7 / S6 / S7 / RS7 (C7 Platform)
- Common Issue: Water leaks are also the main culprit on the C7 platform. Models with the optional dynamic 'sweeping' turn signals have an additional control module that can fail, causing the animation to glitch or stop. Sometimes this can be fixed with a software update, but often requires replacing the entire light assembly.
- Aftermarket Warning: Owners who install cheap aftermarket tail lights on these models often report flickering or immediate "bulb out" errors. This is because the car's computer expects a specific electrical resistance from the OEM unit, and the aftermarket parts don't match it, triggering a fault.
- Known Part Numbers (A6/S6): 4G5945095B (Left); 4G5945096B (Right).
- Known Part Numbers (A7/S7/RS7): Part numbers will start with 4G8. The shape is different from the A6/S6.
Replacement Difficulty: 2/5
Replacing the outer tail light is a straightforward DIY job that usually takes less than 30 minutes per side.
- Open the Trunk: Access the area behind the tail light.
- Remove Trim: Pull back the trunk liner or remove a small plastic access panel to expose the back of the light assembly.
- Unplug Connector: Depress the tab on the single electrical harness connector and pull it off.
- Remove Nuts: Using a socket wrench (typically 10mm), remove the two or three nuts holding the assembly in place.
- Remove Assembly: Gently pull the tail light straight back out of the quarter panel.
- Install New Unit: Installation is the reverse of removal. Hand-tighten the nuts to avoid cracking the plastic, then test all light functions before reinstalling the trim.
Cost of Replacement
The cost can vary dramatically depending on the source of the part.
| Part Source | Estimated Price (Per Side) |
|---|---|
| New OEM (Dealer) | $500 - $900+ |
| New Aftermarket | $150 - $400 |
| Used OEM | $100 - $250 |
| Shop Labor | $75 - $150 |
Frequently Asked Questions (FAQ)
Do I need to have a used tail light programmed by the dealer?
No. For these models, the tail lights are not subject to Audi's 'Component Protection' system. As long as you install a functional, compatible OEM part, it is a plug-and-play installation with no programming required.
Can I just dry out my water-damaged tail light and reseal it?
You can try, but it is usually not a permanent fix. While using a hairdryer to dry the inside may restore function temporarily, the original seal has already failed. The light will almost certainly collect moisture again the next time it rains or you wash the car. The best long-term solution is to replace the assembly.
Why are my aftermarket LED tail lights flickering or causing errors?
This is a common problem with non-OEM lights on modern German cars. The vehicle's lighting control module monitors the electrical current drawn by each light. If the aftermarket unit draws more or less current than the factory part, the computer interprets this as a fault and may cut power to the light, causing flickering or a dashboard error. Sticking with a used OEM part is the safest bet.
Is a small amount of fog inside the lens normal?
Light fogging or condensation that appears in certain weather conditions and disappears quickly after driving is often considered normal by manufacturers, as the lights have small vents to equalize pressure. However, if you see large water droplets, pooling water at the bottom, or condensation that never goes away, the light's main seal has failed and it needs to be replaced.
Helpful Videos
Technical Specifications
OEM Part Numbers: 4E0945095J 4E0945095P 4E0945096J 4E0945096N 4H0945095 4H0945095A 4H0945095E 4H0945095K 4H0945096A 4G5945095B 4G5945096B
Technology: LED. Voltage: 12V. Position: Outer Quarter Panel Mount.
We Have This Part in Stock



The information in this article is provided for general reference and educational purposes only. Vehicle specifications, procedures, and part compatibility can vary by production date, trim level, and region. Always consult your vehicle's factory service manual and verify part numbers before purchasing or performing repairs. Safety-critical components such as airbags, seat belts, and braking systems should be installed by a qualified professional.
- Audi S8:
- Audi A8:
- Audi A8 Quattro:
- Audi A6:
- Audi A7 Quattro:
- Audi RS7:
- Audi S6:
- Audi S7:
- 🎬 Helpful Videos
- 🛍️ Shop This Part
- Critical Compatibility Warning: Not All Tail Lights Are the Same
- Symptoms of Tail Light Failure
- The Real Cause: Water Intrusion and Corrosion
- Buying a Used Tail Light: What to Check
- 1. Verify the Part Number
- 2. Inspect the Lens and Housing
- 3. Check for Signs of Water
- 4. Examine the Mounting Points and Seals
- 5. Inspect the Electrical Connector
- Known Issues and Vehicle-Specific Information
- 2008-2010 Audi A8 / S8 (D3 Platform)
- 2011-2015 Audi A8 / A8 Quattro / S8 (D4 Platform)
- 2012-2015 A6 / A7 / S6 / S7 / RS7 (C7 Platform)
- Replacement Difficulty: 2/5
- Cost of Replacement
- Frequently Asked Questions (FAQ)
- 🎟️ Get 5% Off