

2009-2015 Audi A6, S6, RS6 Tail Light Guide: Fixing Water Leaks & LED Failures
This guide covers the common tail light problems for 2009-2015 Audi A6, S6, and RS6 models, including LED failures, water leaks, and critical generation differences.
- You MUST correctly identify your car as a C6 (2009-2011) or C7 (2012-2015) generation; the parts are not interchangeable.
- These tail lights are for Sedan models ONLY and will not fit the Avant (wagon).
- Water leaks from failed gaskets (C7) or cracked housings (C6) are the #1 cause of failure, leading to condensation and fried electronics.
- Flickering LEDs are often caused by bad internal solder joints (C6) or water damage (C7). A used OEM part with a warranty is often a better value than a new aftermarket unit.
Critical: Identify Your Vehicle Generation (C6 vs. C7)

Warning: The 2009-2015 year range covers two different Audi A6/S6/RS6 generations, and their tail lights are NOT interchangeable. Buying the wrong part is a common and expensive mistake.
- 2009-2011 Models (C6 Platform Facelift): These vehicles use tail lights with part numbers typically starting with 4F. They have a distinct shape and different electrical connectors from the later models.
- 2012-2015 Models (C7 Platform): These vehicles use tail lights with part numbers typically starting with 4G. They feature a sleeker, more modern design.
Always verify your vehicle's model year before purchasing. If in doubt, match the part number from your old tail light to the new one.
Symptoms of Tail Light Failure

Failures can range from annoying to dangerous. Here are the most common signs that your tail light assembly needs attention.
1. Water Leaks and Condensation
This is the most frequent issue for both C6 and C7 generations. You'll notice moisture, fog, or water droplets inside the lens. On the C7 models, this is almost always caused by a dried-out and failed foam gasket that sits between the light assembly and the car's body. For C6 models, water entry is often due to hairline cracks in the plastic housing itself. When water gets in, it can short out the internal circuit boards, corrode connectors, and cause intermittent or total failure of the LEDs. Sometimes, water pools inside the trunk lid or in the spare tire well.
2. Flickering or Dim LED Sections
Individual LEDs or entire sections of the tail light may flicker, appear dim, or fail to light up at all.
- On C6 models, this is often caused by failed solder joints on the internal LED circuit board 🎬 Watch a teardown of the C6 tail light to find internal defects. due to heat and vibration over time. Tapping on the light might make it work temporarily.
- On C7 models, flickering is commonly linked to water damage, but can also be triggered by an aging battery causing voltage drops, which the car's computer misinterprets as a bulb failure.
3. "Bulb Out" Warning Light on Dash
You may get a warning message on your instrument cluster even if the tail light appears to be working correctly. This happens because the lighting control module detects a brief or intermittent fault. This can be caused by a corroded connector, a bad ground wire, or a momentary flicker in the LEDs that is too fast to see.
4. Incorrect Turn Signal or Brake Light Behavior
On C6 models, a well-known issue is a poor ground connection in the wiring harness plug. This can cause strange behavior, like the turn signal flashing dimly or interfering with the brake lights. The permanent fix often involves bypassing the faulty ground pin in the connector and creating a new, direct ground connection.
🎬 See how to fix common flickering and ground faults on C6 models.Buying a Used Tail Light: What to Check

A used OEM tail light is often a better choice than a cheap aftermarket part, which can suffer from poor fitment, mismatched colors, and premature LED failure. However, you must inspect a used part carefully.
- Verify Compatibility: This is the most important step. Confirm the generation (C6 vs. C7), body style (Sedan only, will not fit Avant/Wagon), and position (Left/Driver, Right/Passenger, Inner/Outer). The part number is physically stamped on the housing—match it exactly.
- Inspect the Lens and Housing: Look for any cracks, even hairline ones, especially along the top edges and seams where water can get in. Reject any light with visible cracks. Check for deep scratches or scuffs that can't be polished out.
- Check for Signs of Water Intrusion: Look for a hazy film, dried water spots, or a white, chalky residue on the inside of the lens or on the black plastic housing. This indicates the light has had a leak in the past and may have hidden electronic damage.
- Examine Mounting Points: Ensure all plastic mounting tabs and screw holes are intact and not cracked or broken. A light with a broken tab will never sit flush with the body.
- Ask About a Warranty: Since it's impossible to fully test the internal LEDs without plugging the light into a car, buy from a seller who offers a warranty or return policy. This protects you if the light is dead on arrival or fails shortly after installation.
Recalls and Technical Service Bulletins (TSBs)
As of early 2026, there are no major safety recalls or TSBs issued by the National Highway Traffic Safety Administration (NHTSA) specifically for tail light failures on the 2009-2015 Audi A6, S6, or RS6. Most issues are considered wear-and-tear items addressed by dealers on a case-by-case basis.
Replacement Overview and Difficulty
Replacing a tail light on these models is a straightforward DIY job that typically requires basic tools.
- Difficulty: 2 out of 5
- Tools Needed: Trim removal tools, Torx screwdriver (C7), socket or flathead screwdriver (C6).
- Procedure (Outer Light):
- C6 (2009-2011): Open the trunk and remove a small access cover in the carpet liner. The light is held in by a single large plastic nut that can often be turned by hand or with a large screwdriver.
- C7 (2012-2015): Pry off a plastic trim piece next to the light assembly. This reveals two Torx screws that hold the light in place. 🎬 Watch this DIY guide for removing C7 tail lights and upgrading bulbs.
Pro Tip: When replacing a C7 tail light due to a water leak, it is highly recommended to purchase and install a new foam gasket. Reusing the old, compressed gasket will likely lead to the same problem recurring.
Cost Comparison for a Single Outer Tail Light Assembly
| Part Type | Estimated Cost |
|---|---|
| New OEM (Genuine Audi) | $600 - $750 |
| New OEM (Valeo/Hella) | $450 - $550 |
| New Aftermarket | $150 - $300 |
| Used OEM | $100 - $250 |
| Shop Labor | $75 - $150 |
Frequently Asked Questions (FAQ)
Will a tail light from an Avant (wagon) model fit my Sedan?
No. The outer tail lights for Sedan and Avant models have different shapes and part numbers and are not interchangeable. You must buy a part specified for the Sedan.
My tail light has condensation inside. Do I need to replace the whole thing?
Not always. If the electronics still work, you can try to fix the leak. For C7 models, replacing the foam gasket often solves the problem. For any model, you can remove the light, dry it out completely (a hairdryer on low heat can help), and apply a bead of clear silicone sealant around the seam where the lens meets the housing to prevent future leaks. However, if the internal circuit board is already corroded, replacement is the only reliable solution.
Why is my dash showing a "light out" warning when the light works fine?
This usually indicates an intermittent electrical problem. The car's computer performs a resistance check and can detect a fault that is too brief for you to see. Common causes include a corroded connector pin, a failing solder joint inside the light, or a weak ground connection. On C7 models, an aging car battery can also cause these phantom warnings during engine startup.
Can I upgrade my non-LED tail lights to the LED version?
This is not recommended. The vehicle's wiring and lighting control module are different for halogen and LED systems. Attempting to swap them can lead to error codes, flickering, or non-functioning lights because the car's computer expects a different electrical load.
Helpful Videos
Technical Specifications
OEM Part Numbers: 4F5945094E 4F5945096AB 4F5945096E 4F5945096J 4F5945096M 4F5945096R 4G5945095 4G5945095B 4G5945096B 4GD945095
Bulb Type: Full LED (on models with option code 8SL and all S/RS models) or partial LED with incandescent bulbs. Body Style Fitment: Sedan Only. The two main generations are C6 (part numbers starting with 4F) and C7 (part numbers starting with 4G).
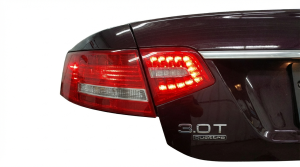
We Have This Part in Stock



The information in this article is provided for general reference and educational purposes only. Vehicle specifications, procedures, and part compatibility can vary by production date, trim level, and region. Always consult your vehicle's factory service manual and verify part numbers before purchasing or performing repairs. Safety-critical components such as airbags, seat belts, and braking systems should be installed by a qualified professional.
- Audi A6:
- Audi S6:
- Audi RS6:
- 🎬 Helpful Videos
- 🛍️ Shop This Part
- Critical: Identify Your Vehicle Generation (C6 vs. C7)
- Symptoms of Tail Light Failure
- 1. Water Leaks and Condensation
- 2. Flickering or Dim LED Sections
- 3. "Bulb Out" Warning Light on Dash
- 4. Incorrect Turn Signal or Brake Light Behavior
- Buying a Used Tail Light: What to Check
- Recalls and Technical Service Bulletins (TSBs)
- Replacement Overview and Difficulty
- Cost Comparison for a Single Outer Tail Light Assembly
- Frequently Asked Questions (FAQ)
- 🎟️ Get 5% Off