

2013-2015 Acura ILX Tail Light: A Buyer's Guide to Failures, Fixes, and Replacement
This guide details common tail light problems on the 2013-2015 Acura ILX, from simple bulb changes to diagnosing electrical faults, and what to inspect on a used assembly.
- This tail light is for the outer, body-mounted position on 2013-2015 Acura ILX models ONLY; it does not fit the trunk lid or 2016+ models.
- Replacement is extremely easy for a DIYer, requiring only basic tools and about 20 minutes.
- When buying used, prioritize checking for cracks, intact mounting tabs, and the quality of the main housing seal to avoid future condensation issues.
- Failure is most often a simple burnt-out 7443 bulb, but persistent moisture inside the lens is a common secondary problem that requires replacing the assembly.
Symptoms of Failure
Diagnosing a faulty tail light on a 2013-2015 Acura ILX can range from obvious to tricky. While a simple burnt-out bulb is the most common culprit, other symptoms can point to different issues.
1. One or More Lights Are Out
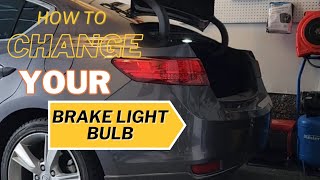
The most straightforward symptom is when a specific function stops working. This could be a brake light, running light, or turn signal. In most cases, this is due to a burnt-out bulb. The brake and tail light functions are often performed by a dual-filament 7443 bulb. 🎬 Watch: How to replace the brake and turn signal bulbs If both brake lights fail simultaneously but the high-mount brake light in the rear window still works, the issue is likely not the fuse or brake switch, but rather the bulbs or wiring to the assemblies.
2. Flickering or Dim Lights
Lights that flicker or appear dimmer than usual can indicate a few problems. It could be a sign of a failing bulb that hasn't completely burned out yet. It can also point to a poor electrical connection at the bulb socket, a corroded connector, or a problem with the vehicle's ground wire for that circuit.
3. Condensation or Water Inside the Lens
Finding moisture, fog, or water droplets inside the tail light lens is a common issue for many vehicles. This happens when the seal between the plastic lens and the rear housing fails, or when the gasket around a bulb socket is cracked or improperly seated. While minor temporary fogging can occur with temperature changes, persistent moisture is a problem. It can corrode bulb sockets and reflective surfaces, leading to premature bulb failure or electrical shorts.
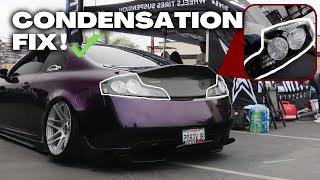
🎬 See how to solve tail light moisture and condensation4. Blown Fuses
If an entire set of lights stops working (e.g., all running lights), a blown fuse is a likely cause. A fuse is a safety device that protects the circuit. A blown fuse often indicates an underlying problem, such as a short circuit caused by water intrusion into a tail light assembly or damaged wiring. One owner reported that after installing new LED bulbs, the tail lights stopped working, pointing towards a potential fuse or electrical compatibility issue.
Compatibility Warning: This tail light assembly is for the outer, body-mounted position only. It does not fit the inner section on the trunk lid. It is specifically for 2013, 2014, and 2015 Acura ILX models. It will not fit the redesigned 2016 and newer models.
Known Issues, TSBs, and Recalls
As of early 2024, there are no specific recalls or Technical Service Bulletins (TSBs) from Acura directly addressing tail light failure or condensation for the 2013-2015 ILX. While other Acura models like the MDX have had recalls for moisture intrusion in tail lights, the ILX of this generation is not included. The most commonly reported issues on owner forums are related to individual bulb burnout and occasional electrical problems, which are not part of a wider manufacturing defect.
Buying a Used 2013-2015 ILX Tail Light
Purchasing a used OEM tail light is an excellent way to save money while retaining factory quality and fit. However, a careful inspection is crucial to ensure you get a good part.
What to Inspect Before You Buy:
- Lens Condition: Check the plastic lens for any cracks, even hairline fractures. Cracks will allow water to enter, leading to chronic condensation and bulb failure. Minor surface scuffs can often be polished out, but deep scratches or hazing are permanent.
- Seal Integrity: The most critical inspection point is the seal where the clear/red lens meets the black plastic housing. Look for any signs of separation, cracking, or previous attempts to reseal it with silicone, which is often a sign of a past leak.
- Mounting Points: Carefully inspect all mounting tabs and studs on the back of the housing. These are made of plastic and can easily break during removal from the donor vehicle. A tail light with broken tabs will not sit securely, leading to gaps, vibration, and potential water leaks.
- Bulb Sockets and Gaskets: Remove the bulb sockets by giving them a quarter-turn. Check the rubber gaskets for dryness or cracking. Look inside the sockets for any white or green corrosion, or signs of melted plastic from overheating. While bulbs are a cheap replacement, a corroded or melted socket may require replacing the wiring harness.
- Wiring Connector: Ensure the main electrical connector on the housing is intact, with no broken plastic or corroded pins.
Pro Tip: Choosing a used OEM tail light over a new, cheap aftermarket one is often the better long-term choice. Aftermarket lights are notorious for using lower-quality seals that can fail quickly, leading to the very condensation issues you might be trying to solve. An original Acura part, even used, generally offers superior fit and durability.
Cost Comparison
| Part Type | Estimated Cost |
|---|---|
| New OEM | $355 - $380 |
| New Aftermarket | $105 - $160 |
| Used OEM | $75 - $200 |
| Shop Labor | $50 - $100 |
Replacement Guide (DIY Difficulty: 1/5)
Replacing the outer tail light on a 2013-2015 Acura ILX is a very simple job that most DIYers can complete in under 20 minutes with basic tools.
Estimated Time: 15-20 minutes
Tools Needed:
- Flathead screwdriver or trim removal tool
- 8mm socket or a Phillips head screwdriver
Step-by-Step Instructions:
- Access the Fasteners: Open the trunk. On the side corresponding to the tail light you're replacing, locate the small plastic cover in the trunk liner. Pop this cover off using a flathead screwdriver or trim tool.
- Remove the Nuts: Behind the cover, you will see two 8mm nuts (or screws with Phillips heads) that secure the tail light assembly. Remove these.
- Remove the Assembly: Firmly and evenly pull the tail light assembly straight back, away from the side of the car. It is held in by a plastic clip on the side, so a gentle wiggle or tap may be needed to pop it free.
- Disconnect Wiring: With the assembly loose, you can access the bulb sockets. For a full assembly replacement, press the release tab on the main electrical connector and pull it apart. If you are just changing a bulb, twist the corresponding bulb socket a quarter-turn and pull it out of the housing.
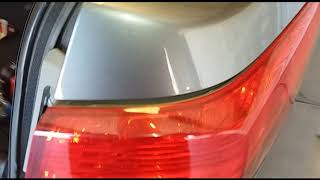
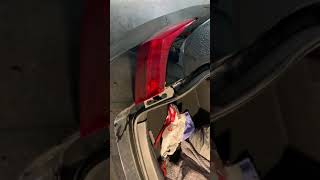
- Installation: Installation is the reverse of removal. Line up the plastic guide pin on the side of the new assembly with the grommet on the car body, push it into place until it clicks, and then reinstall the two nuts. Do not overtighten the nuts. Reconnect the wiring and test all light functions before putting the cover back on. 🎬 Watch: Step-by-step tail light removal walkthrough
Frequently Asked Questions
Why is there water or condensation inside my tail light?
Condensation occurs when the seal around the lens or a bulb socket has failed, allowing moist air to enter. As the temperature changes, this moisture condenses on the inside of the lens. This can be caused by age, damage, or a poor-quality seal on an aftermarket part.
My brake lights don't work, but the bulbs and fuse are good. What's wrong?
If the bulbs and fuse are confirmed to be good, and the high-mount brake light works, the next step is to check the brake light switch located near the top of the brake pedal arm. If that is also working, you may have a wiring issue, such as a bad ground or a break in the power wire leading to the tail light assemblies.
Can I replace just the outer plastic lens?
No, the lens and the housing are manufactured as a single, sealed unit. If your lens is cracked or damaged, the entire tail light assembly must be replaced.
Will a tail light from a 2016 ILX fit my 2014 model?
No. The Acura ILX was redesigned for the 2016 model year, and the tail lights have a different shape and mounting system. You must use a tail light specifically from a 2013, 2014, or 2015 ILX.
What bulb do I need for the brake/tail light?
The dual-function brake and tail light bulb for the outer assembly is a size 7443. The turn signal bulb is located in the same assembly.
Helpful Videos
Technical Specifications
OEM Part Numbers: 33500-TX6-A01 33500TX6A01 33550-TX6-A01 33550TX6A01
Bulb Type (Brake/Tail): 7443
We Have This Part in Stock


The information in this article is provided for general reference and educational purposes only. Vehicle specifications, procedures, and part compatibility can vary by production date, trim level, and region. Always consult your vehicle's factory service manual and verify part numbers before purchasing or performing repairs. Safety-critical components such as airbags, seat belts, and braking systems should be installed by a qualified professional.
- Acura ILX:
- 🎬 Helpful Videos
- 🛍️ Shop This Part
- Symptoms of Failure
- 1. One or More Lights Are Out
- 2. Flickering or Dim Lights
- 3. Condensation or Water Inside the Lens
- 4. Blown Fuses
- Known Issues, TSBs, and Recalls
- Buying a Used 2013-2015 ILX Tail Light
- What to Inspect Before You Buy:
- Cost Comparison
- Replacement Guide (DIY Difficulty: 1/5)
- Step-by-Step Instructions:
- Frequently Asked Questions
- 🎟️ Get 5% Off