

1991-1995 Toyota MR2 Tail Lights: A Guide to Revisions, Leaks, and Swaps
This guide covers the key differences between early and late model SW20 MR2 tail lights, how to diagnose common water leaks, and what to look for when buying a used set.
- The most common issue is water leaks caused by deteriorated foam gaskets; always replace the gasket when installing a tail light.
- There are two main styles: 1991-1993 ('Zenki') and 1994-1995 ('Kouki'). They are interchangeable only as a complete three-piece set.
- When buying used, prioritize checking for cracks, water damage (corrosion on sockets), and verifying the correct style for your car.
- Replacement is a simple DIY job that requires basic tools and about an hour of time.
Symptoms of Failure

Tail lamp issues on the SW20-generation MR2 are usually easy to spot. Here’s what to look for:
- Water or Condensation Inside the Lens: This is the most common problem. It indicates a failed gasket or a crack in the housing, which can lead to corroded bulb sockets and electrical issues.
- Dim or Non-Functioning Bulbs: While this can be a simple burnt-out bulb, it can also point to corrosion in the socket caused by water intrusion. Check the metal contacts for a white or greenish crust.
- Cracked or Faded Lenses: Over time, the plastic lenses can become brittle and crack from sun exposure or minor impacts. Fading or haziness can reduce light output, making your signals less visible.
- Loose Assembly: If the tail light feels loose, it could be due to broken mounting tabs or loose retaining nuts. This will worsen any existing water leak problems.
Known Vehicle-Specific Issues: Revisions and Leaks


The second-generation MR2 had two distinct tail light styles for the North American market. Understanding these is crucial for buying the correct replacement part.
1991-1993 "Zenki" vs. 1994-1995 "Kouki" Lights
Toyota updated the MR2's design in 1994, which included a significant change to the tail lights.
- 1991-1993 (Revision 1 & 2 or "Zenki"): These feature a rectangular, grid-like pattern with amber turn signal lenses and a separate, honeycombed center panel.
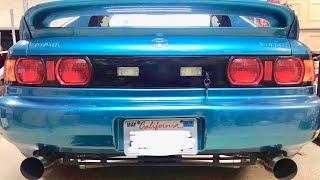
- 1994-1995 (Revision 3 or "Kouki"): These are often considered more modern, with two distinct circular lamps per side, clear turn signal lenses, and a solid, color-matched center panel.
Pro Tip: The two styles are physically interchangeable, but you must swap the complete set (left light, right light, and center panel) for a proper fit and matching appearance. Swapping from the earlier Zenki style to the later Kouki style is a very popular modification among owners.
Common Water Leaks
The primary cause of tail light failure on the SW20 MR2 is water intrusion. This is almost always due to the original foam gaskets deteriorating with age. When the foam compresses and becomes brittle, it no longer creates a watertight seal against the car's body. Water then drips into the trunk, causing rust, mold in the carpet, and corrosion of the tail light sockets and wiring. When replacing a tail light, it is essential to also replace this gasket.
Buying a Used 1991-1995 MR2 Tail Lamp

A used OEM tail light is often the best choice, offering original quality and fitment that can be superior to new aftermarket parts. Here’s what to inspect before you buy:
- Check for Cracks: Carefully inspect the entire lens and housing for cracks, especially around the mounting points. Stress cracks can be hard to see but will allow water in.
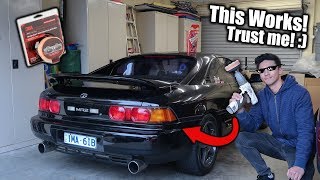
- Look for Haze or Delamination: Check for any cloudiness or separation between the layers of the lens. This cannot be easily repaired and affects the appearance. Minor surface hazing can sometimes be polished out. 🎬 See how to restore hazy MR2 tail lights with great results.
- Inspect the Bulb Sockets: Ask to see the back of the assembly. Look for any signs of white or green corrosion, rust, or melted plastic on the bulb sockets and electrical connectors. This is a clear sign of past water damage.
- Verify the Revision: Make sure you are buying the correct style for your car (1991-1993 Zenki or 1994-1995 Kouki) or that you are getting a complete set if you plan to do a conversion.
- Assume the Gasket is Bad: Even if the gasket looks okay, it's over 25 years old. Plan on replacing it with a new one to ensure a leak-free installation.
Cost Comparison

| Part Type | Estimated Cost (per side) | Notes |
|---|---|---|
| New OEM | $100 - $300+ | Often just the lens or housing, not a complete assembly. Can be difficult to find new. |
| New Aftermarket | $150 - $500+ (for a set) | Quality can vary. Some are direct replacements, others are "Altezza" or LED styles. May require reusing stock bulbs and sockets. |
| Used OEM | $100 - $300 | This is the sweet spot for value. Prices vary based on condition and whether it's the Zenki or more desirable Kouki style. A full Kouki set can be $500+. |
Replacement and Installation
Replacing the tail lights on an SW20 MR2 is a straightforward job for a DIYer.
- Difficulty: 2 out of 5
- Estimated Time: 1 hour
Basic Steps:
- Open the trunk and remove any plastic trim panels covering the back of the lights.
- Pry off the small side reflector panel next to the main tail light. This reveals two screws.
- Remove the two screws behind the reflector and one screw at the top of the assembly inside the trunk area.
- Gently pull the tail light assembly straight back from the car body. It is held in by a couple of clips.
- Disconnect the main wiring harness and pass the rubber grommet through the hole in the body.
- Installation is the reverse of removal. Be sure to install a new foam gasket to prevent leaks.
Warning: When removing the side reflector, pry from the side nearest the rear of the car. The other side has plastic tabs that can easily break.
Frequently Asked Questions (FAQ)
Can I put 1994-1995 ('Kouki') tail lights on my 1991-1993 MR2?
Yes, this is a very common and popular upgrade. The assemblies are physically interchangeable, but you must replace the two outer tail lights and the center panel as a complete set for everything to line up correctly. Some minor wiring modification may be needed for the center panel lights.
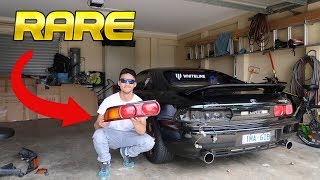
🎬 Watch a step-by-step DIY guide to installing Kouki tail lights.How do I fix my leaking MR2 tail lights?
The most effective and permanent fix is to remove the tail light assembly, clean the mounting surface on the car's body, and install a brand new foam gasket before reinstalling the light. Applying silicone can be a temporary fix but is often messy and makes future removal difficult. A new gasket is the correct solution.
🎬 Watch this video on fixing and preventing leaking tail lights.Are aftermarket LED tail lights a good option?
Aftermarket LED lights can offer a modern look and may be brighter than stock bulbs. However, quality varies greatly. Cheaper units may have issues with premature LED failure, poor fitment, or hyperflashing (blinking too fast) if they don't have built-in resistors. High-quality reproduction units are available but can be expensive.
What bulbs do I need for my 1991-1995 MR2 tail lights?
Bulb types can vary by year and specific location (brake, turn, reverse). It is always best to remove the old bulb and match the number printed on its base. You can also consult an auto parts store's database for the specific bulbs required for your model year.
OEM Part Numbers
The following are some of the known OEM part numbers for the 1991-1995 MR2. Note that part numbers can be superseded over time. Always verify fitment with the seller.
| Part Number | Description | Years |
|---|---|---|
| 81550-17070 | Lamp Assembly, Rear, RH | 1991-1993 |
| 81560-17040 | Lamp Assembly, Rear, LH | 1991-1993 |
| 81551-17140 | Lens & Body, Rear, RH | 1994-1995 |
| 81561-17140 | Lens & Body, Rear, LH | 1994-1995 |
| 81551-17060 | Lens, Rear Combination, RH | 1991-1993 |
| 81561-17040 | Lens, Rear Combination, LH | 1991-1993 |
Note: This list is not exhaustive. "Lamp Assembly" may refer to the full housing with wiring, while "Lens" or "Lens & Body" may be a partial component.
Helpful Videos


Technical Specifications
OEM Part Numbers: 81550-17060 81550-17070 81550-17110 81550-17120 81551-17060 81551-17070 81551-17140 81560-17040 81561-17040 81561-17140
Housing materials are typically PMMA for lenses and ABS or PP plastic for the main body. Assemblies are sealed to the vehicle body with a foam gasket.

The information in this article is provided for general reference and educational purposes only. Vehicle specifications, procedures, and part compatibility can vary by production date, trim level, and region. Always consult your vehicle's factory service manual and verify part numbers before purchasing or performing repairs. Safety-critical components such as airbags, seat belts, and braking systems should be installed by a qualified professional.
- Toyota MR2:
- 🎬 Helpful Videos
- Symptoms of Failure
- Known Vehicle-Specific Issues: Revisions and Leaks
- 1991-1993 "Zenki" vs. 1994-1995 "Kouki" Lights
- Common Water Leaks
- Buying a Used 1991-1995 MR2 Tail Lamp
- Cost Comparison
- Replacement and Installation
- Frequently Asked Questions (FAQ)
- OEM Part Numbers
- 🎟️ Get 5% Off