

2010-2012 Mazda CX-7 Tail Lamp: Fading, Water Leaks, and Replacement Guide
A guide to diagnosing common failures, choosing a quality used replacement, and avoiding compatibility issues for your facelift CX-7.
- This tail lamp only fits 2010-2012 Mazda CX-7 models; lamps from 2007-2009 will not fit.
- Water intrusion from failed seals is the most common failure, leading to condensation and electrical issues. Inspect used parts carefully for signs of moisture.
- Replacement is very easy for a DIYer, requiring only a 10mm socket and about 20 minutes.
- A used OEM part is often a better value and quality than a new, cheap aftermarket part, provided it is inspected for cracks and water damage.
Symptoms of a Failing 2010-2012 Mazda CX-7 Tail Lamp

Failures in the CX-7 tail lamp assembly are typically easy to spot. Keeping an eye out for these signs can help you address issues before they become a safety hazard or lead to a traffic ticket.
Condensation or Water Inside the Lens
This is one of the most common problems. A buildup of moisture, fog, or visible water droplets inside the housing indicates that the factory seal between the lens and the back housing has failed. This can lead to corroded bulb sockets, electrical shorts, and frequent bulb burnout. A TSB from Mazda (09-003/19) acknowledges that minor fogging can be a normal occurrence due to temperature changes, but significant water accumulation points to a failed seal requiring replacement of the assembly.
Dim or Non-Functioning Bulbs
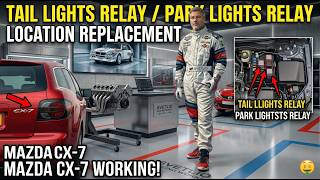
While often caused by a simple burnt-out bulb, this can also point to a deeper issue within the assembly, such as a corroded socket or a problem with the vehicle's wiring. If replacing the bulb doesn't solve the problem, the issue may lie with the tail light relay 🎬 Watch this guide to locate and replace the tail light relay or a fuse.
Cracked or Faded Lens
The plastic lens can become brittle over time due to UV exposure and weather, leading to cracks, crazing, or a hazy, faded appearance. A forum post mentioned an issue where the red plastic capsule inside the clear lens melted from the bulb's heat, causing the light to appear clear instead of red. A cracked lens is not just a cosmetic issue; it can allow water to enter the housing, leading to the problems described above.
Melted Internal Components
In some cases, the heat from the halogen bulbs can melt the internal plastic components, particularly the red filters that give the light its color. This is a serious failure that compromises the light's visibility and color, making it unsafe and illegal. The entire assembly must be replaced.
Buying a Used Tail Lamp: What to Check

A used OEM tail lamp is often a better choice than a cheap aftermarket alternative due to superior fit, plastic quality, and durability. However, it's crucial to inspect a used part carefully before purchasing.
Pro Tip: The part number for the right (passenger) side outer lamp often ends in EH44-51-150F, while the left (driver) side is EH44-51-160F. The letters at the end indicate revisions, with 'F' being the latest. These replace earlier versions like those ending in A, B, C, D, or E.
- Verify Compatibility: First and foremost, ensure the lamp is from a 2010, 2011, or 2012 Mazda CX-7. The 2007-2009 pre-facelift models have a different design and will not fit. This article covers the outer lamp mounted on the quarter panel, not the inner lamp on the liftgate.
- Inspect for Cracks and Scratches: Examine the entire lens surface, paying close attention to the edges and corners. Even small hairline cracks can let in moisture. Minor surface scratches can often be polished out, but deep gouges cannot.
- Check for Signs of Water Intrusion: Look for a faint "water line," mineral deposits, or a foggy film on the inside of the lens. Shake the assembly gently to listen for any sloshing water. Avoid any lamp that shows signs of past or present water entry.
- Examine All Mounting Tabs: Carefully inspect all mounting points and tabs on the back of the housing. These are critical for a secure, flush fit. If any tabs are cracked or broken, the lamp will not mount correctly and will likely vibrate or allow water to leak into the trunk.
- Check the Bulb Sockets: If possible, twist out the bulb sockets and inspect the metal contacts for any signs of green or white corrosion. Corrosion is a major red flag indicating water damage.
Known Issues, Recalls, and Service Bulletins

While there are no specific recalls for the tail lamp assembly itself on the 2010-2012 CX-7, Mazda has issued a Technical Service Bulletin (TSB) that is relevant.
- TSB 09-003/19: This bulletin addresses customer complaints about condensation or fog inside the front and rear combination lamps. It explains that some condensation is normal due to atmospheric changes. However, it also provides criteria for what is considered excessive (i.e., large droplets or pooling water), which would warrant a replacement under warranty. For a used part buyer, this confirms that seal failure is a known issue.
- Recalls: The 2010-2012 Mazda CX-7 has been subject to several recalls, most notably for front suspension ball joints and Takata airbag inflators, but none directly involve the tail lamp assemblies.
Cost Comparison: 2010-2012 CX-7 Tail Lamp
Prices can vary based on supplier and condition. The following is an estimated range.
| Part Source | Estimated Price Range (per side) |
|---|---|
| New OEM | $750 - $1100 |
| New Aftermarket | $350 - $470 |
| Used OEM | $75 - $200 |
| Shop Labor | $50 - $100 |
Warning: The part number MA2800150 is not a Mazda OEM number. It is an aftermarket industry number (Partslink) used for cross-referencing. Be aware that parts sold under this number are not original equipment.
Replacement Guide (Outer Quarter Panel Lamp)

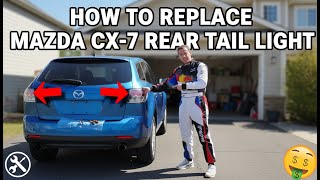
Replacing the outer tail lamp assembly is a straightforward job that most DIYers can complete with basic tools.
- Difficulty: 1/5 (Very Easy)
- Estimated Time: 15-20 minutes
- Tools Needed: 10mm socket with ratchet and extension, trim removal tool (optional).
- Open the Rear Hatch: Access the interior trim panel in the corner of the cargo area behind the tail lamp.
- Remove the Access Cover: There is a small plastic cover designed for bulb replacement. Pop this cover off to reveal the mounting hardware.
- Unbolt the Assembly: You will see two or three 10mm nuts holding the tail lamp assembly to the body. Use your socket and ratchet to remove these nuts.
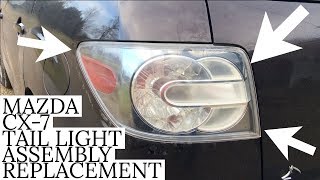
- Release the Lamp: From the outside of the vehicle, gently but firmly pull the tail lamp assembly straight back, away from the car. There is a plastic locating clip on the side of the lamp that will pop out of a grommet in the body. Wiggling the assembly slightly can help release it.
- Disconnect the Wiring: Once the lamp is free, twist each bulb socket counter-clockwise and pull it out of the housing. Transfer the bulbs and sockets to the new assembly.
- Installation: Installation is the reverse of removal. Carefully align the locating clip and mounting studs, press the lamp into place, and tighten the 10mm nuts from inside the trunk. Do not overtighten. Test all light functions before finishing.
Frequently Asked Questions (FAQ)
Will a tail light from a 2009 CX-7 fit my 2011 model?
No. The Mazda CX-7 received a facelift for the 2010 model year, which included redesigned tail lights. You must use a lamp from a 2010, 2011, or 2012 model for proper fitment.
Do replacement tail lights come with bulbs and wiring?
New OEM and most aftermarket assemblies typically include the housing and lens only. Used OEM parts may or may not come with the wiring harness and bulbs. You should plan to reuse your existing harness and sockets.
Why is there water inside my tail light?
Water gets inside when the seal between the plastic lens and the rear housing fails. This can be due to age, UV damage, or physical impact. Once the seal is broken, the only permanent solution is to replace the entire assembly.
My brake light isn't working, but the bulb is good. What's wrong?
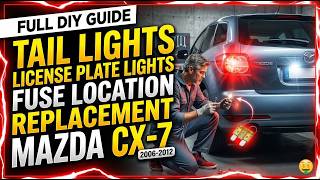
If you've confirmed the bulb is good, the next things to check are the fuse for the tail lights, 🎬 See how to find and replace the tail light fuse the tail light relay, and the brake light switch. Also, inspect the bulb socket for any corrosion that could be preventing a good electrical connection.
Helpful Videos
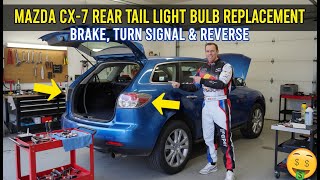
Technical Specifications
OEM Part Numbers: EH44-51-150A EH44-51-150B EH44-51-150C EH44-51-150D EH44-51-150E EH44-51-150F EH44-51-160A EH44-51-160B EH44-51-160C EH44-51-160D EH44-51-160E EH44-51-160F
Bulb Type: Halogen. Location: Outer, Quarter Panel Mounted. Fits all trims for 2010-2012 model years.
We Have This Part in Stock



The information in this article is provided for general reference and educational purposes only. Vehicle specifications, procedures, and part compatibility can vary by production date, trim level, and region. Always consult your vehicle's factory service manual and verify part numbers before purchasing or performing repairs. Safety-critical components such as airbags, seat belts, and braking systems should be installed by a qualified professional.
- Mazda CX-7:
- 🎬 Helpful Videos
- 🛍️ Shop This Part
- Symptoms of a Failing 2010-2012 Mazda CX-7 Tail Lamp
- Condensation or Water Inside the Lens
- Dim or Non-Functioning Bulbs
- Cracked or Faded Lens
- Melted Internal Components
- Buying a Used Tail Lamp: What to Check
- Known Issues, Recalls, and Service Bulletins
- Cost Comparison: 2010-2012 CX-7 Tail Lamp
- Replacement Guide (Outer Quarter Panel Lamp)
- Frequently Asked Questions (FAQ)
- 🎟️ Get 5% Off