

2013-2014 BMW X6 Outer Tail Lamp: LCI Failures, Warnings, and Replacement
This guide details common LED failures, dashboard warnings, and how to select the correct used outer tail lamp for your facelift (LCI) E71 BMW X6.
- These tail lamps fit ONLY the 2013-2014 BMW X6 LCI (facelift) models and are not interchangeable with earlier years.
- Failures are typically electronic (bad LED driver boards) rather than burnt-out bulbs, causing dashboard warnings and partial light failure.
- When buying a used unit, the most critical inspection is for any sign of past or present moisture inside the lens, which indicates a bad seal.
- Replacement is a simple DIY job requiring basic tools and takes less than 30 minutes per side, with no programming typically needed.
Symptoms of Failure

Failure of the 2013-2014 BMW X6 outer tail lamp often goes beyond a simple burnt-out bulb, as the assembly uses long-life LEDs. When problems arise, they typically manifest in specific ways related to the LED circuits or the vehicle's monitoring system.
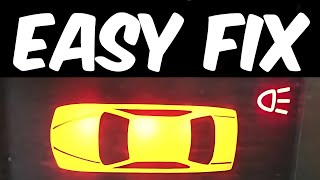
- "Check Rear Lamp" or "Brake Light Malfunction" Warning: The most common symptom is a warning message appearing on the iDrive screen or instrument cluster. The vehicle's lighting control module constantly monitors the electrical circuits, and if it detects a change in resistance or a short circuit from a failing LED or internal driver board, it will trigger an alert.
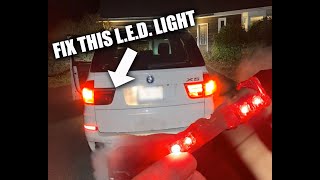
- Partial or Complete LED Failure: One or more of the LED light bars within the assembly may go out completely. This can affect the running light (the continuous red glow) or the brighter brake light function. Sometimes, the light may flicker intermittently before failing entirely.
- Hyper-flashing Turn Signal: While less common for the rear assembly, a failure in the turn signal portion of the LED unit can sometimes cause the corresponding indicator on the dashboard to flash rapidly, a condition known as hyper-flashing.
- Dimly Lit or Overly Bright Sections: An internal circuit board failure can cause a section of the tail lamp to appear dimmer than normal or, conversely, stay stuck on full brightness as if the brakes were applied.
- Moisture or Condensation Inside Lens: Finding water droplets or fog inside the lens is a clear sign that the factory seal has failed. This is a major red flag, as moisture quickly corrodes the sensitive LED circuit boards and connectors, leading to eventual failure.
Known Issues, TSBs, and Recalls

While the 2013-2014 BMW X6 has been subject to several recalls, none specifically target the tail lamp assemblies for these model years. Most recalls for this vehicle concern airbags and the front driveshaft. However, older BMW models have experienced recalls and Technical Service Bulletins (TSBs) for issues like poor ground connections and corroding bulb carriers, which can cause similar lighting failures. On many BMWs from this era, including the related X3 and X5, a common point of failure is the internal driver board that regulates power to the LEDs. These boards can overheat and develop bad solder joints, leading to intermittent or total failure.
Important: The vehicle's Footwell Module (FRM) has a short circuit counter. If it detects a fault in a specific lamp circuit (like a failing tail light) too many times, it may permanently shut off power to that circuit to prevent damage. If a new or known-good tail lamp doesn't work, the FRM may need to be reset with a diagnostic tool to clear the short circuit fault.
🎬 Watch this guide on resetting a BMW rear light warningBuying a Used 2013-2014 X6 Tail Lamp

Purchasing a used OEM tail lamp is an excellent way to save money, but careful inspection is key to getting a good part. Given the electronic complexity, a used original BMW part is often a better choice than a cheap aftermarket alternative, which may have issues with fitment, LED quality, or communication with the vehicle's computer.
Physical Inspection Checklist
- Check for Cracks and Scratches: Inspect the lens for any cracks, chips, or deep scratches that could allow moisture to enter. Minor scuffs can often be polished out, but any crack compromises the housing.
- Examine Mounting Points: Ensure all mounting tabs and studs on the back of the housing are intact. Broken tabs will prevent the lamp from seating securely, leading to gaps and potential water leaks.
- Look for Signs of Water Intrusion: This is the most critical check. Look for any dried water spots, a hazy film on the inside of the lens, or a discolored, chalky residue. These are all signs of past moisture exposure that has likely damaged the internal electronics.
- Inspect the Main Seal: Check the condition of the foam or rubber gasket that seals the lamp against the vehicle's body. It should be pliable and complete. A dried-out or crumbling gasket should be replaced to prevent leaks.
- Check the Electrical Connector: Look at the pins inside the electrical connector socket. They should be clean and free of any green or white corrosion.
Compatibility Verification
Warning: These tail lamps are specific to the 2013-2014 LCI (facelift) models. They will not fit or function correctly on pre-facelift 2008-2012 BMW X6 models. You must also distinguish between the outer lamp (mounted on the quarter panel) and the inner lamp (mounted on the trunk lid). This guide and its part numbers are for the outer lamp only.
Cost Comparison
| Part Type | Estimated Price Range |
|---|---|
| New OEM | $355 - $420 per side |
| New Aftermarket | $290 - $350 per side |
| Used OEM | $150 - $250 per side |
| Shop Labor | $100 - $200 |
Replacement Guide

Replacing the outer tail lamp on a 2013-2014 X6 is a straightforward DIY task. The difficulty is rated 1 out of 5 and typically takes less than 30 minutes per side.
Required Tools:
- Trim removal tool
- 10mm socket with ratchet and extension
Step-by-Step Instructions:
- Open the Trunk: Access the rear cargo area.
- Access the Lamp Housing: On the side of the trunk corresponding to the lamp you are replacing, locate and open the access panel in the trunk liner.
- Disconnect Wiring: Reach inside the access panel and locate the electrical connector plugged into the back of the tail lamp. Press the release tab and pull the connector straight off.
- Remove Mounting Nuts: You will see three 10mm nuts securing the tail lamp studs to the body. Use a 10mm socket to remove all three nuts.
- Remove the Tail Lamp: From inside the trunk, carefully push the studs outward. The lamp assembly should pop out from the quarter panel. Gently pull it away from the vehicle.
- Install the New Lamp: Position the new lamp, ensuring the studs go through the holes in the body and the alignment pins are seated correctly. From inside the trunk, hand-tighten the three 10mm nuts, then snug them down with the socket. Do not overtighten.
- Reconnect and Test: Plug the electrical connector back into the new lamp until it clicks. Before closing the access panel, have a helper test all light functions (running lights, brake lights, turn signals) to ensure everything works correctly.
- Reassemble: Close the access panel in the trunk liner.
Part Number Reference
| Position | OEM Part Number | Alternate Part Numbers |
|---|---|---|
| Left (Driver Side) Outer | 63-21-7-295-003 | 63217295003, 7295003 |
| Right (Passenger Side) Outer | 63-21-7-295-004 | 63217295004, 7295004 |
Frequently Asked Questions
Will this tail lamp fit my 2011 BMW X6?
No. This part is specifically for the 2013-2014 facelift (LCI) models, which have a different tail light design. It is not compatible with 2008-2012 pre-LCI vehicles.
Do I need to program the car after installing a new tail lamp?
Generally, no programming is required when replacing a failed tail lamp with a new or used OEM unit. It is a plug-and-play installation. However, if the vehicle's Footwell Module (FRM) has registered too many short circuits from the old, failing lamp, it may need to be reset with a diagnostic tool to restore power to that circuit.
Can I just replace the LED board inside instead of the whole assembly?
While some DIYers have successfully repaired the internal circuit boards by re-soldering connections or replacing the driver chip, it is a complex repair. The housing is permanently sealed, and you must carefully cut it open to access the internal components, then reseal it to be watertight. For most people, replacing the entire assembly is the more reliable and practical solution.
🎬 See how to repair a BMW broken LED tail lightWhy are my tail lights flickering or giving an error message when it's wet or raining?
This is a classic symptom of a failed seal and water intrusion. Moisture is getting inside the lamp housing and shorting out the electronics. The lamp assembly needs to be replaced, and you should ensure the new unit's gasket provides a tight seal against the body.
Helpful Videos
Technical Specifications
OEM Part Numbers: 63-21-7-295-003 63217295003 7295003 63-21-7-295-004 63217295004 7295004
Designed for LCI (Life Cycle Impulse) models with LED light bar technology. Mounts to the outer quarter panel.
We Have This Part in Stock



The information in this article is provided for general reference and educational purposes only. Vehicle specifications, procedures, and part compatibility can vary by production date, trim level, and region. Always consult your vehicle's factory service manual and verify part numbers before purchasing or performing repairs. Safety-critical components such as airbags, seat belts, and braking systems should be installed by a qualified professional.
- BMW X6:
- 🎬 Helpful Videos
- 🛍️ Shop This Part
- Symptoms of Failure
- Known Issues, TSBs, and Recalls
- Buying a Used 2013-2014 X6 Tail Lamp
- Physical Inspection Checklist
- Compatibility Verification
- Cost Comparison
- Replacement Guide
- Required Tools:
- Step-by-Step Instructions:
- Part Number Reference
- Frequently Asked Questions
- 🎟️ Get 5% Off