

2009-2014 Hyundai Genesis Tail Finish Panel: Camera Failure, Trunk Switch, and Replacement Guide
This guide covers the common failures of the Genesis sedan's trunk garnish, including backup camera problems, and explains how to choose the correct used replacement part.
- This panel is for the 2009-2014 Genesis SEDAN only and does not fit the Coupe.
- For models with a backup camera, the camera's electrical connector design changed mid-2011. You must verify the connector matches your original part.
- Common failures are electrical, including the integrated backup camera and the trunk release button, not just cosmetic damage.
- A used OEM panel is a cost-effective repair, but requires careful inspection of mounting points and the camera connector for compatibility.
Main Symptoms of a Failing Tail Finish Panel

Since the tail finish panel houses several components, its failure can manifest in a few different ways. Problems are typically electrical or cosmetic.
1. Backup Camera is Black, Flickering, or Fuzzy
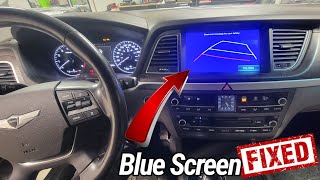
One of the most common issues is a malfunctioning backup camera. You may experience an intermittent black screen, a constantly black screen, or a fuzzy, distorted image when you shift into reverse. This can be caused by several factors:
- Internal Camera Failure: The camera unit itself can fail from age or moisture intrusion.
- Wiring Damage: The wiring harness that runs from the trunk lid into the car's body can become frayed or broken from the repeated motion of opening and closing the trunk. This can cause an intermittent connection.
- Poor Connection: The electrical connector to the camera may become loose or corroded.
- Moisture Intrusion: Water leaking into the camera housing can cause condensation on the lens or short out the electronics.
2. Trunk Release Button Stops Working
The rubber-covered button on the exterior of the panel may stop opening the trunk. This is often due to the rubber cover deteriorating, allowing water to enter the switch and cause corrosion. In other cases, the switch itself simply wears out from use. While the trunk can still be opened with the key fob or the interior release, the exterior button becomes inoperative.
3. Chrome Trim is Peeling or Bubbling
The chrome garnish strip on the panel is prone to cosmetic failure. Over time, exposure to the elements can cause the chrome finish to bubble, peel, or develop a cloudy appearance. While this doesn't affect the panel's function, it is a common cosmetic issue.
4. Water Leaking Into the Trunk
While less common, poorly sealed tail finish panels or failing gaskets around the integrated taillights can sometimes be a source of water leaks into the trunk area. If you notice moisture in your trunk, inspecting the seals around the panel and lights is a good diagnostic step.
Warning: This part fits the 2009-2014 Hyundai Genesis Sedan only. It will NOT fit the Genesis Coupe, which is a completely different vehicle with different body panels.
Buying a Used 2009-2014 Genesis Tail Finish Panel

Buying a used OEM tail finish panel is a popular, cost-effective option. However, there are critical details to check to ensure you get the right part that works with your car.
1. Camera vs. No Camera
The most obvious difference is whether the panel is for a car with or without a factory backup camera. The panels are not interchangeable without modification. Ensure the part you are buying matches your vehicle's original configuration.
2. The Mid-2011 Backup Camera Connector Change
Hyundai changed the electrical connector for the backup camera partway through the 2011 model year. A camera with part number 95760-3M060 is specified for models built up to May 12, 2011. If you are replacing a panel on a 2011-2014 model, it is absolutely essential to visually compare the camera connector on the used part with your original one before purchasing. Buying a panel from the wrong year range will result in a camera that cannot be plugged in.
3. Physical Inspection Checklist
Before buying a used panel, inspect it carefully:
- Mounting Points: Check the back of the panel. Ensure all plastic mounting tabs and studs are intact and not cracked. Broken tabs will prevent the panel from sitting flush against the trunk lid.
- Chrome Trim: Examine the chrome strip for any signs of peeling, bubbling, or heavy oxidation.
- Trunk Release Button: Look at the rubber cover on the trunk release switch. It should be pliable and free of cracks or tears. A damaged cover suggests the switch may have been exposed to water.
- Camera Lens: If equipped, inspect the camera lens for deep scratches or fogginess, which could indicate moisture has gotten inside the housing.
- Wiring Harness: Check the short wiring pigtail on the panel for any cuts, frayed wires, or damage to the connector.
Pro Tip: When replacing the panel, it's a good time to transfer your existing license plate lights and bulbs to the new panel, or install new bulbs, as they are easy to access while the panel is off the car.
Known Issues, TSBs, and Recalls
There are no specific recalls or Technical Service Bulletins (TSBs) for the tail finish panel itself on the 2009-2014 Genesis Sedan. However, there are related issues. TSB 20-BE-007H was issued for the next-generation 2015-2016 Genesis for a trunk wiring harness that could be damaged by the trunk lid arm, causing the backup camera and other lights to fail. While not for the 2009-2014 models, it highlights a similar potential failure point—the wiring that flexes when the trunk is opened and closed. Several recalls were issued for this Genesis generation for issues like brake light switches and corrosion of the brake control unit, but none pertain directly to the tail finish panel.
Replacement Overview

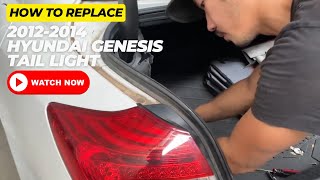
Replacing the tail finish panel is a straightforward job that can be done by a DIYer with basic tools. The process involves removing the interior trunk lid liner to access the nuts and electrical connectors.
- Difficulty: 2 out of 5
- Estimated Time: 1 hour
- Tools Needed: 10mm socket or wrench, panel clip removal tool (or flathead screwdriver), Phillips screwdriver.
Step-by-Step Guide
- Open the trunk and remove the plastic clips holding the carpeted trunk lid liner in place.
- Carefully pull the liner away to expose the back of the tail finish panel.
- Disconnect the electrical connectors for the license plate lights, trunk release switch, and backup camera (if equipped).
- Using a 10mm socket, remove the nuts securing the panel to the trunk lid.
- Carefully pull the old panel away from the trunk. It may be held on by some adhesive tape as well.
- If your replacement panel did not come with them, you may need to transfer the license plate light housings, trunk release switch, or camera to the new panel.
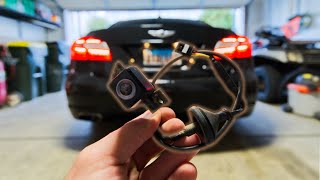
- Install the new panel by reversing the steps. 🎬 Watch how to replace the backup camera on a Genesis Connect the electronics and test them before reinstalling the trunk liner.
Cost Comparison: New vs. Used
| Part Type | Estimated Cost |
|---|---|
| New OEM | $210 - $320 for the panel; cameras are often separate and cost $180+. |
| New Aftermarket | $130 - $180 for chrome trim strips or camera-only replacements. Full panels are less common. |
| Used OEM | $125 - $200 for a complete assembly. |
| Shop Labor | $100 - $180 |
Frequently Asked Questions (FAQ)
Can I add a backup camera to my Genesis if it didn't come with one?
It is technically possible but complex. You would need the camera-compatible tail finish panel, the camera itself, and the correct wiring harness to run through the car to an aftermarket or compatible factory screen. It is not a simple plug-and-play upgrade.
My backup camera screen is black. Is the camera definitely broken?
Not necessarily. A black screen can be caused by a bad camera, but it can also be a broken wire in the harness, a loose connection, or even a blown fuse. 🎬 Watch this step-by-step diagnostic video for a failing camera It's best to check the wiring and fuses before buying a new camera or panel assembly.
Is the chrome trim piece available separately?
Yes, aftermarket stainless steel or chrome-finish trim pieces are available that stick on over the original garnish. However, the factory chrome piece is typically integrated with the panel. Replacing it with an OEM part usually requires replacing the entire finish panel.
Why won't my trunk open with the button on the trunk lid?
This is usually due to a failed trunk release switch, which is integrated into the tail finish panel. The rubber cover on the switch can wear out, allowing water to damage the internal contacts. Replacing the switch, which may come as part of the panel assembly, typically resolves the issue.
Helpful Videos
Technical Specifications
OEM Part Numbers: 87371-3M020 87371-3M260 87372-3M000 87372-3M010 87372-3M020 87372-3M030 95760-3M000 95760-3M050 95760-3M060 95760-3M061 95760-3M200
The primary variations are with or without a factory backup camera, and a camera connector change occurred mid-2011.

The information in this article is provided for general reference and educational purposes only. Vehicle specifications, procedures, and part compatibility can vary by production date, trim level, and region. Always consult your vehicle's factory service manual and verify part numbers before purchasing or performing repairs. Safety-critical components such as airbags, seat belts, and braking systems should be installed by a qualified professional.
- Hyundai Genesis:
- 🎬 Helpful Videos
- Main Symptoms of a Failing Tail Finish Panel
- 1. Backup Camera is Black, Flickering, or Fuzzy
- 2. Trunk Release Button Stops Working
- 3. Chrome Trim is Peeling or Bubbling
- 4. Water Leaking Into the Trunk
- Buying a Used 2009-2014 Genesis Tail Finish Panel
- 1. Camera vs. No Camera
- 2. The Mid-2011 Backup Camera Connector Change
- 3. Physical Inspection Checklist
- Known Issues, TSBs, and Recalls
- Replacement Overview
- Step-by-Step Guide
- Cost Comparison: New vs. Used
- Frequently Asked Questions (FAQ)
- 🎟️ Get 5% Off