

1990-1997 Mazda Miata Front Subframe: Rust, Damage, and Replacement Guide
Learn how to spot a bad front subframe, what to look for when buying a used one, and what's involved in this critical replacement.
- The primary causes of failure are severe rust or collision damage; inspect any used part for both.
- A damaged subframe is a critical safety issue and the vehicle should not be driven.
- Replacement is a very difficult (5/5) job that requires an engine support bar and a subsequent wheel alignment.
- Only a subframe from a 1990-1997 (NA) Miata is a direct fit; subframes from 1999+ (NB) models require modification.
Symptoms of a Failing Miata Subframe
Failure of the front subframe on a 1990-1997 Miata is almost always due to either severe rust or physical damage from an impact. While the subframe itself is a simple piece of steel, the symptoms of a problem can sometimes be mistaken for other suspension issues. The most common signs point to unwanted movement or a change in the front-end structure.
- Clunking or Popping Noises: Loud clunks, pops, or knocking sounds from the front of the car when accelerating, braking, or driving over bumps are a primary symptom. This noise is often caused by the subframe shifting slightly due to cracked metal or rotted-out mounting points.
- Poor Alignment & Steering Wander: If your Miata constantly pulls to one side, refuses to hold an alignment, or feels vague and "wanders" at speed, it could be a sign of a bent or compromised subframe. A damaged subframe alters the mounting points for the control arms, making a correct and stable alignment impossible.
- Excessive Vibration: A vibration or shimmy felt in the steering wheel, especially at highway speeds, can be caused by the flex and movement of a damaged subframe that is no longer rigidly holding the suspension components.
- Uneven Tire Wear: Because a bad subframe can throw the alignment out of specification, you may notice accelerated or uneven wear on your front tires.
Pro Tip: A quick visual check can often confirm your suspicions. Use a flashlight to inspect the entire subframe, paying close attention to the areas where the control arms mount and the welds around the motor mounts. Any visible cracks, significant bending, or rust that has created holes is a clear sign of failure.
Buying a Used 1990-1997 Miata Subframe: Inspection Guide
Since new OEM subframes are expensive and often backordered, a quality used OEM subframe is the most popular and cost-effective solution. However, you must inspect a used part carefully. A bad used subframe is just scrap metal.
Rust: The Number One Enemy
Rust is the main killer of Miata chassis components. Surface rust is common and can be cleaned and painted, but structural rust is a deal-breaker.
- Check Welds and Seams: Pay close attention to all welded seams and corners. This is where moisture sits and rust begins.
- Probe with a Screwdriver: Gently poke any suspicious-looking rusty areas with a screwdriver or pick. If it's soft, flaky, or a hole appears, the subframe is junk.
- Ask About the Car's Origin: If possible, find out if the donor car came from a state in the "salt belt." Subframes from southern or western states are much more likely to be rust-free.
Checking for Straightness and Crash Damage
A subframe that has been in an accident is useless. It will make proper alignment impossible.
- Look for Bends or Ripples: Inspect all the flat surfaces and straight sections for any signs of bending, twisting, or ripples in the metal. These are tell-tale signs of a collision.
- Check Mounting Holes: The large holes where the subframe bolts to the car's frame rails should be perfectly round. If they are oval-shaped or torn, the part was likely ripped from a car during a crash.
- The Flat Floor Test: The best way to check for straightness is to lay the subframe on a flat concrete floor. It should sit level without rocking. If it wobbles, it's likely twisted.
Verifying Mounting Points and Threads
All threaded holes must be in good condition to safely attach your suspension, steering, and engine components.
- Inspect All Threaded Holes: Check the threaded mounting points for the lower control arms, steering rack, and motor mounts. Ensure the threads are clean and not stripped or cross-threaded.
- Confirm No Broken Bolts: Make sure there are no broken-off bolts stuck in any of the mounting holes. Removing them can be extremely difficult.
Compatibility Warning: Only subframes from a 1990-1997 (NA) Miata are a direct, bolt-in replacement. A subframe from a 1999-2005 (NB) Miata will physically bolt to the car, but it has different steering rack mounts and suspension geometry. Using an NB subframe requires also using an NB steering rack and potentially other components, making it a modification, not a simple repair.
Known Issues, Recalls, and Service Bulletins
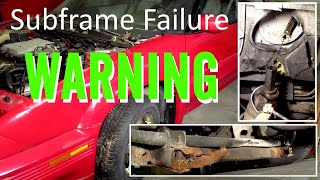
The 1990-1997 Mazda Miata has no official recalls or Technical Service Bulletins (TSBs) related to the front subframe. This component is generally very robust and is only expected to fail due to external factors like rust or collision damage. However, in the performance driving community, fatigue failure has been observed. Cars used frequently for autocross or track days can develop cracks near the control arm mounts from stress. For these high-performance applications, weld-in reinforcement gussets are available from Mazda Motorsports.
Front Subframe Replacement Cost
Replacing the front subframe is a labor-intensive job, which is reflected in the cost. A used OEM part offers significant savings over a new one.
| Part or Service | Estimated Cost |
|---|---|
| New OEM Subframe | $725 - $1,050 |
| New Aftermarket Subframe | Not commonly available |
| Used OEM Subframe | $150 - $350 |
| Shop Labor | $700 - $1,400 |
| Total (with Used Part) | $850 - $1,750 |
Cost estimates are for the part and labor only and do not include a mandatory wheel alignment or potential replacement of other related parts like control arm bolts or motor mounts.
Front Subframe Replacement Overview & Difficulty
- Difficulty: 5 out of 5 (Very Difficult)
- DIY Feasible: Yes, for experienced mechanics with proper tools.
- Estimated Time: 5-8 hours
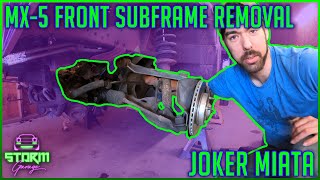
This is not a job for a beginner. The procedure requires supporting the engine from above using an engine support bar, as the motor mounts bolt to the subframe. The process involves lifting the front of the vehicle, removing the wheels, and disconnecting the lower control arms, steering rack, and motor mounts before unbolting and lowering the subframe from the car. 🎬 Watch: Step-by-step guide to removing the front subframe Reinstallation can be tricky, as the engine, suspension, and subframe must all be carefully aligned. 🎬 Watch: How to install a reconditioned front subframe A full front-end wheel alignment is required immediately after replacement.
Technical Specifications and Part Numbers
The primary part number for the NA Miata front subframe has been superseded over the years. The latest version will fit all 1990-1997 models.
- Primary OEM Part Number: NA01-34-800E (Mazda)
- Superseded Part Number: NA01-34-800D (Mazda)
- Alternative Part Number: Some catalogs may list NA01-53-16XC, which also refers to a front crossmember for this vehicle.
- Material: Stamped and welded steel
Frequently Asked Questions (FAQ)
Can I use a subframe from a newer NB Miata on my NA?
While an NB (1999-2005) subframe will bolt into an NA (1990-1997) chassis, it is not a direct replacement. The NB subframe uses different steering rack mounts, so you must also install an NB steering rack. It's a common modification for enthusiasts but is not recommended if you are looking for a simple, direct repair.
Is it safe to drive with a bent or rusted subframe?
No, it is not safe. A compromised subframe can fail completely, leading to a loss of steering control and the potential for the engine to shift or drop. If a shop has diagnosed your subframe as critically rusted or bent, the vehicle should not be driven until it is repaired.
Do I need to get an alignment after replacing the subframe?
Yes, absolutely. The subframe is the primary mounting point for your front suspension and steering. Replacing it will significantly alter your alignment settings. A full four-wheel alignment is mandatory after the job is complete to ensure the vehicle drives straight and does not cause premature tire wear.
What else should I replace while the subframe is out?
Since the job is so labor-intensive, it's a perfect time to inspect and replace other wear items in the area. This includes the lower control arm bushings, motor mounts, and steering rack bushings. If your car has high mileage, replacing these components at the same time can save you significant labor costs in the future.
Helpful Videos
![Mazda MX5 Miata Common Rust Spots [Fix Before It's Too Late]](https://img.youtube.com/vi/eoFtbtP2ONs/mqdefault.jpg)

Technical Specifications
OEM Part Numbers: NA01-34-800E NA01-34-800D NA0134800E NA0134800D NA01-53-16XC
Stamped and welded steel construction. Mounts for engine, lower control arms, and steering rack.
We Have This Part in Stock


The information in this article is provided for general reference and educational purposes only. Vehicle specifications, procedures, and part compatibility can vary by production date, trim level, and region. Always consult your vehicle's factory service manual and verify part numbers before purchasing or performing repairs. Safety-critical components such as airbags, seat belts, and braking systems should be installed by a qualified professional.
- Mazda MX-5 Miata:
- 🎬 Helpful Videos
- 🛍️ Shop This Part
- Symptoms of a Failing Miata Subframe
- Buying a Used 1990-1997 Miata Subframe: Inspection Guide
- Rust: The Number One Enemy
- Checking for Straightness and Crash Damage
- Verifying Mounting Points and Threads
- Known Issues, Recalls, and Service Bulletins
- Front Subframe Replacement Cost
- Front Subframe Replacement Overview & Difficulty
- Technical Specifications and Part Numbers
- Frequently Asked Questions (FAQ)
- 🎟️ Get 5% Off