

2014-2016 Mazda 6 Control Arm Guide: Clunks, Bushing Failures, and the 2016 Design Change
Your definitive guide to diagnosing, replacing, and buying the right used front control arm for your third-generation Mazda 6, including critical compatibility warnings.
- For 2016 models, visually verify your existing part before buying a replacement, as Mazda used two different designs during that model year.
- The most common failure symptom is a clunking or creaking noise from the front suspension when going over bumps at low speed.
- After replacing a control arm, a wheel alignment is mandatory to ensure safety and prevent premature tire wear.
- When installing, the bushing pivot bolts must be final-torqued only when the car's full weight is on the suspension to avoid immediate bushing failure.
Symptoms of a Failing Control Arm

When the control arm on a 2014-2016 Mazda 6 fails, it's almost always due to the rubber bushings cracking or the integrated ball joint wearing out. This wear and tear produces distinct noises and handling issues that serve as clear warning signs.
Clunking or Knocking Noises
The most common symptom is a clunking, popping, or knocking sound from the front of the car. This noise is most obvious at low speeds when driving over bumps, pulling into driveways, or turning the steering wheel in a parking lot. The sound is caused by the worn-out components allowing metal-on-metal contact as the suspension moves.
🎬 Watch this video to help diagnose front-end clunking noises.Creaking or Squeaking Sounds
A creaking noise, especially in wet conditions or at speeds between 12-25 mph, can also indicate failing control arm bushings. This specific issue is so common that Mazda issued a Technical Service Bulletin (TSB) to address it. The sound comes from the worn rubber flexing and rubbing against its metal housing.
Steering and Handling Problems
A worn control arm can make the vehicle's steering feel loose, vague, or unstable. You might notice the car wanders or pulls to one side, requiring constant correction to drive straight. This happens because the worn bushings and ball joint can no longer hold the wheel in the correct alignment.
Vibrations and Uneven Tire Wear
As the components wear, vibrations from the road are no longer properly absorbed and can be felt through the steering wheel. A visual inspection of your front tires may reveal uneven wear, particularly on the inner or outer edges. This is a direct result of the wheel alignment being compromised by the loose control arm.
Known Issues, TSBs, and Recalls

While there are no direct safety recalls for the control arms themselves on the 2014-2016 Mazda 6, there are official service bulletins and a related recall you should be aware of.
TSB for Creaking Lower Arm Bushings
Mazda issued Technical Service Bulletin (TSB) 02-010/16 (later updated) for a creaking noise from the front lower arm bushings on 2014-2016 Mazda 6 models. The bulletin acknowledges that friction in the bushings can cause noise and outlines a repair procedure. This TSB confirms that the bushings are a known weak point.
The Critical 2016 Mid-Year Design Change
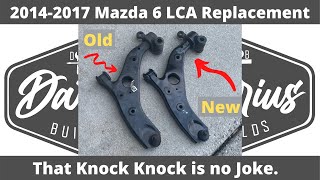
For 2016 models, it is crucial to know that Mazda changed the design of the control arm mid-year. Part listings show a cutoff date of November 1, 2015. This means a control arm from an early 2016 model may not fit a late 2016 model, and vice-versa. Before purchasing, it is essential to visually compare the replacement part to the one on your vehicle to ensure the shape and mounting points match.
Related Recall: Loose Front Strut Bolts
Safety Recall 9316D (NHTSA ID: 16V203) was issued for some 2014-2016 models because the bolts connecting the front strut to the steering knuckle could loosen. This can cause a rattling or clunking noise very similar to a bad control arm. Before assuming the control arm is the problem, it is critical to check that these two large bolts are present and properly tightened on both sides of the vehicle.
Warning: Other recalls exist for this vehicle generation, including for the parking brake and occupant classification sensor, but they are not directly related to the control arm's function. A subframe corrosion recall affected the previous generation (2009-2013) Mazda 6 and does not apply to 2014-2016 models.
Buying a Used 2014-2016 Mazda 6 Control Arm

A used OEM control arm from a low-mileage vehicle can be an excellent value, offering better fit and material quality than many new, inexpensive aftermarket parts. Here’s what to look for.
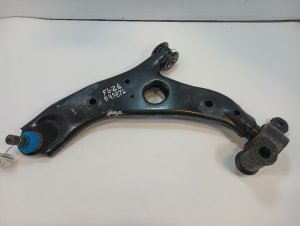
- Check the Bushings: The large rubber bushings are the most common failure point. Inspect them closely for any cracks, tearing, or separation from the metal sleeve. A healthy bushing is solid and intact; a bad one will look dry-rotted and torn.
- Inspect the Ball Joint: The ball joint is integrated into the arm. Ensure its rubber boot is not ripped, torn, or leaking grease. Squeeze the boot to feel for any excessive play or looseness in the joint underneath.
- Verify Straightness: Look down the length of the arm to ensure it is not bent or twisted. Compare it to photos of a new part if you are unsure. Any deformation means the part was likely damaged in a collision and is unusable.
- Confirm Compatibility (Especially for 2016): Due to the mid-year design change, visually matching the part is non-negotiable for 2016 models. For all years, confirm the part is for the correct side (right/passenger or left/driver).
- Mileage vs. Condition: While lower mileage is always better, the condition of the bushings and ball joint is more important. A 70,000-mile part from a vehicle driven on smooth highways may be in better shape than a 50,000-mile part from a car driven on rough city streets. Failures are commonly reported starting around 90,000 to 100,000 miles.
Cost of Replacement
Replacing a control arm involves both parts and labor costs. An alignment is also required after the job is complete, adding to the total expense.
| Item | Estimated Cost | Notes |
|---|---|---|
| New OEM Part | $245 - $355 (per side) | Price from Mazda dealers or online OEM suppliers. |
| New Aftermarket Part | $70 - $150 (per side) | Prices vary widely by brand (e.g., RockAuto, Advance Auto). Quality can be inconsistent. |
| Used OEM Part | $50 - $125 (per side) | Dependent on mileage, condition, and supplier. |
| Shop Labor | $150 - $300 (per side) | Typically 1-2 hours of labor per arm. Dealer labor rates will be higher. |
| Wheel Alignment | $100 - $200 | Mandatory after replacement to prevent tire wear and handling issues. |
A dealership repair for one side could cost between $485 and $536, while having both front arms replaced could exceed $1,700. An independent shop using quality aftermarket or used OEM parts will typically be more affordable.
Replacement Overview & Special Procedures

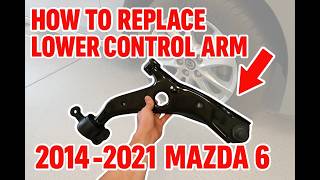
Replacing the control arm is a feasible DIY job for someone with mechanical experience and the right tools. The general process involves safely lifting and supporting the vehicle, removing the wheel, and then unbolting the three connection points of the control arm: the two inner bushing bolts and the outer ball joint pinch bolt.
Pro Tip: The bolts for the rubber bushings must be final-torqued only when the vehicle's full weight is resting on the suspension (at normal ride height). You can achieve this by lowering the car onto ramps or using a floor jack to lift the knuckle and compress the suspension before tightening. Tightening these bolts while the suspension is hanging down will twist and bind the bushings, causing them to fail very quickly.
🎬 See this step-by-step lower control arm replacement walkthrough.Key Torque Specs:
Always consult a factory service manual for the most accurate specs for your specific vehicle. However, general values are:
- Control Arm to Subframe Bolts (Front & Rear): 110 - 180 ft-lbs (sources vary, the front bolt is often higher).
- Ball Joint Pinch Bolt: ~40 ft-lbs.
- Wheel Lug Nuts: ~80 ft-lbs.
Frequently Asked Questions (FAQ)
Do I need an alignment after replacing a control arm?
Yes, absolutely. Replacing a control arm will always change the vehicle's wheel alignment. A full four-wheel alignment is mandatory to ensure the vehicle is safe to drive, handles correctly, and does not cause rapid tire wear.
Can I just replace the bushings or ball joint instead of the whole arm?
While it is technically possible to press out old bushings and press in new ones, it requires a hydraulic shop press and special tools. The ball joint is considered non-serviceable. Given the low cost of a complete used OEM or new aftermarket assembly which includes new bushings and a new ball joint, it is almost always more time and cost-effective to replace the entire control arm.
My car clunks, but the control arm looks fine. What else could it be?
A very common cause of similar clunking noises is a worn sway bar end link. Other possibilities include a bad strut mount or the loose strut-to-knuckle bolts mentioned in recall 9316D. A thorough inspection is needed to pinpoint the source of the noise.
How do I know if I have the early or late 2016 control arm?
The production cutoff date was around November 2015. However, the only certain way to guarantee fitment is to take a clear photo of your existing control arm and compare its shape, especially around the bushing and ball joint areas, with the replacement part before you buy or install it.
Helpful Videos

Technical Specifications
OEM Part Numbers: G46C-34-300 G46C-34-300K GHP9-34-300 GHP9-34-300A GHP9-34-300B GHP9-34-300C GHP9-34-300E GHP9-34-300J GHP9-34-300M GHP9-34-300N
The assembly includes a pre-installed ball joint and two pre-installed rubber bushings. The arm is typically made of stamped steel.
We Have This Part in Stock


The information in this article is provided for general reference and educational purposes only. Vehicle specifications, procedures, and part compatibility can vary by production date, trim level, and region. Always consult your vehicle's factory service manual and verify part numbers before purchasing or performing repairs. Safety-critical components such as airbags, seat belts, and braking systems should be installed by a qualified professional.
- Mazda 6:
- 🎬 Helpful Videos
- 🛍️ Shop This Part
- Symptoms of a Failing Control Arm
- Clunking or Knocking Noises
- Creaking or Squeaking Sounds
- Steering and Handling Problems
- Vibrations and Uneven Tire Wear
- Known Issues, TSBs, and Recalls
- TSB for Creaking Lower Arm Bushings
- The Critical 2016 Mid-Year Design Change
- Related Recall: Loose Front Strut Bolts
- Buying a Used 2014-2016 Mazda 6 Control Arm
- Cost of Replacement
- Replacement Overview & Special Procedures
- Key Torque Specs:
- Frequently Asked Questions (FAQ)
- 🎟️ Get 5% Off