

1965-1966 Thunderbird Lower Control Arm: Diagnosing Clunks, Wandering, and Wear
A complete guide to identifying, inspecting, and replacing the unique front lower control arms on the 1965-1966 Ford Thunderbird.
- This lower control arm (C5SZ-3079-A) fits ONLY 1965-1966 Ford Thunderbirds due to a unique suspension design.
- The most common failure symptoms are clunking noises over bumps, steering wander, and uneven tire wear.
- A high-quality used OEM arm with new bushings and a new ball joint is often a better choice than a cheap, complete aftermarket part.
- A professional wheel alignment is mandatory after replacing the control arm to prevent unsafe handling and tire damage.
Symptoms of a Failing Lower Control Arm
When a lower control arm or its components begin to fail, the signs are often hard to ignore. Because this part is so fundamental to your car's steering and suspension, problems can manifest as strange noises, poor handling, or unusual tire wear.
Noises to Listen For
- Clunking or Knocking: This is the most common symptom. You'll hear a heavy clunk or knock from the front end when driving over bumps, potholes, or even uneven driveways. This sound is typically caused by worn-out rubber bushings, which allow the metal control arm to slam against its mounting points on the frame.
- Popping or Creaking: A sharp pop or a binding, creaking sound when you turn the steering wheel, especially at low speeds, often points to a worn-out ball joint at the end of the control arm. This happens when the joint loses its lubrication and the metal-on-metal surfaces grind against each other.
Steering and Handling Issues
- Steering Wander: The car may feel like it's 'wandering' or drifting from side to side, requiring constant small corrections to the steering wheel to keep it driving straight. This indicates that the worn bushings or ball joint are allowing the wheel alignment to shift during driving.
- Pulling to One Side: A bad control arm can cause the vehicle to pull to the left or right. This is especially noticeable during braking, where the force can cause the worn arm to shift, altering the wheel's direction.
- Steering Wheel Vibration: Excessive vibrations felt in the steering wheel, particularly at higher speeds, can be caused by worn bushings that are no longer able to dampen road imperfections.
Visual Clues
- Uneven Tire Wear: A classic sign of a bad control arm is rapid or uneven tire wear, especially on the inner or outer edges of the front tires. This happens because the arm can no longer hold the wheel at the correct angle (camber), causing the tire to lean and scrub rubber off one edge.
- Damaged Bushings: A visual inspection can often confirm the problem. Look at the rubber bushings where the control arm mounts to the car's frame. If the rubber is cracked, torn, separated, or missing chunks, the bushing has failed.
Warning: A completely failed lower control arm or ball joint can cause the wheel to detach from the suspension, leading to a total loss of steering control. These symptoms should be addressed immediately.
Known Issues for the 1965-1966 Thunderbird
The front suspension on the 1965-1966 Thunderbird is a one-of-a-kind design, used only for these two model years. This makes part compatibility extremely specific.
- Fitment is Exclusive: The lower control arm, OEM part number C5SZ-3079-A, fits only the 1965 and 1966 Thunderbird. It will not fit a 1964 or 1967 model due to significant changes in suspension geometry.
- Bushing and Ball Joint Wear: Like any car of this era, the rubber bushings and ball joints are the primary failure points. Decades of exposure to heat, oil, and road stress cause the rubber to harden and disintegrate, leading to the clunks and wandering described above.
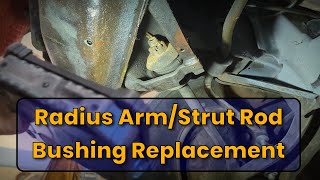
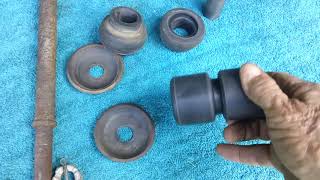
- Strut Rod Bushings: The lower control arm is stabilized by a strut rod that runs forward to a mount on the frame. The bushings on this strut rod are also a very common source of noise and play in the front suspension and should always be inspected when working on the control arms. 🎬 Watch: How to replace the strut rod bushings
- Recalls: There are no specific recalls on file with the National Highway Traffic Safety Administration (NHTSA) for the suspension control arms on the 1965-1966 Thunderbird. However, a recall (19E011000) was issued for certain aftermarket spindles sold for 1965-1966 Mustangs, which share some suspension concepts, highlighting the importance of using quality components.
Buying a Used 1965-1966 Lower Control Arm
Given the age of these vehicles, a high-quality used OEM control arm can be an excellent choice, often made from heavier gauge steel than modern aftermarket replacements. However, careful inspection is key.
What to Inspect
- Check for Bends and Cracks: Lay the arm on a flat surface to check for any bends or twists. Pay close attention to the welds and the areas around the bolt holes for any signs of stress cracks.
- Assess Rust Damage: Surface rust is normal, but avoid any arm with deep, flaky pitting or areas that are rusted through. The structural integrity is paramount.
- Assume Wear Items are Bad: When buying a used arm, assume the bushings and ball joint need to be replaced. Even if they look intact, the rubber is likely old and hardened. The value is in the bare steel arm itself.
- Verify the Ball Joint Mount: Original arms came with the ball joint riveted in place. A used arm may have had this replaced already with a bolt-in unit. Ensure the mounting holes are not damaged or enlarged.
Why a Used OEM Arm Can Be a Smart Choice
A solid, rust-free OEM control arm from a dry climate is an excellent foundation. By pressing in new, high-quality bushings and installing a new premium ball joint, you can have a component that is often superior in fit and durability to a complete, low-cost aftermarket assembly.
Rebuilding vs. Replacing the Arm
You have two main options when your control arm fails: replace the entire assembly or rebuild your existing one with new components.
Rebuilding the Arm
This involves removing the arm from the car and then replacing the individual wear components. The original ball joint must be removed by grinding off the heads of the rivets and punching them out. The old bushings must be pressed out using a hydraulic shop press or a large bench vise. New bushings are then pressed in, and a new service-style ball joint is installed using the supplied bolts.
- Pros: Can be cost-effective if you have the right tools. Allows you to choose premium-quality individual components.
- Cons: Requires special tools like a press and a ball joint separator. Can be time-consuming.
Replacing the Entire Arm
This is often the faster and easier choice for a DIY mechanic. You can purchase a new aftermarket arm that comes pre-assembled with new bushings and a ball joint, or a clean used OEM arm to which you add new components before installation.
- Pros: Much faster installation. No special press tools required.
- Cons: New aftermarket assemblies can vary in quality.
Replacement Overview & Torque Specs
Replacing the lower control arm is a job for an experienced DIYer. While the 1965-66 Thunderbird's design (with the coil spring on the upper arm) makes it safer than many cars where the spring must be compressed, proper safety procedures are still critical.
Pro Tip: The large pivot bolt holding the control arm to the frame can be difficult to remove. There may not be enough clearance to slide the bolt all the way out, requiring the mounting bracket itself to be unbolted from the frame.
🎬 See this lower control arm removal walkthroughBasic Replacement Steps
- Lift the front of the vehicle and support it securely on jack stands. Never work under a car supported only by a jack.
- Remove the front wheel.
- Disconnect the front shock absorber at its lower mount.
- Disconnect the sway bar link from the control arm.
- Disconnect the strut rod from the control arm (two bolts).
- Separate the lower ball joint from the steering knuckle. This usually requires a ball joint separator tool (a "pickle fork" can damage the parts if you intend to reuse them).
- Unbolt the main control arm pivot bolt from the frame and remove the arm.
- Installation is the reverse of removal. Do not fully tighten the main pivot bolt until the car's full weight is back on the suspension.
Important: You must get a professional wheel alignment after replacing a control arm. Failure to do so will result in poor handling and rapid tire wear.
| Fastener | Torque Specification (General Ford, verify for specific application) |
|---|---|
| Lower Ball Joint to Knuckle Nut | 83 - 112 ft-lbs |
| Lower Control Arm to Frame Pivot Nut | 197 - 241 ft-lbs (for 2003 and earlier models, use as a guideline) |
| Strut Rod to Control Arm Nuts | Typically 70-100 ft-lbs (verify with shop manual) |
Related Parts to Inspect
While you have the suspension apart, it's the perfect time to inspect other related components that often wear out at the same time:
- Upper Control Arm, Bushings, and Ball Joint
- Strut Rod Bushings
- Sway Bar End Links and Frame Bushings
- Inner and Outer Tie Rod Ends
- Shock Absorbers
- Wheel Bearings
Cost Comparison
| Part/Service | Estimated Cost |
|---|---|
| New Aftermarket Control Arm (loaded) | $100 - $200 per side |
| Used OEM Control Arm (bare) | $50 - $150 per side |
| Front End Rebuild Kit (includes bushings, ball joints, tie rods) | $500 - $700 |
| Shop Labor to Replace One Arm | $200 - $450 |
| Wheel Alignment | $100 - $150 |
Frequently Asked Questions
Do I have to replace control arms in pairs?
It is highly recommended. Suspension components wear at similar rates, so if one side has failed, the other is likely not far behind. Replacing them in pairs ensures balanced handling and saves you from paying for a second alignment down the road.
Will this control arm fit my 1964 or 1967 Thunderbird?
No. The front suspension was completely different in those years. The C5SZ-3079-A lower control arm is specific to 1965 and 1966 models only.
Is a wheel alignment really necessary after replacement?
Yes, it is absolutely critical. The control arm directly sets the wheel's alignment angles. Skipping the alignment will lead to unsafe handling and will destroy your front tires in a very short time.
Can I just replace the bushings instead of the whole arm?
Yes, you can replace just the bushings and ball joint, but it requires special tools. You will need a hydraulic press to remove the old bushings and install the new ones, and you'll have to drill out the rivets holding the original ball joint. For many people, replacing the entire arm is a more practical and time-saving repair.
Helpful Videos

Technical Specifications
OEM Part Numbers: C5SZ-3079-A C5SZ3079A
Fits 1965-1966 Ford Thunderbird only. Part is for the front lower position. Original design features riveted ball joint and pressed-in bushings.
We Have This Part in Stock


The information in this article is provided for general reference and educational purposes only. Vehicle specifications, procedures, and part compatibility can vary by production date, trim level, and region. Always consult your vehicle's factory service manual and verify part numbers before purchasing or performing repairs. Safety-critical components such as airbags, seat belts, and braking systems should be installed by a qualified professional.
- 🎬 Helpful Videos
- 🛍️ Shop This Part
- Symptoms of a Failing Lower Control Arm
- Noises to Listen For
- Steering and Handling Issues
- Visual Clues
- Known Issues for the 1965-1966 Thunderbird
- Buying a Used 1965-1966 Lower Control Arm
- What to Inspect
- Why a Used OEM Arm Can Be a Smart Choice
- Rebuilding vs. Replacing the Arm
- Rebuilding the Arm
- Replacing the Entire Arm
- Replacement Overview & Torque Specs
- Basic Replacement Steps
- Related Parts to Inspect
- Cost Comparison
- Frequently Asked Questions
- 🎟️ Get 5% Off