

2009-2016 Toyota Venza Sun Visor: Why It Sags and How to Replace It
This guide covers the common failure points, color matching, and step-by-step replacement for the 2009-2016 Venza sun visor.
- The primary failure is an internal pivot mechanism that causes the visor to droop; this cannot be fixed by tightening external screws.
- You must match the replacement visor by color (Gray or Ivory) and by your vehicle's sunroof configuration (with or without).
- Find your interior color code on the driver's door jamb sticker to ensure a perfect match.
- Replacement is a very easy DIY task that takes less than 15 minutes with only a screwdriver.
Known Issues and Symptoms of Failure

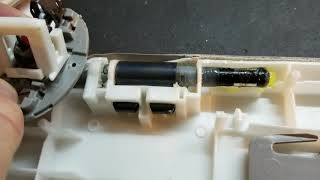
The most common problem with the 2009-2016 Toyota Venza sun visor is a failure of the internal pivot mechanism. Over time and with repeated use, the plastic and metal components inside the visor wear out, losing the friction needed to hold it in place. This leads to the visor sagging, drooping, or falling down completely, often obstructing the driver's view.
- Visor Won't Stay Up: The most obvious symptom is a visor that droops or falls down on its own, especially when driving over bumps.
- Loose or Floppy Feel: The visor may feel loose at the pivot point and lack the tension it once had.
- Vanity Light Malfunction: While less common, the electrical connection for the vanity mirror light can fail, causing the light to flicker or not turn on at all.
- Cracked Mounting Point: In some cases, the plastic around the mounting base can become brittle and crack, though this is less frequent than internal failure.
Pro Tip: Attempts to repair a drooping visor by tightening the external mounting screws will not work. The failure is internal to the visor assembly itself, and replacement is the only reliable solution.
🎬 Watch: Why these internal mechanisms can't be repaired.Buying a Used Sun Visor

A used OEM sun visor is an excellent, cost-effective alternative to a new part. Since the failure is mechanical, a used visor in good condition from a lower-mileage vehicle can provide years of service. Aftermarket options are available, but they may not perfectly match the interior color and texture of your Venza.
What to Inspect:
- Pivot Tension: Ask the seller to confirm that the visor's pivot is stiff and holds its position firmly. It should not feel loose or floppy.
- Physical Condition: Check photos for any cracks in the plastic housing, especially around the mounting arm. Ensure the fabric is not torn or stained.
- Correct Color and Options: Verify the color (Gray or Ivory/Beige) and confirm it is for the correct side (driver or passenger) and for a vehicle with a sunroof, if applicable.
Compatibility: Color and Feature Verification

Matching the correct sun visor to your Venza is critical for a proper fit and appearance. Pay close attention to the color and sunroof option.
1. Interior Color Code (Gray vs. Ivory)
The Venza was available with two primary interior colors for the sun visors: Gray and Ivory (often called Beige or Tan). To ensure a perfect match, find your vehicle's interior trim code on the manufacturer's sticker located on the driver's side door jamb. The code will be labeled as 'C/TR' (Color/Trim). The last two characters of the trim code indicate the interior color.
- Gray Interior: Trim codes ending in B0 or B1. Part numbers often contain 'B0' or 'B1', such as 74320-0T022-B1.
- Ivory/Beige Interior: Trim codes ending in A0 or A1. Part numbers often contain 'A0' or 'A1', such as 74320-0T022-A1.
2. Sunroof vs. Non-Sunroof Models
There are different part numbers for Venzas with and without a sunroof. While they may appear similar, there can be subtle differences in the mounting or shape. Always confirm that the replacement visor is specified for your vehicle's sunroof configuration.
Step-by-Step Replacement Guide

Replacing the sun visor on a 2009-2016 Venza is a simple DIY job that typically takes less than 15 minutes and requires only basic tools.
- Pry Open the Cover: Use a small flathead screwdriver or a plastic trim tool to gently pry open the plastic cover at the base of the sun visor mount. This will expose the mounting screws.
- Remove the Screws: Using a Phillips head screwdriver, remove the two screws holding the visor to the headliner. Hold the visor with one hand to prevent it from falling.
- Disconnect Electrical Connector: If your visor has a vanity light, carefully pull the visor down to expose the small electrical wire. Depress the tab on the connector and unplug it.
- Install the New Visor: Plug in the electrical connector on the new visor. Align the mounting base with the screw holes in the headliner and install the two screws. Do not overtighten.
- Close the Cover: Snap the plastic cover back into place over the mounting base. Test the visor's movement and the vanity light to ensure everything is working correctly. 🎬 Watch this quick and easy replacement walkthrough.
Recalls and Technical Service Bulletins (TSBs)
There are no specific recalls or TSBs related to the sun visor itself. However, a significant safety recall (NHTSA Campaign Number: 21V225000) was issued for 2009-2015 Venza models concerning the driver-side door wire harness. A wire in this harness could fracture, potentially disabling the driver-side airbag and curtain shield airbag. While unrelated to the visor's function, it is a critical safety issue for this vehicle generation that owners should be aware of.
Cost Comparison
| Part Type | Estimated Cost |
|---|---|
| New OEM | $95 - $150 |
| New Aftermarket | $25 - $60 |
| Used OEM | $50 - $100 |
| Shop Labor | $40 - $80 |
Frequently Asked Questions
Can I repair my drooping Venza sun visor instead of replacing it?
Repairing the internal mechanism is generally not feasible. The failure occurs inside a sealed plastic assembly that is difficult to open without causing damage. Replacement is the most effective and permanent solution.
How do I find my interior color code?
Look for the manufacturer's sticker on the driver's side door jamb. You will see 'C/TR' followed by the exterior paint code and the interior trim code. The last two characters of the trim code identify your interior color.
Is the driver's side visor the same as the passenger's side?
No, they are not interchangeable. Sun visors are side-specific parts due to the mirror placement and mounting orientation. Ensure you order the correct part for the side you are replacing (Left for Driver, Right for Passenger).
Do all 2009-2016 Venza sun visors have a light?
Yes, all Venza models in this generation came equipped with an illuminated vanity mirror on both the driver and passenger sun visors.
Helpful Videos
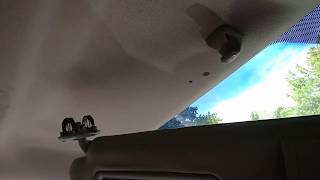
Technical Specifications
OEM Part Numbers: 74320-0T020-B1 74320-0T021-B1 74320-0T022-B1 74320-73010-B0 74320-0T022-A1 74320-73010-A0 74320-0T020-A1 74320-0T021-A1 74310-0T022-B1 74310-73020-A0
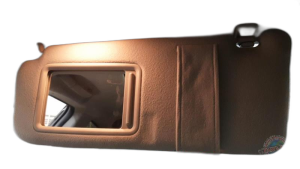
Equipped with illuminated vanity mirror. Available in Gray (B0/B1 suffix) and Ivory (A0/A1 suffix). Specific part numbers for models with and without sunroof.
We Have This Part in Stock



The information in this article is provided for general reference and educational purposes only. Vehicle specifications, procedures, and part compatibility can vary by production date, trim level, and region. Always consult your vehicle's factory service manual and verify part numbers before purchasing or performing repairs. Safety-critical components such as airbags, seat belts, and braking systems should be installed by a qualified professional.
- Toyota Venza:
- 🎬 Helpful Videos
- 🛍️ Shop This Part
- Known Issues and Symptoms of Failure
- Buying a Used Sun Visor
- What to Inspect:
- Compatibility: Color and Feature Verification
- 1. Interior Color Code (Gray vs. Ivory)
- 2. Sunroof vs. Non-Sunroof Models
- Step-by-Step Replacement Guide
- Recalls and Technical Service Bulletins (TSBs)
- Cost Comparison
- Frequently Asked Questions
- 🎟️ Get 5% Off