

2000 Toyota RAV4 Sun Visor: Fixing Droop and Matching Interior Colors
Your guide to diagnosing common sun visor failures, finding the correct color-matched replacement, and a simple DIY installation for your first-generation RAV4.
- The most common failure is drooping or sagging, which requires full replacement as repair is not practical.
- Fitment is specific to 1996-2000 Toyota RAV4 models; visors from other generations will not fit.
- You must verify your car's interior trim code on the driver's door jamb sticker to ensure an exact color match, as multiple shades of gray exist.
- Replacement is a simple DIY task requiring only a screwdriver and about 10-15 minutes.
Symptoms of a Failing Sun Visor

The most common problem with the sun visor in a 2000 RAV4 is age-related wear and tear on the internal pivot mechanism. Here’s what to look for:
- Drooping or Sagging: The visor won't stay in its fully raised position, slowly falling down or hanging a few inches from the headliner. This is the most frequent failure and happens because the internal spring and friction components have worn out.
- Won't Stay in Place: When you flip the visor down, it doesn't hold its position and falls completely, obstructing your view.
- Broken Mounting Point: The plastic at the pivot base where the screws attach can become brittle and crack, causing the entire assembly to become loose.
- Broken Mirror or Cover: The vanity mirror or its sliding cover can crack or break from impact or age.
- Loose Outer Clip: The small, stationary clip that holds the end of the visor near the rearview mirror can break, leaving the visor unsecured on one side.
Known Issues, TSBs, and Recalls
For a vehicle of this age, most issues are related to simple wear rather than manufacturing defects. There are no recalls or specific Technical Service Bulletins (TSBs) from Toyota for sun visor failure on the 2000 RAV4. However, Toyota has issued TSBs for other models with similar drooping issues, confirming it's a known problem across their lineup. One TSB, T-SB-0093-09, provides a generic revised procedure for removing and installing sun visors to prevent damage to the mounting clips and headliner, which is useful for this repair. Another bulletin, T-SB-0055-13, details a repair for when the sheet metal mounting area in the roof gets damaged from improper visor removal, though this is less common.
Pro Tip: While some owners attempt DIY fixes with velcro or magnets, these are temporary solutions that don't restore full function. 🎬 Watch this guide on fixing a saggy Toyota sun visor Given the low cost of used or aftermarket replacements, replacing the entire unit is the most effective and lasting repair.
Buying a Used 2000 RAV4 Sun Visor: What to Look For

A used OEM sun visor is an excellent choice, as it guarantees a perfect match for color, texture, and fit. Here’s how to ensure you get the right part.
1. Verify Vehicle Fitment
The sun visors for the 2000 RAV4 are specific to the first generation (XA10). They will fit all 1996, 1997, 1998, 1999, and 2000 Toyota RAV4 models. Parts from a second-generation RAV4 (2001-2005) will not fit.
2. The Critical Color Match: Finding Your Trim Code
Toyota offered different shades of gray for the 2000 RAV4 interior. The part number suffixes, such as -B0 and -B1, denote these specific colors. To avoid a mismatch, you must find your vehicle's interior trim code.
- Location: The code is printed on the vehicle identification sticker located on the driver's side door jamb.
- How to Read It: Look for the letters "C/TR". The 'C' stands for the exterior color, and the 'TR' stands for the interior trim. The code that follows 'TR' is your interior color code.
When purchasing a used visor, provide this trim code to the seller to guarantee a perfect match. The part numbers listed in this guide often end in these color codes.
3. Physical Inspection Checklist
When inspecting a used sun visor, check the following:
- Pivot Tension: Hold the visor by its base and move it up and down. It should feel firm and hold any position without assistance. Avoid any that feel loose or floppy.
- Mounting Base: Inspect the plastic mounting base for any cracks, especially around the screw holes.
- Mirror and Cover: If equipped, check that the vanity mirror is not cracked and that its cover slides or flips open and closed properly.
- Fabric/Vinyl Condition: Check for stains, tears, or peeling on the visor's surface.
Cost of Replacement

Replacing a sun visor is an inexpensive repair, especially when choosing a used OEM or aftermarket part.
| Part Type | Estimated Cost |
|---|---|
| New OEM | $75 - $120 |
| New Aftermarket | $20 - $45 |
| Used OEM | $30 - $50 |
| Shop Labor | $25 - $50 |
Step-by-Step Replacement Guide

Replacing the sun visor is a very simple DIY job that takes less than 15 minutes.
Tools Needed:
- Phillips Head Screwdriver
- Small Flathead Screwdriver or Trim Removal Tool
Procedure:
- Expose the Screws: The mounting base is covered by a plastic trim piece. Use a small flathead screwdriver to gently pry this cover off. It should pop off, revealing two Phillips head screws.
- Unscrew the Old Visor: While holding the sun visor to prevent it from falling, use the Phillips screwdriver to remove the two screws.
- Remove the Visor: Once the screws are out, the visor assembly will come free from the headliner. The 2000 RAV4 sun visors do not typically have electrical connections for a vanity light, making removal simple.
- Install the New Visor: Position the new visor's mounting base against the headliner, aligning it with the screw holes.
- Secure the Screws: Hand-thread the two screws to start them, then tighten them snugly with the screwdriver. Do not overtighten, as this can crack the plastic base.
- Replace the Cover: Snap the plastic trim cover back onto the mounting base. 🎬 Watch how quick it is to replace a RAV4 sun visor Test the visor to ensure it moves correctly and holds its position.
OEM Part Numbers
Part numbers for Toyota are typically structured as `XXXXX-XXXXX-ZZ`, where `ZZ` is the two-character color code. The prefix `74310` generally denotes the right (passenger) side, and `74320` denotes the left (driver) side. The following are known OEM part numbers for the 1996-2000 RAV4, but always verify fitment with your vehicle's VIN and interior trim code.
- Right Side (Passenger): 74310-42170-B0, 74310-42190-B0, 74310-42240-B0, 74310-42240-B1
- Left Side (Driver): 74320-42090-B0, 74320-42120-B0, 74320-42170-B0, 74320-42210-B0, 74320-42260-B1, 74320-42270-B0, 74320-42270-B1, 74320-42340-B0, 74320-42420-B0
Frequently Asked Questions (FAQ)
Can I just fix my drooping sun visor instead of replacing it?
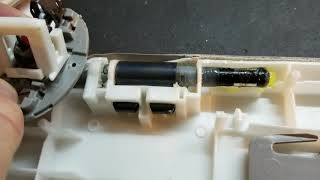
While some people use velcro strips or clips as a temporary fix, repairing the internal mechanism is not practical. 🎬 Watch why attempting to repair a Toyota sun visor usually fails The assembly is typically sealed, and getting it apart without causing damage is difficult. Replacement is the only reliable, long-term solution.
Does the 2000 RAV4 sun visor have a lighted mirror?
No, the factory sun visors for this generation of RAV4 typically do not have integrated vanity lights. This simplifies replacement as there are no electrical connectors to worry about.
Will a sun visor from a different Toyota model fit my RAV4?
No, sun visors are designed with specific mounting points and shapes for each vehicle model and generation. You must use a visor intended for a 1996-2000 Toyota RAV4 for a proper fit.
Is there a difference between the driver and passenger side visors?
Yes, they are mirror images of each other and are not interchangeable. Make sure you order the correct side (Left/Driver or Right/Passenger) for your needs. Part numbers starting with 74320 are for the left side, and 74310 are for the right side.
Helpful Videos
Technical Specifications
OEM Part Numbers: 74310-42170-B0 74310-42190-B0 74310-42240-B0 74310-42240-B1 74320-42090-B0 74320-42120-B0 74320-42170-B0 74320-42210-B0 74320-42260-B1 74320-42270-B0 74320-42270-B1 74320-42340-B0 74320-42420-B0
Material: Vinyl over foam core. Mounting: Two-screw pivot base. Features: Integrated non-lit vanity mirror.

The information in this article is provided for general reference and educational purposes only. Vehicle specifications, procedures, and part compatibility can vary by production date, trim level, and region. Always consult your vehicle's factory service manual and verify part numbers before purchasing or performing repairs. Safety-critical components such as airbags, seat belts, and braking systems should be installed by a qualified professional.
- Toyota RAV4:
- 🎬 Helpful Videos
- Symptoms of a Failing Sun Visor
- Known Issues, TSBs, and Recalls
- Buying a Used 2000 RAV4 Sun Visor: What to Look For
- 1. Verify Vehicle Fitment
- 2. The Critical Color Match: Finding Your Trim Code
- 3. Physical Inspection Checklist
- Cost of Replacement
- Step-by-Step Replacement Guide
- OEM Part Numbers
- Frequently Asked Questions (FAQ)
- 🎟️ Get 5% Off