

2021-2025 Model 3 & Model Y Sun Visor: Rattles, Clips, and Replacement Guide
This guide covers common sun visor issues like rattles and broken clips on the 2021-2025 Tesla Model 3 and 2021-2024 Tesla Model Y, including how to choose the correct magnetic-style replacement.
- The most critical compatibility check is ensuring the replacement visor uses the magnetic clip system, found on 2021 and newer Model 3/Y vehicles.
- A common rattling noise can often be fixed by simply tightening the single T25 Torx screw at the visor's mounting point.
- Replacement is a very simple DIY task, requiring only a T25 driver and a pry tool, and can be completed in under 15 minutes.
- The magnetic clip in the headliner is a separate, replaceable part if that is the only component that has failed.
Symptoms of a Failing Sun Visor


Sun visor problems on the 2021-2025 Tesla Model 3 and 2021-2024 Tesla Model Y are typically straightforward to identify. While not a critical component, a failing visor can be a persistent annoyance.
- Rattling or Buzzing Noises: The most common complaint is a rattle or vibration coming from the visor area, especially when driving. This is often caused by a loose mounting screw at the visor's pivot point.
- Drooping or Sagging: The visor may not stay in its fully stowed position against the headliner, drooping down and obstructing your view. This can be due to a weak internal spring or a problem with the magnetic clip.
- Broken Mounting Point: The plastic base where the visor mounts to the roof can become brittle and break, causing the entire visor to hang loose.
- Broken Clip: The separate magnetic clip in the headliner that holds the end of the visor can break or pull out.
- Vanity Mirror Light Failure: The light around the mirror may flicker or fail to turn on when the mirror cover is opened. This indicates a problem with the electrical connection or the light itself.
- Cracked Mirror: The vanity mirror glass can crack from impact, such as the seat headrest hitting it when the seat is moved all the way forward.
Known Issues, Recalls, and TSBs

While there are no major recalls specifically for sun visor failure on the 2021-2024 models, older Model 3s had some related issues that are worth noting.
- NHTSA Recall 19V-719: This recall affected a small number of 2019 Model 3 vehicles where the driver-side sun visor was missing the required airbag safety warning labels. The fix was to replace the entire sun visor with the correct, labeled part.
- Rattling TSB (Model X): While for a different model, Tesla previously issued a service bulletin for rattling sun visors on the Model X, acknowledging that the magnetic clip design could cause noise. The solution was to replace the visors with an updated design. This indicates a history of addressing similar issues.
- Broken Clips (Pre-2021 Models): The earlier hook-style clips on 2017-2020 Model 3s were known to be brittle and break easily. This prompted the change to the more robust magnetic system in 2021 and newer vehicles.
Compatibility Warning: The sun visors covered in this guide are for 2021 and newer Model 3 and Model Y vehicles equipped with a magnetic clip system. They are not interchangeable with the 2017-2020 models that use a physical hook-style clip. Attempting to install the wrong type will result in an improper fit.
Buying a Used Sun Visor
A used OEM sun visor is an excellent, cost-effective replacement. Since these parts don't experience mechanical wear, a visor from a low-mileage vehicle is often as good as new. Here’s what to check:
- Verify the Clip Type: This is the most critical step. Ensure the visor you are buying is from a 2021 or newer Model 3 or Model Y. It should not have a hole for a physical hook; it is designed to meet a magnet in the headliner.
- Check for Rattles: Shake the visor gently. There should be no internal rattling sounds.
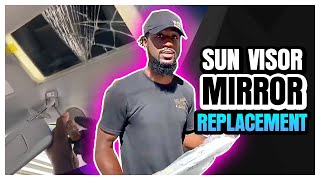
- Inspect the Fabric: Check for stains, tears, or sagging in the fabric. Match the color (typically black or white) to your vehicle's interior. Tesla does not provide interior color codes on the vehicle's data tag, so visual matching is necessary. 🎬 Watch: Step-by-step guide to replacing a cracked vanity mirror.
- Test the Pivot and Hinge: The main pivot should have firm resistance and hold its position. The hinge that allows the visor to swing to the side window should also move smoothly without being loose.
- Examine the Electrical Connector: Look at the electrical pigtail and connector at the mounting base. Ensure there are no bent pins or damage to the wiring.
- Confirm Features: If your vehicle has HomeLink for garage door opening, ensure the replacement visor also has the HomeLink buttons. Not all visors include this feature.
Cost of Replacement
Replacing a sun visor is relatively inexpensive, especially if you do the work yourself.
| Part/Service | Estimated Cost |
|---|---|
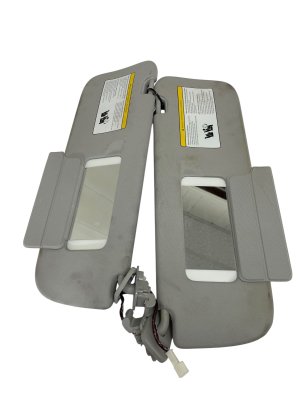
| New OEM Sun Visor (Single) | $125 - $175 |
| New Aftermarket Sun Visor | $70 - $120 (Quality and fit may vary) |
| Used OEM Sun Visor (Single) | $50 - $100 |
| Shop Labor | $50 - $100 (Typically less than 1 hour of labor) |
Prices are estimates and may vary based on supplier, location, and vehicle configuration. A new visor was quoted at around $125 from Tesla.
Step-by-Step Replacement Guide
Replacing the sun visor is a simple DIY task that usually takes less than 15 minutes. The procedure is nearly identical for the Model 3 and Model Y.
Tools Needed:
- Torx T25 driver
- Small pry tool or flathead screwdriver
Procedure:
- Remove the Bracket Cover: Use a pry tool to carefully release the clips holding the plastic cover over the visor's mounting base. There are typically four clips. The cover will hinge open or come off completely.
- Remove the Mounting Screw: With the cover off, you will see a single Torx T25 screw holding the visor assembly to the roof structure. Remove this screw.
- Disconnect the Electrical Connector: Gently pull the visor down from the headliner. You will see a small electrical wire. Press the tab on the connector and pull it apart to disconnect the power for the vanity light.
- Install the New Visor: Connect the electrical plug on the new visor, making sure it clicks securely.
- Mount the Visor: Position the new visor's base into the recess in the headliner. Insert and tighten the T25 screw. The official torque spec is 3.5 Nm (2.6 lb-ft), which is just snug. Do not overtighten, as you could strip the threads or crack the plastic base.
- Re-install the Cover: Snap the plastic bracket cover back into place.
- Test Functionality: Test the visor's movement, the magnetic clip, and the vanity mirror light to ensure everything is working correctly.
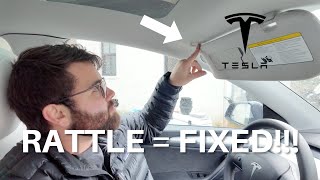
Pro Tip: If your only issue is a rattle, try tightening the T25 mounting screw before buying a new part. Often, this screw can loosen slightly over time, causing a buzzing sound.
🎬 Watch: This 2-minute DIY fix stops sun visor rattles fast.Frequently Asked Questions (FAQ)
Can I replace just the broken clip instead of the whole visor?
Yes. The magnetic clip in the headliner is a separate part and can be replaced independently. It is held in by clips and can be pried out with a non-marring tool. 🎬 See how to replace a broken visor clip or hook. The part number for the magnetic clip base is often cited as 1533088-00-D or a similar revision.
Will a sun visor from a Model 3 fit a Model Y?
Yes, for the years specified (2021+), the sun visors are shared between the Model 3 and Model Y as they are built on the same platform and share many interior components. Always verify the part number and magnetic clip design before purchasing.
My visor light doesn't work. Is it a fuse?
It's unlikely to be a fuse, as other interior lights would also be affected. The problem is almost always a bad connection at the visor's electrical plug, a broken wire in the visor's hinge, or a failed LED in the mirror assembly itself. The first step is to reseat the electrical connector during reinstallation.
What is the difference between a regular visor and a HomeLink visor?
A HomeLink visor has integrated buttons that can be programmed to operate garage doors, gates, and other radio-frequency (RF) devices. If your current visor has these buttons, you must get a HomeLink-equipped replacement for that functionality to continue working.
Helpful Videos


Technical Specifications
OEM Part Numbers: 1088740-01-I 1103084-00-F 1490405-13-D 1490406-01-B 1490406-13-D 1533088-00-D
Mounting Screw Torque: 3.5 Nm (2.6 lb-ft) Mounting Screw Type: Torx T25
We Have This Part in Stock



The information in this article is provided for general reference and educational purposes only. Vehicle specifications, procedures, and part compatibility can vary by production date, trim level, and region. Always consult your vehicle's factory service manual and verify part numbers before purchasing or performing repairs. Safety-critical components such as airbags, seat belts, and braking systems should be installed by a qualified professional.
- TESLA MODEL 3:
- TESLA MODEL Y: