

Tesla Model 3 & Y Sun Visor Guide: Magnetic vs. Hook Clips and Rattle Fixes (2017-2025)
This guide decodes the critical differences between sun visor types for the Tesla Model 3 and Model Y, helping you get the right part and fix common issues like rattles.
- The most critical factor when buying is identifying your car's visor clip: early models use a physical hook, while later models (approx. 2021+) use a magnetic system. They are not interchangeable.
- The 2024+ Tesla Model 3 'Highland' uses a completely different sun visor that is not compatible with any earlier Model 3 or Model Y.
- A rattling noise can often be fixed for free by simply tightening the T25 Torx screw at the visor's pivot point.
- Replacement is a very easy DIY job, requiring only a pry tool and a T25 Torx driver, and can be completed in under 15 minutes.
Key Compatibility Differences: 2017-2025

When replacing a sun visor on a 2017-2025 Tesla Model 3 or a 2020-2024 Tesla Model Y, correctly identifying the clip style is the most important step. Using the wrong style will result in a visor that cannot be secured against the headliner.
Early Models (Hook-Style Clip): Approx. 2017 - Mid-2020
The first generation of Model 3 and early Model Y vehicles use a traditional sun visor system with a physical hook clip mounted to the headliner. The sun visor has a corresponding loop or receptacle that snaps into this hook. These visors are not interchangeable with the later magnetic style, as the headliner lacks the necessary metal plate for the magnet to attach to.
Later Models (Magnetic Clip): Approx. Mid-2020 - 2023
Warning: These later-style visors use a magnetic clip to attach to the headliner. They will only fit vehicles originally equipped with the magnetic clip system. They are not compatible with earlier models that use a physical hook-style clip.
Starting around the 2020/2021 model year, Tesla transitioned to a sun visor that uses a powerful magnet embedded in the visor itself. This magnet attaches to a metal plate located within the headliner, providing a clean, clip-free look. Aftermarket replacement clips are available for the earlier hook style, which are known to break.
Model 3 'Highland' (2024+)
The updated Tesla Model 3, often called 'Highland', introduced in 2024, features a redesigned interior and uses a different sun visor. These visors are not backward-compatible with 2017-2023 Model 3 or any Model Y vehicles. Part numbers specific to the Highland, such as 1490405-13-D, confirm this change.
Pro Tip: Before ordering, visually inspect your vehicle. Look at where the tip of the sun visor meets the headliner. If you see a plastic clip, you have the hook style. If you see nothing but headliner fabric, you have the magnetic style. This is the only way to guarantee compatibility.
Symptoms of Failure

Sun visor issues on the Model 3 and Y are common but usually simple to diagnose.
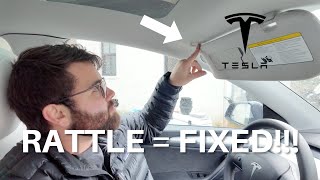
- Rattling Noise: A buzzing or rattling sound coming from the headliner is often the most reported issue. This is typically caused by the main T25 Torx screw at the visor's pivot point becoming loose. Simply tightening this screw often resolves the problem. 🎬 Watch: This 2-minute DIY fix stops sun visor rattles fast.
- Drooping or Sagging Visor: A visor that will not stay in the stowed position and constantly falls down has a worn-out pivot mechanism. The entire visor assembly must be replaced.
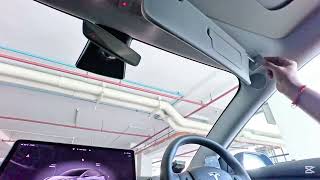
- Broken Headliner Clip: For models with the hook-style clip, the clip itself can become brittle and break, leaving the visor unable to be secured. Aftermarket replacement clips are widely available. 🎬 Watch: How to replace a broken hook-style visor clip.
- Vanity Mirror Light Failure: If the light in the mirror does not turn on, the issue could be the bulb, the switch activated by the mirror cover, or the electrical connector in the headliner.
- Detached Mirror: On some newer models, owners have reported the vanity mirror glass becoming unglued from the visor assembly, especially in high heat. This is typically a warranty claim on newer vehicles.
Buying a Used Sun Visor: What to Look For

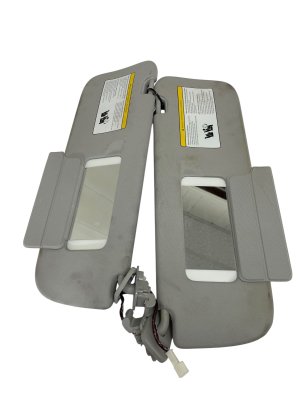
A used OEM sun visor is an excellent, cost-effective option, as aftermarket choices are limited and may not perfectly match the interior color and texture. Here’s what to inspect:
- Confirm Clip Type: This is the most critical step. Get a clear photo of the visor you are buying and compare it to your existing one to ensure it's the correct magnetic or hook style.
- Check the Pivot Hinge: The pivot where the visor mounts to the roof should be stiff and hold its position. Ask the seller to confirm that it doesn't droop. Used parts sellers often test for this.
- Inspect Fabric and Color: Verify the color (typically gray or black) matches your interior. Be aware that sun exposure can cause slight fading, so a used part may not be a perfect match to a pristine interior. Check for stains, tears, or sagging fabric.
- Test the Mirror: Ensure the mirror glass is not cracked and that the cover opens and closes properly. The cover's hinge is what activates the light, so its movement is important.
- Electrical Connector: Make sure the electrical pigtail and connector are intact with no cut or frayed wires.
Sun Visor Replacement Guide

Replacing the sun visor on a Model 3 or Model Y is a simple DIY task that typically takes less than 15 minutes.
Tools Needed:
- Plastic Pry Tool
- T25 Torx Driver
- Torque Wrench (optional, for precise installation)
Step-by-Step Instructions:
- Using a plastic pry tool, carefully pop off the plastic cover at the base of the sun visor pivot point where it meets the headliner. There are typically four small clips holding it on.
- With the cover removed, you will see a single T25 Torx screw. Remove this screw.
- Gently pull the visor down from the headliner. It will remain attached by a small electrical wire.
- Disconnect the electrical connector for the vanity light. There is a small tab you must press to release the connector.
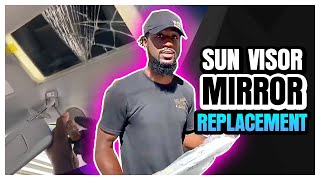
- Installation is the reverse of removal. Connect the new visor's electrical plug, insert the base into the headliner, and tighten the T25 screw. The official torque specification is 3.5 Nm (2.6 lb-ft). 🎬 See this step-by-step walkthrough of the full replacement process.
- Snap the plastic cover back into place.
Caution: When installing the new visor, ensure the electrical harness is routed correctly and not pinched, which could cause damage during installation.
Recalls and Technical Service Bulletins (TSBs)
As of early 2026, there are no official recalls or Technical Service Bulletins (TSBs) specifically for the sun visors on the Tesla Model 3 or Model Y. However, Tesla issued a TSB for the Model X (SB-19-15-001) to address a rattle from the magnetic clip, which was resolved with an updated part. This indicates a history of refining visor designs to improve fit and reduce noise.
Cost of Replacement
| Part Type | Estimated Cost |
|---|---|
| New OEM | $125 - $250 |
| New Aftermarket | $50 - $100 |
| Used OEM | $45 - $90 |
| Shop Labor | $50 - $125 |
OEM Part Numbers
A variety of part numbers have been used for these visors over the years. Due to frequent revisions, visual confirmation of the clip style is more reliable than matching part numbers. However, some known numbers include:
- 1088740-01-I (Early Hook Style)
- 1103084-00-F (Model Y)
- 1490405-01-B (Common Magnetic Style for Model 3/Y)
- 1490405-13-D (Model 3 'Highland')
- 1490406-01-B (Passenger Side)
Frequently Asked Questions (FAQ)
Can I upgrade my older hook-style visors to the newer magnetic ones?
No, this is not a direct swap. The magnetic visors require a metal plate inside the headliner that older models do not have. Upgrading would require significant and costly modification to the headliner.
My visor is rattling. Do I need to replace it?
Not usually. A rattle is most often caused by a loose T25 Torx screw at the pivot mount. Try removing the plastic cover and tightening this screw before considering a full replacement.
Is the sun visor the same for the driver and passenger side?
No, they are not interchangeable. Sun visors are side-specific parts due to the placement of the pivot and clip. They are sold as Left (driver) and Right (passenger) side versions.
What does the electrical connector on the sun visor do?
The electrical connector powers the light for the vanity mirror. If this is not connected, the visor will function mechanically, but the light will not turn on when you open the mirror cover.
Helpful Videos

Technical Specifications
OEM Part Numbers: 1088740-01-I 1103084-00-F 1490405-00-F 1490405-01-A 1490405-01-B 1490405-01-C 1490405-13-D 1490406-01-B 1490406-13-D 1490406-30-D 1533088-00-D
Mounting Screw: T25 Torx. Torque Specification: 3.5 Nm (2.6 lb-ft).
We Have This Part in Stock



The information in this article is provided for general reference and educational purposes only. Vehicle specifications, procedures, and part compatibility can vary by production date, trim level, and region. Always consult your vehicle's factory service manual and verify part numbers before purchasing or performing repairs. Safety-critical components such as airbags, seat belts, and braking systems should be installed by a qualified professional.
- TESLA MODEL 3:
- TESLA MODEL Y:
- 🎬 Helpful Videos
- 🛍️ Shop This Part
- Key Compatibility Differences: 2017-2025
- Early Models (Hook-Style Clip): Approx. 2017 - Mid-2020
- Later Models (Magnetic Clip): Approx. Mid-2020 - 2023
- Model 3 'Highland' (2024+)
- Symptoms of Failure
- Buying a Used Sun Visor: What to Look For
- Sun Visor Replacement Guide
- Recalls and Technical Service Bulletins (TSBs)
- Cost of Replacement
- OEM Part Numbers
- Frequently Asked Questions (FAQ)
- 🎟️ Get 5% Off