

2011 Nissan LEAF Sun Visor: Fixing Drooping, Light Issues, and Replacement
This guide covers the common problems with the 2011 Nissan LEAF sun visor, including how to choose the right used part and perform a simple DIY replacement.
- The most common failure is a drooping visor that won't stay up; the only permanent fix is to replace the entire unit.
- Verify if your LEAF has a lighted or non-lighted visor before buying a replacement, as the wiring is different.
- Replacement is a very easy DIY job, requiring only a screwdriver and about 15 minutes.
- Used OEM visors are an affordable and readily available option, costing significantly less than new dealer parts.
Symptoms of a Failing Sun Visor

Sun visor issues on the 2011 Nissan LEAF are common and usually easy to spot. While not critical to the vehicle's operation, a failing visor can be a daily annoyance and even a safety hazard if it obstructs your view.
- Drooping or Not Staying Up: 🎬 See how to fix a loose sun visor mechanism This is the most frequent complaint. The internal friction mechanism that holds the visor in place wears out, causing the visor to fall down on its own, especially when hitting a bump. This happens because the plastic components inside the pivot wear down or break over time.
- Vanity Light Failure: If your LEAF has lighted mirrors, the light may stop working. This can be due to a burnt-out bulb, a faulty switch in the mirror cover mechanism, or a problem with the wiring that runs through the visor arm.
- Broken or Cracked Mounting Point: The plastic base where the visor mounts to the roof can become brittle and crack, causing the entire assembly to become loose or detach.
- Inability to Unclip or Swing to the Side: The clip that holds the outer end of the visor to the headliner can break, preventing the visor from being secured or, conversely, making it difficult to release and swing to the side window.
Known Issues, Recalls, and TSBs for 2011 Nissan LEAF
As of mid-2024, there are no specific recalls or Technical Service Bulletins (TSBs) from Nissan or the NHTSA that directly address sun visor failures on the 2011 LEAF. However, drooping sun visors are a widely known issue across many Nissan models of this era, often attributed to a plastic clip or arm inside the visor that deteriorates.
A common complaint from owners of early LEAFs is that the visors are too small and lack a sliding extension feature, providing inadequate coverage for the side window. While some later models introduced a small plastic extender, the 2011 models do not have this feature.
Warning: A drooping sun visor can be a safety hazard. If it falls unexpectedly, it can obstruct your view of the road. It's recommended to either secure it in the 'up' position or replace it promptly.
Buying a Used 2011 Nissan LEAF Sun Visor

Buying a used OEM sun visor is often the most cost-effective solution. Since aftermarket options are rare and may not match the interior perfectly, a quality recycled part is a smart choice. Here’s what to look for.
Step 1: Identify Your Visor Type (Lighted vs. Non-Lighted)
The most critical compatibility check is for the vanity mirror light. The 2011 LEAF was available in SV and SL trims, which typically included lighted mirrors. Base models may have non-illuminated visors. A visor with a light will have a wiring harness and connector that a non-lighted version lacks. Inspect your current visor to see if it has a mirror with a light and a wire running from the mounting point into the headliner. You must match this feature for a plug-and-play replacement.
Step 2: Verify Interior Color
The 2011 Nissan LEAF was offered with one primary interior color: Light Gray. The visors are typically a matching gray vinyl material. While color matching is usually straightforward for this model, it's always wise to compare the color of the potential replacement part to your vehicle's headliner to ensure a good match.
Step 3: Physical Inspection Checklist
When inspecting a used sun visor, check the following:
- Test the Pivot Tension: Hold the visor by its mounting base and move the visor panel up and down. It should move smoothly but offer enough resistance to hold its position at any angle. If it feels loose or drops on its own, it has the same drooping problem you're trying to fix.
- Inspect the Mounting Base: Check the plastic mounting area for any cracks or stress marks, especially around the screw holes.
- Check the Mirror and Cover: Open and close the vanity mirror cover. Ensure it's not broken and that the hinge operates correctly. If it's a lighted model, the switch is usually integrated into this cover.
- Examine the Fabric/Vinyl: Look for any rips, tears, or heavy stains on the visor's surface.
- Check the Electrical Connector: If it's a lighted visor, make sure the electrical connector and a few inches of wiring are intact and undamaged.
Cost Comparison for a 2011 Nissan LEAF Sun Visor
| Part Type | Estimated Cost |
|---|---|
| New OEM | $150 - $220 |
| New Aftermarket | Not commonly available |
| Used OEM | $20 - $80 |
| Shop Labor | $50 - $100 |
Sun Visor Replacement Guide (DIY)

Replacing the sun visor on a 2011 LEAF is a simple DIY task that usually takes less than 15 minutes and requires only basic tools.
Tools Needed:
- Small flathead screwdriver or a plastic trim removal tool
- Phillips head screwdriver
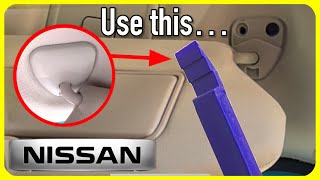
Step-by-Step Instructions: 🎬 Watch this step-by-step Nissan sun visor replacement tutorial
- Pry Open the Screw Cover: At the base of the sun visor where it mounts to the roof, there is a small plastic cover hiding the screws. Use a small flathead screwdriver or a trim tool to gently pry this cover off.
- Disconnect Electrical Connector (if applicable): If you have a lighted visor, you will see a small electrical plug once the cover is off. Carefully press the release tab and unplug the connector.
- Remove the Mounting Screws: Using a Phillips screwdriver, remove the two screws holding the visor assembly to the roof. Be sure to support the visor with one hand as you remove the final screw to prevent it from falling.
- Remove the Old Visor: With the screws and any wiring disconnected, the old visor can be removed from the vehicle.
- Install the New Visor: Position the new visor, reconnect the electrical plug if you have one, and then secure it to the roof using the two Phillips screws. Do not overtighten, as this can crack the plastic mount.
- Replace the Cover: Snap the plastic trim cover back into place over the mounting base. Test the visor's movement and the vanity light to ensure everything is working correctly.
OEM Part Numbers
These part numbers are for the 2011 Nissan LEAF. Part numbers can be superseded over time, so always verify fitment with the seller.
| Position | Part Numbers | Notes |
|---|---|---|
| Left (Driver Side) | 96401-3NA0A, 96401-3NA0C, 96401-3NA0E | Gray, with or without illumination. |
| Right (Passenger Side) | 96400-3NA0A, 96400-3NA0C, 96400-3NA0E | Gray, with or without illumination. |
Frequently Asked Questions (FAQ)
Can I fix a drooping sun visor without replacing it?
Some temporary DIY fixes exist, such as attaching a piece of velcro to the visor and headliner or using a binder clip, but these are not permanent solutions. The internal mechanism is not sold separately by Nissan, so a full replacement is the only proper repair.
Can I upgrade from a non-lighted visor to a lighted one?
It is possible, but it is not a direct swap. You would need to run wiring from a power source, such as the map light assembly, to the sun visor's mounting point to power the vanity light. This requires more advanced DIY skills.
Is the driver's side and passenger's side sun visor interchangeable?
No, they are not. The driver's side (Left Hand) and passenger's side (Right Hand) visors are mirror images of each other and have unique part numbers.
Why doesn't the light on my newly installed used visor work?
First, ensure the electrical connector is fully seated. If it is, the issue could be a bad bulb in the replacement visor or a blown fuse in the vehicle's fuse panel. It's also possible the replacement visor's internal switch is faulty.
Helpful Videos
Technical Specifications
OEM Part Numbers: 96401-3NA0A 96401-3NA0C 96401-3NA0E 96400-3NA0A 96400-3NA0C 96400-3NA0E
Interior Color Code: K (Light Gray)

The information in this article is provided for general reference and educational purposes only. Vehicle specifications, procedures, and part compatibility can vary by production date, trim level, and region. Always consult your vehicle's factory service manual and verify part numbers before purchasing or performing repairs. Safety-critical components such as airbags, seat belts, and braking systems should be installed by a qualified professional.
- Nissan LEAF:
- 🎬 Helpful Videos
- Symptoms of a Failing Sun Visor
- Known Issues, Recalls, and TSBs for 2011 Nissan LEAF
- Buying a Used 2011 Nissan LEAF Sun Visor
- Step 1: Identify Your Visor Type (Lighted vs. Non-Lighted)
- Step 2: Verify Interior Color
- Step 3: Physical Inspection Checklist
- Cost Comparison for a 2011 Nissan LEAF Sun Visor
- Sun Visor Replacement Guide (DIY)
- OEM Part Numbers
- Frequently Asked Questions (FAQ)
- 🎟️ Get 5% Off