

2000-2002 Mercury Villager Sun Visor: Fixing Sag and Matching Interior Colors
A complete guide to diagnosing, replacing, and finding the correct used sun visor for your 2000, 2001, or 2002 Mercury Villager.
- The most common failure is sagging, which is not repairable; the entire visor must be replaced.
- Compatibility is critical: you must match the side (left/right), color (Gray/Tan), and feature (illuminated mirror).
- Find your interior color code on the driver's door jamb sticker under 'INT TR' to ensure a perfect match.
- Replacement is a very simple DIY job requiring only a screwdriver, taking less than 20 minutes.
Symptoms of a Failing Sun Visor
When a sun visor begins to fail, the signs are usually obvious and annoying. These issues typically stem from age, frequent use, and heat exposure which can degrade internal components.
- Sagging or Drooping: The most common failure is a loss of tension in the pivot mechanism. 🎬 Watch: Quick tips for fixing a floppy sun visor The visor will no longer stay flush against the headliner, drooping down and obstructing your view. This is caused by internal wear and tear.
- Vanity Light Failure: If you have an illuminated model, the light may flicker or stop working entirely. This can be due to a burnt-out bulb, a faulty switch in the mirror cover, or a break in the wiring where it flexes at the pivot point.
- Broken Mirror or Cover: The plastic frame, mirror glass, or the sliding/folding cover can become brittle over time and crack or break.
- Won't Stay Clipped In: The visor may pop out of the secondary clip near the rearview mirror, often due to a worn-out clip or a slight bend in the visor board itself.
Safety Note: A sun visor that droops and won't stay up can be a safety hazard, as it can block your vision while driving. It's best to address this issue promptly.
Known Issues, TSBs, and Recalls
As of mid-2026, there are no specific Technical Service Bulletins (TSBs) or safety recalls issued by the National Highway Traffic Safety Administration (NHTSA) for the sun visors on the 2000-2002 Mercury Villager. While recalls for sun visor wiring and mounting integrity have been issued for other vehicles, this particular part on the Villager has not been subject to any official service campaigns.
Buying a Used 2000-2002 Villager Sun Visor
Since new OEM sun visors for this van are scarce, a quality used OEM part is the best option. It will fit correctly, match the interior, and plug right in. Aftermarket options are available but may not perfectly match the color, texture, or electrical connector. Here’s what to look for when buying used.
1. Verify Compatibility: Side, Color, and Features
This is the most critical step. Not all 2000-2002 Villager visors are the same. You must match three things:
- Vehicle Side: The driver (left) and passenger (right) side visors are not interchangeable. The initial part numbers provided (1F5Z1204104AAA, XF5Z1204104BAB) are for the right (passenger) side only. Ensure you are buying for the correct side you need.
- Illuminated Mirror: This guide focuses on the more common version equipped with an illuminated vanity mirror. If your van does not have a light in the visor, you need to source a non-illuminated version, which will have a different part number and no electrical connector.
- Interior Color: The Villager was primarily available with Gray or Tan/Beige interiors. A mismatched visor will be very noticeable.
2. How to Find Your Interior Color Code
To guarantee a perfect match, find your vehicle's interior color code. Open the driver's side door and look for the Vehicle Certification Label on the door jamb. Look for the letters "INT TR" or similar, which stands for Interior Trim. The code next to it specifies your color. For example, common Ford/Mercury interior codes from this era might be letters or numbers corresponding to colors like "Medium Prairie Tan" or "Medium Graphite". Provide this code to the seller to confirm a match.
3. Physical Inspection Checklist
When you have the used part in hand, inspect it carefully:
- Check Pivot Tension: Hold the mounting base and swing the visor arm. It should feel firm and hold its position without drooping. If it feels loose, it will sag in your vehicle.
- Inspect the Fabric: Check for stains, tears, or sagging fabric. Headliner material can separate from its foam backing over time.
- Test the Mirror and Cover: Open and close the mirror cover. It should move smoothly and the hinge should not be cracked. On illuminated models, this action also activates the light switch, so ensure it feels crisp.
- Examine the Wiring: Look at the short electrical wire and connector coming out of the mount. Check for any frayed wires or damage to the plastic connector.
Pro Tip: The 2000-2002 Mercury Villager was a joint-venture vehicle with Nissan and is mechanically similar to the Nissan Quest of the same generation. While many parts are interchangeable, always verify the sun visor's part number, color, and electrical connector, as there can be minor differences between the brands.
Sun Visor Replacement Guide (DIY)
Replacing the sun visor is a simple job that most owners can do in under 20 minutes with basic tools.
Tools Needed:
- Phillips head screwdriver
- Small flathead screwdriver or a plastic trim removal tool
Step-by-Step Instructions:
- Pry Open the Screw Cover: The mounting base of the sun visor has a plastic cover hiding the screws. Use a small flathead screwdriver or a pry tool to gently pop this cover off. There is often a small slot designed for this.
- Remove the Mounting Screws: You will now see two Phillips head screws. Hold the visor assembly with one hand and use the screwdriver to remove both screws.
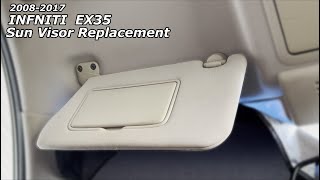
- Disconnect the Electrical Connector: Carefully pull the visor down from the headliner. The electrical wire for the vanity light will still be attached. The connector is a small plastic plug; press the release tab and pull it apart to disconnect it. The old visor is now free. 🎬 Watch: Step-by-step sun visor replacement walkthrough
- Install the New Visor: Connect the electrical plug from the new visor to the vehicle's harness. You should hear a click.
- Test the Light: Before re-installing, turn the vehicle's ignition to the 'On' or 'Accessory' position and open the vanity mirror cover to ensure the light works.
- Secure the New Visor: Position the new visor's mounting base against the headliner, aligning the screw holes. Start both screws by hand to avoid cross-threading, then tighten them until snug with the screwdriver. Do not overtighten.
- Replace the Cover: Snap the plastic screw cover back into place. Test the visor's movement and check that it stays up against the headliner.
Cost of a 2000-2002 Villager Sun Visor
The cost can vary significantly depending on the source. As this is an older vehicle, new OEM stock is largely unavailable.
| Part Type | Estimated Cost |
|---|---|
| New OEM | $150 - $250+ (If found) |
| New Aftermarket | $30 - $60 |
| Used OEM | $40 - $90 |
| Shop Labor | $50 - $100 |
Frequently Asked Questions (FAQ)
Can I repair my sagging sun visor instead of replacing it?
Some DIY fixes exist, like using velcro strips or trying to crimp the pivot rod, but these are temporary at best and can damage your headliner. The internal tension mechanism is not designed to be serviced. 🎬 See: How to repair a broken sun visor The most reliable and long-lasting solution is to replace the entire visor assembly.
Is the sun visor from a 2000-2002 Nissan Quest the same?
It is highly likely to be the same part, as the Villager and Quest were sister vehicles from a Ford-Nissan collaboration. However, you must still verify that the color, fabric texture, and electrical connector are identical before purchasing.
Where is the interior color code located on my Villager?
The interior trim color code is printed on the Vehicle Certification Label, which is a sticker located in the driver's side door jamb. Look for the abbreviation "INT TR" to find your specific code.
What tools do I need to replace the sun visor?
You only need a Phillips head screwdriver and a small, flat-bladed tool (like a small screwdriver or a plastic pry tool) to pop off the screw cover. No special tools are required.
Helpful Videos
Technical Specifications
OEM Part Numbers: 1F5Z1204104AAA XF5Z1204104BAB 1F5Z-1204104-AAA
Fits right (passenger) side. Designed for models with illuminated vanity mirror. Available interior colors include Gray and Tan/Beige.
We Have This Part in Stock


The information in this article is provided for general reference and educational purposes only. Vehicle specifications, procedures, and part compatibility can vary by production date, trim level, and region. Always consult your vehicle's factory service manual and verify part numbers before purchasing or performing repairs. Safety-critical components such as airbags, seat belts, and braking systems should be installed by a qualified professional.
- Mercury Villager:
- 🎬 Helpful Videos
- 🛍️ Shop This Part
- Symptoms of a Failing Sun Visor
- Known Issues, TSBs, and Recalls
- Buying a Used 2000-2002 Villager Sun Visor
- 1. Verify Compatibility: Side, Color, and Features
- 2. How to Find Your Interior Color Code
- 3. Physical Inspection Checklist
- Sun Visor Replacement Guide (DIY)
- Cost of a 2000-2002 Villager Sun Visor
- Frequently Asked Questions (FAQ)
- 🎟️ Get 5% Off