

2013-2019 Mercedes B250 Sun Visor: Fixing Droop, Sag, and Matching Colors
Your complete guide to diagnosing common sun visor failures, finding the correct color-matched part, and replacing it yourself in under 30 minutes.
- The most common failure is a drooping visor that won't stay up, which requires full replacement as it cannot be repaired.
- You MUST match your vehicle's three-digit interior color code (found on the driver's door jamb sticker) to ensure the replacement part's color is correct.
- Replacement is a simple DIY task that takes about 15 minutes and only requires a trim tool and a T20 Torx screwdriver.
- Only use sun visors with part numbers beginning in 'A246'. Parts starting with 'A166' are for different models and will not fit.
Symptoms of a Failing Sun Visor

Sun visor failures are usually easy to spot. They range from minor annoyances to genuine safety concerns if the visor obstructs your view. Here are the most common problems you'll encounter.
1. Sun Visor Drooping or Not Staying Up
This is the most frequent complaint. You push the visor up, and it immediately sags down, either partially or completely blocking your vision. This happens when the internal spring or friction mechanism in the pivot rod wears out. Constant use and heat cycles weaken the components that are supposed to hold it firmly against the headliner. This is not something that can be tightened; the internal mechanism is worn and the visor assembly must be replaced.
2. Broken Vanity Mirror Cover or Hinge
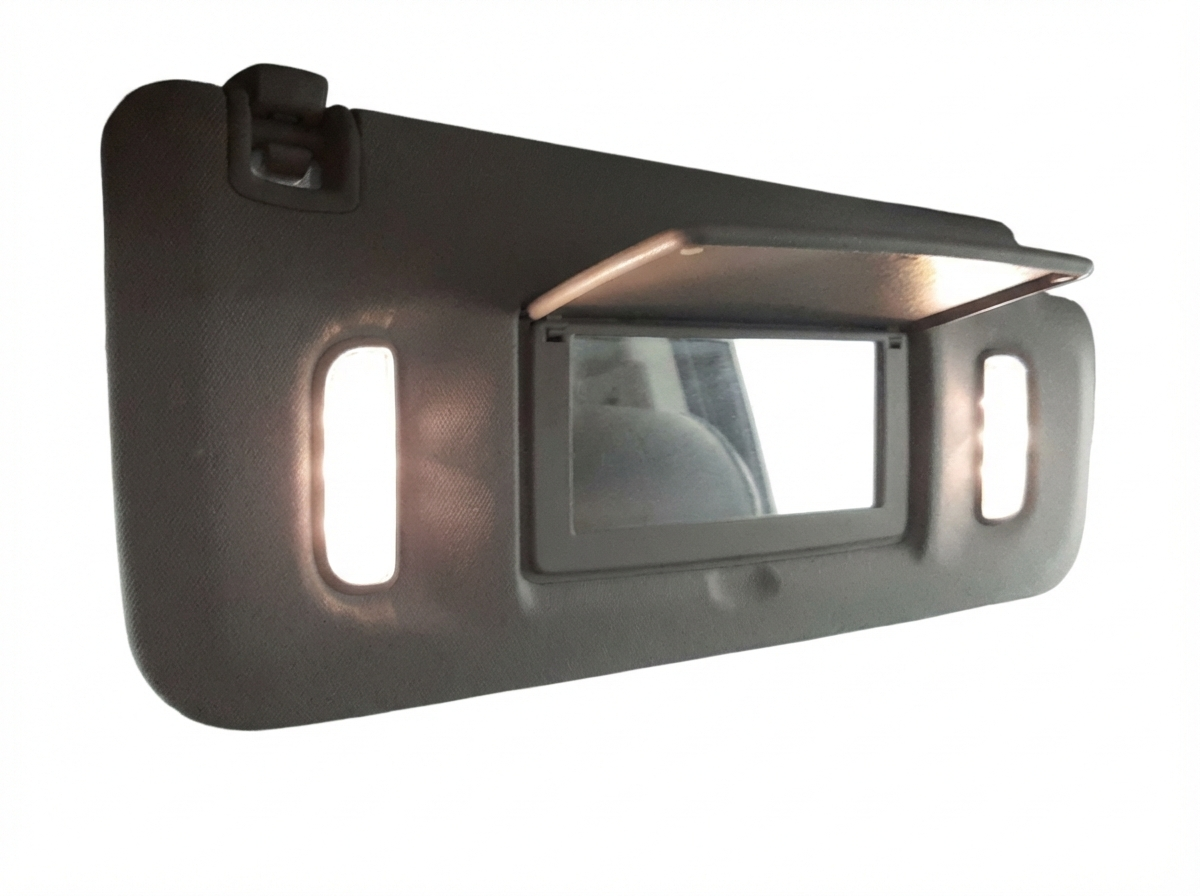
The small plastic hinges on the vanity mirror cover are fragile and can easily break from repeated use. When this happens, the cover may hang loose, fall off completely, or cause the vanity light to stay on, potentially draining the battery.
3. Flickering or Dead Vanity Light
If the light for the vanity mirror doesn't turn on or flickers, the issue could be a burnt-out bulb, a faulty switch (which is often part of the mirror cover hinge), or a problem with the wiring or connector in the headliner. Often, a broken mirror cover hinge is the root cause of the light not working, as it fails to activate the switch.
4. Sagging or Peeling Fabric
The fabric or vinyl covering on the sun visor is attached with adhesive. Over years of exposure to intense sun and heat, this adhesive can fail, causing the material to bubble, sag, or peel away from the visor's inner structure.
Pro Tip: A drooping sun visor can be a safety hazard if it blocks your view while driving. While some temporary fixes like using velcro exist, replacement is the only correct and safe long-term solution.
Known Issues, TSBs, and Recalls
As of mid-2026, there are no specific recalls or widespread Technical Service Bulletins (TSBs) from Mercedes-Benz for sun visor failures on the 2013-2019 B250. Problems like drooping, broken mirror covers, or peeling fabric are generally considered normal wear-and-tear items. While some other vehicle brands have issued TSBs for loose visors that involve adding foam pads, this is not a documented procedure for the B-Class.
Buying a Used Sun Visor for Your B250

Since a new OEM sun visor can be surprisingly expensive, a quality used OEM part is often the best value. It guarantees a perfect fit, correct electrical connection, and an exact color match, unlike many aftermarket alternatives. Here’s how to ensure you get the right part.
Step 1: Identify Your Visor's Features
Not all visors are the same. Before buying, confirm these two things on your current visor:
- Driver vs. Passenger Side: They are not interchangeable.
- Illuminated Vanity Mirror: Nearly all B250 models came with an illuminated mirror, but it's wise to double-check. A visor without the light will have a blank plate where the lens should be, and the wiring connector will be different.
Step 2: Find Your Interior Color Code
This is the most critical step for a perfect match. Mercedes uses several shades of grey, beige, and black that look similar online but are noticeably different in person. Do not guess based on photos.
You can find your three-digit interior trim code on the vehicle's data plate. On most modern Mercedes models, this is a black sticker located on the driver's side door jamb (the B-pillar). On some older models, it may be a metal plate under the hood on the radiator support. The interior code is typically located near the paint code.
Common interior color codes for this model include:
- 9H43: Black / Anthracite
- 7M94 / 7N00: Crystal Grey
- 1C36 / 1C37: Sahara Beige
Warning: Always provide the seller with your VIN and the color code from your data plate to confirm a match before purchasing. Part numbers like A24681003107M94 have the color code appended to the end.
Step 3: What to Inspect on a Used Visor
- Pivot Tension: The main pivot should feel stiff and hold its position without any help. If it feels loose, it will droop in your car.
- Mirror Cover Hinge: Open and close the vanity mirror cover several times to ensure the hinge is intact and operates smoothly.
- Fabric Condition: Check for any signs of peeling, bubbling, or stains on the fabric.
- Mounting Points: Ensure the plastic mounting base and screw holes are not cracked or damaged.
Cost Comparison for a B250 Sun Visor
Prices can vary significantly between new, used, and aftermarket options. Dealership replacement costs are often high due to both parts markup and labor charges.
| Part Source | Estimated Price Range |
|---|---|
| New OEM (Dealer) | $250 - $400 |
| New Aftermarket | $50 - $120 (Quality and color match may vary) |
| Used OEM | $75 - $150 |
| Shop Labor Cost | $50 - $100 |
Sun Visor Replacement Guide (DIY)

Replacing the sun visor on a W246/W242 B-Class is a very simple DIY job that requires minimal tools and time.
- Difficulty: 1/5 (Beginner)
- Estimated Time: 15 minutes
- Tools Needed:
- Plastic trim removal tool
- Torx T20 screwdriver
Step-by-Step Instructions:
- Pry Off the Mounting Cover: The base of the sun visor where it meets the headliner has a plastic cover. Use a trim tool to gently pry this cover off. It is held on by clips.
- Disconnect Electrical Connector: With the cover off, you will see the small electrical connector for the vanity light. Carefully unplug it.
- Unscrew the Visor: There are typically two or three Torx T20 screws holding the visor's mounting bracket to the roof structure. Remove these screws while supporting the visor to keep it from falling.
- Remove the Old Visor: The visor will now be free. You may also need to unclip the other end of the visor from its holder near the rearview mirror.
- Install the New Visor: Installation is the reverse of removal. Position the new visor, plug in the electrical connector, and secure it with the Torx screws. Do not overtighten the screws.
- Test and Finish: Before snapping the plastic cover back on, test the vanity light to ensure it works. Then, press the cover firmly back into place until it clicks.
Technical Specifications & Part Numbers

The primary part numbers for the B250 sun visor belong to the A246 chassis designation. Be aware that part numbers starting with A166 are for other models like the ML/GLE-Class and will not fit.
- Chassis Code: W246, W242
- Common Base Part Numbers: A2468100310, A2468100410, A2468102500
- Example Full Part Number (with color code): A24681003107M94 (Crystal Grey)
- Mounting Screw Torque: 2.5 N·m (22 in. lbs.) if you are using a torque wrench.
Frequently Asked Questions (FAQ)
Can I just repair my drooping sun visor instead of replacing it?
Unfortunately, no. The drooping is caused by a worn-out internal friction mechanism that is not sold as a separate part. While some people attempt temporary fixes with velcro or clips, the only permanent and safe solution is to replace the entire sun visor assembly.
Why doesn't the light on my replacement visor work?
First, double-check that you securely plugged in the electrical connector before snapping the trim cover back on. Second, ensure you bought an illuminated visor, not a base model without a light. Finally, the issue could be a blown fuse or a problem with the replacement part itself, though this is less common with OEM parts.
Will a sun visor from a Mercedes GLA-Class or CLA-Class fit my B250?
No. Even though these models share some platform components, interior trim parts like sun visors are specific to the vehicle's body shell and headliner design. You must use a visor specifically for the W246/W242 B-Class for a proper fit.
How do I find my exact interior color?
Look for the data sticker on the driver's side door jamb (the pillar between the front and rear doors). This sticker contains your VIN, paint code, and a three-digit interior trim code. Matching this code is the only way to guarantee your replacement visor's color is identical to your original.
Technical Specifications
OEM Part Numbers: A2468100310 A2468100410 A2468102500 A24681003107M94 A24681025007M94
Chassis Fitment: W246, W242. Mounting Hardware: Torx T20 screws. Mounting Torque: 2.5 N·m (22 in. lbs.)
We Have This Part in Stock


The information in this article is provided for general reference and educational purposes only. Vehicle specifications, procedures, and part compatibility can vary by production date, trim level, and region. Always consult your vehicle's factory service manual and verify part numbers before purchasing or performing repairs. Safety-critical components such as airbags, seat belts, and braking systems should be installed by a qualified professional.
- Mercedes-Benz B250:
- 🛍️ Shop This Part
- Symptoms of a Failing Sun Visor
- 1. Sun Visor Drooping or Not Staying Up
- 2. Broken Vanity Mirror Cover or Hinge
- 3. Flickering or Dead Vanity Light
- 4. Sagging or Peeling Fabric
- Known Issues, TSBs, and Recalls
- Buying a Used Sun Visor for Your B250
- Step 1: Identify Your Visor's Features
- Step 2: Find Your Interior Color Code
- Step 3: What to Inspect on a Used Visor
- Cost Comparison for a B250 Sun Visor
- Sun Visor Replacement Guide (DIY)
- Step-by-Step Instructions:
- Technical Specifications & Part Numbers
- Frequently Asked Questions (FAQ)
- 🎟️ Get 5% Off