

2006-2007 Mazda 5 Sun Visor: How to Fix Drooping and Match Interior Colors
This guide covers the common failure points, replacement steps, and how to choose the right used sun visor for your 2006-2007 Mazda 5.
- The most common failure is a drooping visor that won't stay up, which requires full replacement.
- Replacement is a very simple DIY job, typically requiring only a Phillips screwdriver and 15 minutes.
- Always verify your car's interior trim code from the door jamb sticker before buying a used visor to ensure a color match.
- Driver and passenger side visors are not interchangeable; they are specific to each side.
Symptoms of a Failing Sun Visor
Sun visors endure daily use and constant exposure to sun and heat, which can cause them to wear out. The symptoms of failure are usually easy to spot.
1. Visor Droops or Won't Stay Up
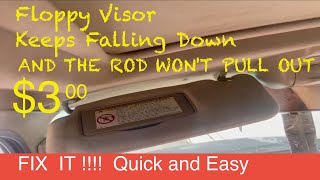
This is the most common failure. The internal friction mechanism that holds the visor in position wears out over time. The visor will no longer stay flush against the headliner, and may droop into your line of sight, creating a constant annoyance and a potential safety hazard. 🎬 See how to quickly fix a floppy sun visor. In most cases, this internal mechanism is not serviceable, and the entire visor assembly must be replaced.
2. Broken Mounting Point or Clip
The plastic components of the visor, including the main mounting bracket and the clip that holds the other end, can become brittle from age and sun exposure. The mounting bracket can crack around the screws, or the retaining clip can break, leaving the visor to hang loose.
3. Vanity Light Doesn't Work
If your visor is equipped with a lighted mirror, the light can fail. This is typically caused by a burned-out bulb, a faulty switch (often activated by opening the mirror cover), or a problem with the wiring or connector in the headliner.
4. Cracked Mirror or Broken Mirror Cover
The vanity mirror is fragile and can crack from impact. The plastic cover that slides or flips over the mirror can also break at its hinges, which may also prevent the vanity light from turning on.
Known Issues, TSBs, and Recalls
As of early 2026, there are no specific recalls or Technical Service Bulletins (TSBs) from Mazda or the NHTSA directly related to the sun visors for the 2006-2007 Mazda 5. While some recalls exist for airbag warning labels on other vehicles, this has not been a noted issue for this specific model. Any failures are typically due to general wear and tear rather than a manufacturing defect.
Pro Tip: While checking for visor issues, it's a good time to inspect other recalls for your vehicle. The 2006 Mazda 5 had recalls related to sliding door latches and potential exhaust system heat build-up.
Buying a Used Sun Visor
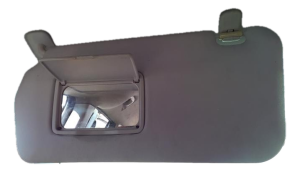
A used OEM sun visor is an excellent, cost-effective choice for this repair, as it ensures a perfect match in color, texture, and fit. Aftermarket options can sometimes have slight variations in color or material that won't look quite right.
What to Inspect
- Test the Pivot: Ask the seller to hold the visor by its mount and see if it stays in various positions. It should feel firm and not droop on its own.
- Check the Mount: Inspect the plastic mounting area for any cracks or stress marks, especially around the screw holes.
- Verify the Light: If it's a lighted visor, confirm with the seller that the light was working before it was removed from the vehicle.
- Examine the Fabric and Mirror: Check for stains, tears, or a cracked mirror or cover.
How to Verify the Correct Color
The 2006-2007 Mazda 5 was available with a few interior color schemes, primarily black and a lighter gray/beige. To ensure you buy the correct matching visor, you need to find your vehicle's interior trim code. This code is typically found on a sticker in the driver's side door jamb. Provide this code to the seller of the used part to guarantee a perfect match. The OEM part number CC4369320D77 is a good starting point, but suffixes on the part number often denote color variations.
Cost Comparison
| Part Type | Estimated Cost |
|---|---|
| New OEM | $150 - $250 |
| New Aftermarket | $50 - $90 |
| Used OEM | $40 - $75 |
| Shop Labor | $40 - $80 |
Sun Visor Replacement Guide
Replacing the sun visor on a 2006-2007 Mazda 5 is a simple DIY task that requires only basic tools and about 15 minutes.
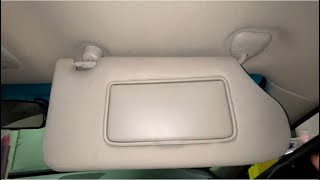
🎬 Watch this step-by-step walkthrough of the visor replacement process.Tools Needed:
- Phillips head screwdriver
- Small flathead screwdriver or trim removal tool
Step-by-Step Instructions:
- Pry Off the Screw Cover: At the base of the sun visor where it mounts to the roof, there is a small plastic cover. Use a small flathead screwdriver to gently pry this cover off to expose the mounting screws.
- Remove the Mounting Screws: While holding the visor to prevent it from falling, use a Phillips screwdriver to remove the two screws holding the bracket to the roof.
- Disconnect Electrical Connector (if applicable): If your visor has a vanity light, there will be a small electrical wire. Carefully pull the visor down a few inches and disconnect the wiring harness connector.
- Remove the Old Visor: The visor is now free and can be removed from the vehicle.
- Install the New Visor: Installation is the reverse of removal. Start by connecting the electrical plug (if equipped), then line up the mounting bracket and hand-start the screws to avoid cross-threading. Tighten the screws until snug, but do not overtighten as this can crack the plastic mount.
- Test and Finish: Snap the plastic screw cover back into place. Test the visor's movement and the vanity light to ensure everything is working correctly.
Frequently Asked Questions (FAQ)
My sun visor won't stay up. Can it be fixed or do I have to replace it?
In most cases, a drooping sun visor cannot be effectively repaired. The internal tension mechanism is not sold as a separate part and is difficult to access without destroying the visor. Replacement is the standard and most reliable solution.
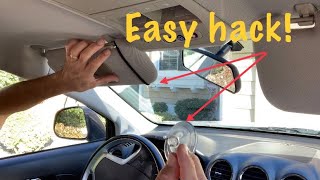
🎬 Try this simple hack to fix a broken, floppy visor.Is the driver's side sun visor the same as the passenger's side?
No, they are not interchangeable. The driver's side and passenger's side visors are mirror images of each other and have different part numbers. Be sure to order the correct side for your needs.
How do I make sure I buy the right color visor?
Check the vehicle identification sticker located on the driver's side door jamb. This sticker contains the exterior paint code and the interior trim code. Use the interior trim code to confirm the color with the parts seller.
The light on my new used visor doesn't work. What should I check?
First, check that the electrical connector is fully seated. If it is, the issue is likely a burned-out bulb. You can swap the bulb from your old visor if it was still working. If that doesn't work, the problem may be with the vehicle's fuse or wiring.
Helpful Videos
Technical Specifications
OEM Part Numbers: CC4369320D77
The primary variations are color (black, gray/beige) and the presence of a lighted vanity mirror.
We Have This Part in Stock

The information in this article is provided for general reference and educational purposes only. Vehicle specifications, procedures, and part compatibility can vary by production date, trim level, and region. Always consult your vehicle's factory service manual and verify part numbers before purchasing or performing repairs. Safety-critical components such as airbags, seat belts, and braking systems should be installed by a qualified professional.
- Mazda MAZDA 5:
- 🎬 Helpful Videos
- 🛍️ Shop This Part
- Symptoms of a Failing Sun Visor
- 1. Visor Droops or Won't Stay Up
- 2. Broken Mounting Point or Clip
- 3. Vanity Light Doesn't Work
- 4. Cracked Mirror or Broken Mirror Cover
- Known Issues, TSBs, and Recalls
- Buying a Used Sun Visor
- What to Inspect
- How to Verify the Correct Color
- Cost Comparison
- Sun Visor Replacement Guide
- Tools Needed:
- Step-by-Step Instructions:
- Frequently Asked Questions (FAQ)
- 🎟️ Get 5% Off