

Sun Visor Guide: 2018-2024 Honda Odyssey & 2024-2025 Tesla Model 3
Diagnose and replace a drooping, broken, or rattling sun visor with this guide covering part numbers, costs, and DIY steps for both vehicles.
- The Honda Odyssey and Tesla Model 3 use completely different visors with unique replacement procedures; the Honda uses a twist-lock mount while the Tesla uses a single screw.
- For the Honda Odyssey, verifying your interior color code from the driver's door jamb sticker is essential before buying a replacement.
- For the 2024+ Tesla Model 3 'Highland', the visor is not compatible with any previous Model 3 or Model Y.
- A rattling noise on a Tesla is often just a loose T25 mounting screw that can be tightened at home for free.
Overview: Two Different Designs

This guide covers the sun visors for the 2018-2024 Honda Odyssey and the 2024-2025 Tesla Model 3 (Highland). It is important to note that while grouped here, these vehicles do not share the same part. They use completely different sun visor designs, mounting systems, and electrical connectors. This article is structured to address each vehicle separately.
Compatibility Warning: The information is specific to the model years listed. The 2024+ Tesla Model 3 'Highland' visor is NOT compatible with earlier 2017-2023 Model 3s. Always verify your vehicle's year and specific features before ordering a part.
2018-2024 Honda Odyssey Sun Visor


Known Issues and Symptoms
For the 2018-2024 Odyssey, there are no widespread, recurring factory defects, recalls, or Technical Service Bulletins (TSBs) related to the sun visors. Failures are typically due to normal wear and tear. Common symptoms include:
- Drooping or Not Staying Up: The most common failure. The internal pivot mechanism wears out and can no longer hold the visor's weight, causing it to sag and obstruct vision.
- Vanity Light Failure: The light in the mirror may flicker or stop working entirely. This can be caused by a burnt-out bulb, a faulty switch in the mirror cover, or a problem with the electrical connection at the mounting base.
- Broken Mirror or Cover: The mirror or the flap that covers it can crack from impact or age.
- Damaged Fabric: The cloth covering can become stained, torn, or begin to separate from the underlying board.
Part Variants & Compatibility Check
Getting the right visor for your Odyssey requires checking three things: side, color, and features.
- Side: Left (Driver) or Right (Passenger).
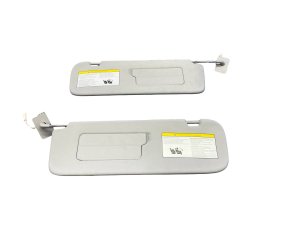
- Features: The primary difference is whether the visor is illuminated (has a vanity light) or non-illuminated. Illuminated visors are typically found on models equipped with a sunroof. Be sure to check your existing visor.
- Color: Honda uses several interior colors like Gray, Shadow Beige, and Wisteria Light Gray. Do not guess based on photos. The correct way to verify your interior color is by finding the code on the vehicle identification sticker located in the driver's side door jamb. This sticker will list an interior color code, often as a single letter under "Type" (e.g., A, U).
DIY Replacement Guide (Twist-Lock Style)
Honda uses a screwless "twist-lock" mounting system on many modern vehicles, including this generation of Odyssey. It can be tricky if you don't know the technique.
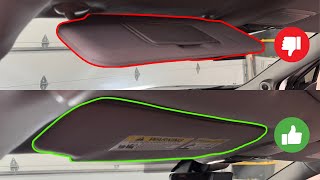
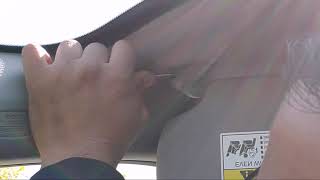
Pro Tip: Watch a video of the process before starting. 🎬 Watch: This walkthrough shows the Honda twist-lock technique in action. The key is depressing a hidden tab while twisting the base.
- Unclip the visor from its outer holder and let it hang down.
- Position the visor so it is pointing towards the open door, roughly parallel to the dashboard.
- Locate the small, rectangular slot on the plastic base of the visor mount where it meets the headliner.
- Insert a small, flathead screwdriver or a trim tool into this slot to press down on the internal locking tab. You will not see the tab, you have to feel for it.
- While keeping the tab depressed, twist the entire sun visor assembly about 90 degrees towards the door. This will disengage the locks.
- Pull the visor down from the headliner. Be careful not to yank it, as the electrical wire for the vanity light is still connected.
- Press the release tab on the small electrical connector and unplug it. The old visor is now free.
- To install the new visor, plug in the electrical connector first. Push the mounting base into the headliner hole at the same 90-degree angle and twist it back towards the windshield until it clicks securely into place.
2024-2025 Tesla Model 3 "Highland" Sun Visor

Known Issues and Symptoms
The 2024+ 'Highland' Model 3 is relatively new, but issues are similar to those seen on other recent Tesla models.
- Rattling Noise: A buzzing or rattling sound from the visor area while driving is a common complaint. This is often caused by a loose mounting screw and can be fixed by simply tightening it.
- Magnetic Clip Failure: The visor is held up by a magnet in the headliner. The magnet itself can become weak or the plastic housing around it can break.
- Broken Mounting Point: The plastic base where the visor pivots can become brittle and crack, causing the entire assembly to hang loose.
- Vanity Light Failure: Like the Odyssey, the light can fail due to a bad connection or a fault within the visor's internal wiring.
Recalls and TSBs
There are no active recalls or TSBs for visor failure on the 2024-2025 Model 3. However, a past recall (NHTSA 19V-719) for a small number of 2019 Model 3s is worth noting: the driver's side visor was missing the required airbag warning label, and the remedy was to replace the entire visor.
DIY Replacement Guide (Single Screw)
Replacing the sun visor on a 'Highland' Model 3 is a very simple DIY task that takes less than 15 minutes.
- Using a plastic trim removal tool, carefully pry off the plastic cover at the base of the sun visor mount. It is held on by clips.
- With the cover removed, you will see a single Torx screw. Use a T25 Torx driver to remove this screw.
- Gently pull the visor down from the headliner to expose the electrical wire.
- Disconnect the electrical connector by pressing the release tab and pulling it apart.
- To install the new visor, first connect the electrical plug.
- Position the new visor's base in the headliner recess, insert the T25 screw, and tighten it to a torque of 3.5 Nm (2.6 lb-ft). Be careful not to overtighten.
- Snap the plastic trim cover back into place.
Buying a Used Sun Visor
A used OEM sun visor is an excellent, cost-effective alternative to a new part, especially since quality aftermarket options for these models are rare. Here’s what to look for:
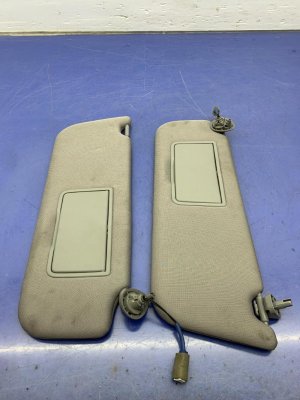
- Physical Inspection: Check for stains, rips, or sagging fabric. Ensure the visor body isn't bent or warped. If possible, test the pivot—it should feel firm and hold its position without drooping.
- Mirror and Light: Inspect the mirror for cracks. If you can, test the vanity light. Ask the seller to confirm it was working when removed from the vehicle. The electrical connector pins should be straight and free of corrosion.
- Mounting Points: For a Honda visor, inspect the plastic locking tabs on the base for any cracks or stress marks. For a Tesla visor, ensure the pivot area where the screw passes through is intact and not cracked.
- Verify Compatibility: This is the most important step. Double-check the part number and ensure it matches the correct side (driver/passenger), color, and feature set (e.g., illuminated) for your vehicle. For Tesla, ensure it is specifically for the 2024+ 'Highland' model.
Cost Comparison
| Part/Service | 2018-2024 Honda Odyssey Cost | 2024-2025 Tesla Model 3 Cost |
|---|---|---|
| New OEM Part | $95 - $140 | $125 - $235 |
| Used OEM Part | $50 - $80 | $50 - $85 |
| New Aftermarket Part | Not widely available | Not widely available |
| Shop Labor | $50 - $100 | $50 - $100 |
Prices are estimates and may vary based on supplier and location.
Frequently Asked Questions (FAQ)
Can I fix my old sun visor instead of replacing it?
For a drooping visor, some DIY fixes exist for older cars (like using velcro or wrapping the pivot), but they are temporary and don't address the worn internal mechanism. For a failed light or broken mirror, replacement is almost always the more effective and lasting solution. Given the reasonable cost of a used OEM part, replacement is recommended.
Is the sun visor clip a separate part?
Yes. The stationary clip that holds the outer end of the visor is a separate, inexpensive part for both vehicles. If only this clip is broken, you do not need to replace the entire visor assembly.
Why did my Tesla sun visor start rattling?
The most common cause is the single T25 mounting screw working its way loose over time due to road vibrations. Before buying a new visor, try removing the trim cover and tightening this screw to see if it resolves the noise.
How do I know which color Honda visor to buy?
Look for the vehicle information sticker on the driver's side door jamb. It will have an interior color code, which you can match with the part description. Do not rely on pictures to match the color.
Helpful Videos
Technical Specifications
OEM Part Numbers: 83230-THR-A01ZA 83230-THR-A01ZB 83280-THR-A01ZA 83280-THR-A01ZB 1490405-13-D
Honda Mount: Twist-lock with hidden release tab. Tesla Mount: Single T25 Torx screw. Tesla Screw Torque: 3.5 Nm (2.6 lb-ft).
We Have This Part in Stock





The information in this article is provided for general reference and educational purposes only. Vehicle specifications, procedures, and part compatibility can vary by production date, trim level, and region. Always consult your vehicle's factory service manual and verify part numbers before purchasing or performing repairs. Safety-critical components such as airbags, seat belts, and braking systems should be installed by a qualified professional.
- Honda Odyssey:
- Tesla Model 3:
- 🎬 Helpful Videos
- 🛍️ Shop This Part
- Overview: Two Different Designs
- 2018-2024 Honda Odyssey Sun Visor
- Known Issues and Symptoms
- Part Variants & Compatibility Check
- DIY Replacement Guide (Twist-Lock Style)
- 2024-2025 Tesla Model 3 "Highland" Sun Visor
- Known Issues and Symptoms
- Recalls and TSBs
- DIY Replacement Guide (Single Screw)
- Buying a Used Sun Visor
- Cost Comparison
- Frequently Asked Questions (FAQ)
- 🎟️ Get 5% Off