

2005-2010 Honda Odyssey Sun Visor: Fixing the Droop and Finding the Right Replacement
This guide covers the common failure points, replacement costs, and critical color-matching details for the third-generation Honda Odyssey sun visor.
- The most common failure is a weak internal mechanism causing the visor to droop, which is a safety hazard.
- Verifying your vehicle's interior color code (found on the driver's door jamb sticker) is essential before buying a replacement.
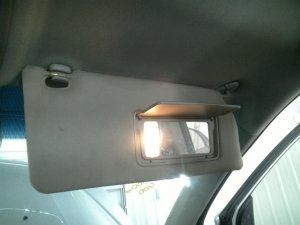
- All 2005-2010 Odyssey trims have an illuminated mirror, so ensure the replacement has an intact electrical connector.
- Replacement is a very simple DIY task requiring only a screwdriver, making a used OEM part a cost-effective solution.
Known Issues: The Infamous Drooping Sun Visor
The most common problem with the 2005-2010 Honda Odyssey sun visor is its inability to stay up against the headliner. Over time, the internal tensioning mechanism weakens or breaks. This causes the visor to sag, droop, or fall down completely, often obstructing the driver's view. This isn't just an annoyance; a visor that falls unexpectedly can be a significant safety hazard. The failure is due to wear and tear on the internal plastic and spring components that create the necessary friction to hold the visor in place.
Symptoms of a Failing Sun Visor
- Visor Won't Stay Up: The most obvious symptom. The visor sags or falls down, refusing to stay flush against the headliner.
- Loose or Floppy Hinge: The visor feels loose and has no tension when you move it. It may swing freely during turns or braking.
- Falls Down on Bumps: The visor may seem to stay in place initially but falls down when the vehicle hits a bump or pothole.
- Vanity Light Failure: The light in the vanity mirror may flicker or fail to turn on. This is usually a separate issue related to the bulb or electrical connection but can occur on a worn-out visor.
- Cracked Mounting Point: The plastic around the mounting base can become brittle and crack, causing the entire assembly to become loose.
Warning: A sun visor that obstructs the driver's field of vision is a serious safety risk and should be addressed immediately. It may also be a reason for a failed state vehicle inspection.
Buying a Used 2005-2010 Odyssey Sun Visor
A used OEM sun visor is often a great value, providing original factory fit and color match at a fraction of the price of a new one. However, you must verify a few key details to ensure you get the right part.
Step 1: Identify the Correct Side and Features
Visors are specific to the driver (left) and passenger (right) sides. They are not interchangeable. All 2005-2010 Odyssey trim levels (LX, EX, EX-L, and Touring) came standard with illuminated vanity mirrors, so you will need to ensure the electrical connector is intact.
Step 2: Verify Your Interior Color Code
This is the most critical step. Honda offered several interior colors for this generation, and the visors must match. The wrong color will be very noticeable.
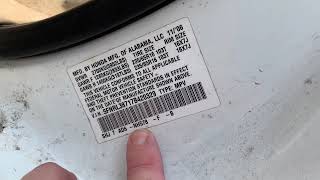
- Locate the vehicle identification sticker on the driver's side door jamb. 🎬 Watch: How to find your Honda's color code
- On the sticker, look for the interior color code. It is typically a code starting with 'NH' or 'YR' followed by numbers and letters.
- Common color codes for this Odyssey include:
- NH220L (or similar): Gray
- YR240L / YR527L (or similar): Tan / Ivory / Olive
Match this code to the part description when buying a used visor. Do not rely on photos alone, as lighting can be deceptive.
Step 3: Inspect the Used Visor
When inspecting the part, either in photos or in person, check the following:
- Hinge Stiffness: Ask the seller to confirm the visor stays up on its own. A good used visor should have strong tension.
- Physical Condition: Look for cracks in the plastic, especially around the mounting arm. Check for stains or tears in the fabric.
- Mirror and Light: Ensure the vanity mirror cover is present and not broken. Confirm the electrical pigtail and connector are undamaged.
Step 4: The Sunroof Question
Some part listings differentiate between models with and without a sunroof. Research indicates that while there might be different part numbers, the primary visors themselves are generally interchangeable. The main difference is often related to the center overhead console, not the visor's mounting. However, to be safe, it's best to match the part number from your original visor or select a part that explicitly matches your vehicle's sunroof configuration.
Pro Tip: A used OEM visor, even with some mileage, is often superior to a new, cheap aftermarket part. Aftermarket visors frequently suffer from poor color matching, flimsy materials, and electrical connectors that don't fit correctly.
Recalls and Technical Service Bulletins (TSBs)
As of mid-2024, there are no specific recalls or TSBs from Honda or the NHTSA directly addressing the sun visor failure on the 2005-2010 Odyssey. The issue is considered a result of normal wear and tear. Other recalls for this vehicle generation pertain to issues like fuel pumps and power liftgate struts.
Sun Visor Replacement Guide
Replacing the sun visor is a simple DIY job that most owners can complete in under 15 minutes.
Tools Needed:
- Phillips head screwdriver
- Small flathead screwdriver or pry tool
Step-by-Step Instructions:
- Unhook the Visor: Unclip the visor from the center hook and let it hang down.
- Remove the Screw Cover: At the base of the visor where it mounts to the roof, there is a small plastic cover. Use a flathead screwdriver to gently pry this cover off, revealing the screws underneath.
- Unscrew the Mount: Remove the two Phillips head screws holding the visor bracket to the roof. Support the visor as you remove the last screw.
- Disconnect Electrical Connector: Gently pull the visor down to expose the electrical wire. Disconnect the small white electrical plug for the vanity mirror light.
- Installation: Installation is the reverse of removal. Connect the electrical plug on the new visor, position the bracket, and secure it with the two screws. Do not overtighten. Snap the plastic cover back into place. 🎬 Watch: Step-by-step sun visor replacement walkthrough
Cost of a Replacement Sun Visor
| Part Type | Estimated Cost |
|---|---|
| New OEM | $90 - $110 |
| New Aftermarket (Dorman, etc.) | $65 - $80 |
| Used OEM | $25 - $50 |
| Shop Labor | $30 - $60 |
Frequently Asked Questions (FAQ)
Can I just fix my drooping sun visor instead of replacing it?
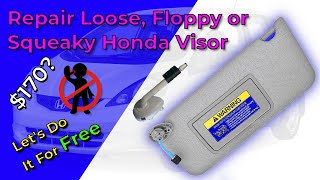
Some temporary DIY fixes exist, such as using Velcro strips, magnets, or external clips to hold the visor up. Another method involves injecting spray lubricant like WD-40 into the hinge mechanism to free it up if it's stiff, though this can sometimes stain the fabric. For a permanent and safe solution, especially if the internal mechanism is broken, replacement is the best option.
🎬 See this video on fixing a floppy visor for freeHow do I find my Honda's interior color code?
The interior color code is located on a sticker in the driver's side door jamb. It's usually labeled 'INTERIOR COLOR' or is a distinct code separate from the exterior paint code.
Are the driver and passenger side visors interchangeable?
No, they are not. The mounting points and shapes are mirrored. You must purchase the correct part for the specific side you are replacing.
Will a sun visor from a newer or older Odyssey fit my 2005-2010 model?
No. Sun visors are specific to the vehicle's generation. A visor from a 2nd generation (1999-2004) or 4th generation (2011-2017) Odyssey will not fit correctly. You must use a visor designed for the 2005-2010 model years.
Helpful Videos
Technical Specifications
OEM Part Numbers: 83230-SHJ-A01ZA 83230-SHJ-A01ZB 83230-SHJ-A01ZC 83230-SHJ-A12ZA 83230-SHJ-A61ZA 83280-SHJ-A01ZA 83280-SHJ-A01ZB 83280-SHJ-A02ZA 83280-SHJ-A21ZA 83280-SHJ-A22ZA
Features illuminated vanity mirror. Available in multiple colors (Gray, Tan/Ivory/Olive). Mounts with two Phillips head screws.
We Have This Part in Stock



The information in this article is provided for general reference and educational purposes only. Vehicle specifications, procedures, and part compatibility can vary by production date, trim level, and region. Always consult your vehicle's factory service manual and verify part numbers before purchasing or performing repairs. Safety-critical components such as airbags, seat belts, and braking systems should be installed by a qualified professional.
- Honda Odyssey:
- 🎬 Helpful Videos
- 🛍️ Shop This Part
- Known Issues: The Infamous Drooping Sun Visor
- Symptoms of a Failing Sun Visor
- Buying a Used 2005-2010 Odyssey Sun Visor
- Step 1: Identify the Correct Side and Features
- Step 2: Verify Your Interior Color Code
- Step 3: Inspect the Used Visor
- Step 4: The Sunroof Question
- Recalls and Technical Service Bulletins (TSBs)
- Sun Visor Replacement Guide
- Tools Needed:
- Step-by-Step Instructions:
- Cost of a Replacement Sun Visor
- Frequently Asked Questions (FAQ)
- 🎟️ Get 5% Off