

1999-2004 Honda Odyssey Sun Visor: How to Fix the Droop and Find the Right Part
This guide covers the common causes of sun visor failure in the second-generation Honda Odyssey and provides a step-by-step process for choosing the correct replacement.
- The most common failure is drooping/sagging, which requires full replacement as the internal mechanism is not repairable.
- Compatibility is critical: You must match the model years (1999-2004), side (Driver/Passenger), feature (Illuminated/Non-Illuminated), and interior color.
- Find your interior color code on the sticker in the driver's door jamb to ensure a perfect match when buying a used part.
- Replacement is a very simple DIY job, requiring only a Phillips screwdriver and about 10-15 minutes.
Symptoms of a Failing Sun Visor
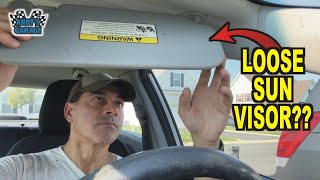
The most common problem with the 1999-2004 Honda Odyssey sun visor is a gradual loss of tension, causing it to droop or fall down completely, obstructing the driver's view. This is typically due to wear and tear on the internal spring and plastic components that create friction.
- Drooping or Sagging: The visor will not stay flush against the headliner and slowly sags or immediately falls when the vehicle hits a bump.
- Broken Mirror or Cover: The vanity mirror may become cracked, or the plastic cover that slides or flips over it may break at the hinges.
- Flickering or Dead Vanity Light: On models equipped with an illuminated mirror, the light may flicker or fail to turn on. This can be caused by a bad bulb, a faulty switch in the mirror assembly, or a problem with the wiring where it flexes at the pivot point.
- Loose Mounting: The visor may feel wobbly at its mounting point, which can sometimes be fixed by tightening the mounting screws.
Known Issues, Recalls, and Technical Service Bulletins (TSBs)
As of mid-2024, there are no specific recalls or Technical Service Bulletins (TSBs) from Honda for drooping sun visors on the 1999-2004 Odyssey. This issue is generally considered a result of normal wear and tear. However, there was a safety recall for 2003-2004 Odyssey models concerning the SRS (airbag) control unit, which could cause an airbag to deploy inadvertently. While unrelated to the sun visor itself, it's a critical safety issue to be aware of for these model years.
Critical Compatibility Warning: The 1999-2004 Honda Odyssey is the second generation (chassis code RL1). The 2005 model year marks the beginning of the third generation (RL3), which uses completely different sun visors. Parts are not interchangeable between these generations. Many online listings incorrectly group these years; be sure you are buying a part specifically for the 1999-2004 range.
Buying a Used 1999-2004 Odyssey Sun Visor
A used OEM sun visor is often the best choice, as it guarantees a perfect match for color, texture, and fitment, which can be a problem with aftermarket alternatives. Here’s what to check before you buy.
1. Verify Compatibility (The Four-Point Check)
- Model Years: Confirm the part is from a 1999, 2000, 2001, 2002, 2003, or 2004 Odyssey.
- Side: Visors are side-specific. Honda part numbers typically use 83280- for the driver's (LH) side and 83230- for the passenger's (RH) side.
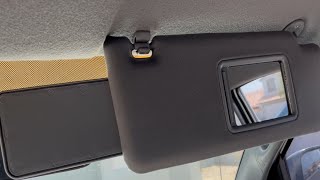
- Features: Check if your van has an illuminated vanity mirror. Base models (like the DX or LX) may have non-illuminated visors, while higher trims (EX, EX-L) have lights. A visor with a light has a visible electrical wire running from its base. Do not buy an illuminated visor for a non-illuminated van, as the wiring will not be present in the headliner.
- Interior Color: This is the most common mistake. You must match your interior color code.
2. How to Find Your Interior Color Code
The interior color code is printed on the vehicle identification sticker located on the driver's side door jamb. Open the driver's door and look for a white or silver sticker. The code will be labeled under "INTERIOR COLOR" and will look something like "TYPE F" or a more specific code like "NH167L" (Graphite Black). Having this code is the only way to guarantee a perfect color match.
3. Physical Inspection
- Test the Tension: Hold the visor's base and pivot the visor itself. It should move smoothly but with enough resistance to hold any position. A good visor will "snap" firmly into the closed position against the headliner. Avoid any that feel loose or floppy.
- Check for Cracks: Inspect the plastic around the mounting base and the visor body for cracks.
- Examine the Mirror: Make sure the mirror is not cracked and the cover's hinge is intact.
Cost Comparison for a Single Sun Visor
| Part Type | Estimated Cost | Notes |
|---|---|---|
| New OEM | $100 - $250+ | Guaranteed fit and color match, but very expensive. Prices for newer models can exceed $300. |
| New Aftermarket | $40 - $80 | Brands like Dorman offer replacements. Color and material texture may not be a perfect match to your vehicle's aged interior. |
| Used OEM | $30 - $75 | The most cost-effective option for a perfect factory match. Price depends on condition and availability. |
| Shop Labor | $50 - $75 | A repair shop will likely charge a minimum fee, around 0.5 hours of labor. However, this is a very easy DIY job. |
Step-by-Step Replacement Guide (DIY)
Replacing the sun visor is a simple task that takes about 10-15 minutes and requires only basic tools.
Tools Needed:
- Phillips head screwdriver
- Small flathead screwdriver or trim removal tool
Procedure:
- Expose the Screws: The mounting base of the sun visor has a plastic cover. Use a small flathead screwdriver to gently pry this cover off. It will pop off, revealing two Phillips head screws.
- Unscrew the Visor: While holding the sun visor to prevent it from falling, use the Phillips screwdriver to remove both screws.
- Disconnect the Wiring (if applicable): If you have an illuminated visor, carefully lower it from the headliner to expose the small electrical connector. Pinch the tab on the connector and pull to disconnect it. Do not pull on the wires themselves.
- Install the New Visor: Connect the electrical plug on the new visor. Align the base with the screw holes in the headliner and hand-thread the two screws to start them.
- Secure the Visor: Tighten both screws until snug. Do not overtighten, as this can crack the plastic base or strip the mounting holes.
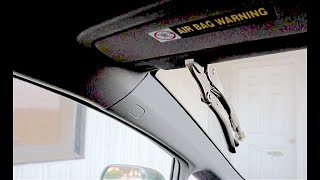
- Replace the Cover: Snap the plastic trim cover back onto the mounting base. Test the visor's movement and the vanity light to ensure everything works correctly. 🎬 See this step-by-step visor replacement walkthrough
Frequently Asked Questions (FAQ)
Why does my Odyssey's sun visor keep falling down?
The drooping is caused by the internal tension mechanism wearing out from repeated use and age. The plastic and spring components lose their ability to create the friction needed to hold the visor's weight.
Can I just tighten something to fix the droop?
Unfortunately, no. The tension mechanism is sealed inside the visor and is not designed to be adjusted or tightened. While tightening the main mounting screws can fix a wobbly base, it will not solve the internal drooping problem. Replacement is the only reliable solution.
Can I install an illuminated visor in my van that didn't come with one?
This is not recommended for a simple swap. Vehicles without factory-lighted visors do not have the necessary wiring harness in the headliner to power the light. It would require custom wiring to make it work.
Is the driver's side visor the same as the passenger's side?
No, they are not interchangeable. They are mirror images of each other. You must purchase the correct part for the side you are replacing (Left/Driver or Right/Passenger).
Helpful Videos
Technical Specifications
OEM Part Numbers: 83230-S0X-A01ZA 83230-S0X-A01ZB 83230-S0X-A02ZA 83230-S0X-A02ZC 83230-S0X-A03ZB 83280-S0X-A01ZA 83280-S0X-A01ZB 83280-S0X-A03ZA
Part numbers beginning with 83280 are for the Left Hand (Driver) side. Part numbers beginning with 83230 are for the Right Hand (Passenger) side.
We Have This Part in Stock



The information in this article is provided for general reference and educational purposes only. Vehicle specifications, procedures, and part compatibility can vary by production date, trim level, and region. Always consult your vehicle's factory service manual and verify part numbers before purchasing or performing repairs. Safety-critical components such as airbags, seat belts, and braking systems should be installed by a qualified professional.
- Honda Odyssey:
- 🎬 Helpful Videos
- 🛍️ Shop This Part
- Symptoms of a Failing Sun Visor
- Known Issues, Recalls, and Technical Service Bulletins (TSBs)
- Buying a Used 1999-2004 Odyssey Sun Visor
- 1. Verify Compatibility (The Four-Point Check)
- 2. How to Find Your Interior Color Code
- 3. Physical Inspection
- Cost Comparison for a Single Sun Visor
- Step-by-Step Replacement Guide (DIY)
- Frequently Asked Questions (FAQ)
- 🎟️ Get 5% Off