

2010-2019 Honda CR-V Sun Visor: Why It Droops and How to Find the Right Replacement
This guide covers the common problem of drooping sun visors in 2010-2019 Honda CR-Vs and explains the critical details for choosing the correct replacement part.
- The most common failure is the internal hinge wearing out, causing the visor to droop and obstruct vision.
- Compatibility is complex; you must match the vehicle's generation (2010-11, 2012-16, 2017-19), side (left/right), color, sunroof option, and illumination feature.
- Replacement is a very simple DIY job, typically requiring only a small screwdriver and taking less than 15 minutes.
- Verify your interior color by checking the code on the driver's door jamb sticker to ensure a perfect match.
Symptoms of a Failing Honda CR-V Sun Visor


The most common problem with 2010-2019 Honda CR-V sun visors is the internal hinge mechanism wearing out. This leads to a variety of frustrating symptoms.
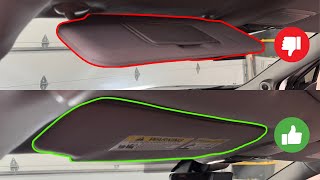
- Drooping or Not Staying Up: This is the most frequent complaint. The visor will not stay in the fully stowed position against the headliner, often drooping down and partially obstructing the view. In some cases, it may fall down completely when the vehicle hits a bump.
- Stiffness or Snapping Sound: Conversely, the mechanism can become very stiff and difficult to move. You might hear a loud snapping or cracking sound when trying to pivot the visor up or down. This is caused by the internal plastic components breaking or the hinge mechanism binding.
- Vanity Light Failure: For visors equipped with an illuminated mirror, the light may flicker or stop working entirely. This can be due to a bad bulb, a faulty switch in the mirror cover, or a damaged wire in the pivot mechanism.
- Visor Falls Out of Mount: In some instances, particularly on newer models, the entire visor assembly can detach from the headliner mount, left hanging only by the electrical wire.
Known Issues, Recalls, and Technical Service Bulletins (TSBs)
While the drooping sun visor is a widely recognized issue among owners, there have been no widespread recalls specifically for this mechanical failure on the 2010-2019 CR-V. Safety recalls are generally issued for defects that pose an unreasonable risk to safety, and a drooping visor has not met that threshold for a full-scale recall. Always check the NHTSA website with your vehicle's VIN for any recalls that may apply to your specific car.
Some earlier Honda models have had recalls related to sun visor vanity light wiring, but these do not directly address the drooping problem. There are no prominent Technical Service Bulletins (TSBs) for this specific issue, as the accepted repair is a full replacement of the visor assembly.
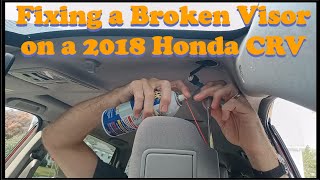
Pro Tip: Some owners have attempted temporary fixes for a stiff or squeaky visor by spraying WD-40 or a similar lubricant into the hinge area. This can sometimes free up a binding mechanism but may also stain the visor fabric and is not a permanent solution for a worn-out, drooping visor.
🎬 Check out this video on fixing stuck or squeaky visor hinges.2010-2019 Honda CR-V Sun Visor Variants and Compatibility

Finding the correct used sun visor is the most critical part of the process. Compatibility depends on your CR-V's model year, trim level, and specific options. The 2010-2019 range covers three distinct generations, and parts are generally not interchangeable between them.
Key Compatibility Factors:
- Vehicle Generation:
- 2010-2011 (3rd Gen, Facelift): These models typically use a two-screw mounting system.
- 2012-2016 (4th Gen): These models use a screwless locking tab mount.
- 2017-2019 (5th Gen): These also use a screwless locking tab mount, but the design and part numbers are different from the 4th generation.
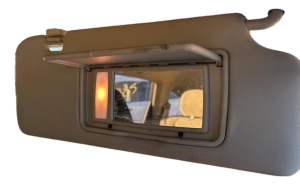
- Illuminated vs. Non-Illuminated Mirror: Base models like the LX typically have a non-illuminated visor (or just a mirror with no light). Higher trims like the EX, EX-L, and Touring have an illuminated vanity mirror. A visor with a light will not work in a vehicle that isn't wired for it.
- Sunroof Option: Honda produced different visors for models with and without a sunroof. This is a crucial detail to verify.
- Interior Color: Common interior colors include Gray, Ivory/Beige, and Black. It is essential to match the color for a proper appearance.
- Side: You must get the correct visor for the driver (left) or passenger (right) side.
How to Find Your CR-V's Interior Color Code
To ensure a perfect color match, check the vehicle identification sticker located on the driver's side door jamb. On this sticker, you will find an interior color code, often labeled as 'INTERIOR COLOR' or as a short code like 'Type A' or 'Type U'. Providing this code when purchasing a used part is the best way to guarantee a match.
Buying a Used 2010-2019 CR-V Sun Visor: What to Look For

A used OEM sun visor is often a great value, but careful inspection is key.
- Test the Hinge: This is the most important check. Move the visor through its full range of motion. It should feel firm and hold its position without any drooping. Avoid any visor that feels loose or floppy.
- Inspect the Fabric: Check for stains, tears, or separation along the seams. Some lubricants used in failed repair attempts can leave permanent stains.
- Check the Mirror and Cover: Open the vanity mirror cover. It should move smoothly and click shut. Ensure the mirror itself is not cracked. For illuminated versions, this is also the switch for the light.
- Examine the Mounting Point: For 2012-2019 models, inspect the plastic locking tab mechanism for any cracks or stress marks. For 2010-2011 models, ensure the screw holes are intact.
- Verify the Electrical Connector: If buying an illuminated visor, make sure the electrical connector and a short length of wire are intact and undamaged.
Sun Visor Replacement Cost Comparison
Replacing a sun visor is a common repair, and costs can vary significantly between new and used options.
| Part Source | Estimated Cost |
|---|---|
| New OEM | $190 - $530 |
| New Aftermarket | $40 - $90 |
| Used OEM | $50 - $125 |
| Shop Labor | $50 - $100 |
How to Replace a 2010-2019 Honda CR-V Sun Visor (DIY Guide)
Replacing the sun visor on a CR-V is a simple DIY task that usually takes less than 15 minutes and requires minimal tools.
For 2012-2016 and 2017-2019 Models (Locking Tab):
- Position the Visor: Unclip the visor from its retainer clip near the rearview mirror.
- Locate the Locking Tab: At the base of the visor mount, there is a small slot. The locking tab is inside.
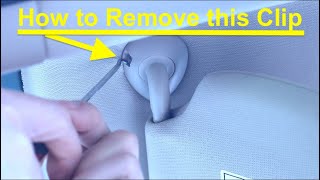
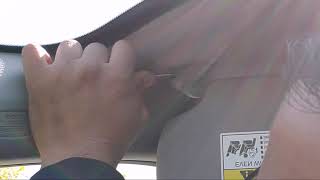
- Release the Tab: Insert a small flathead screwdriver or a pick tool into the slot to depress the internal locking tab.
- Rotate and Remove: While pressing the tab, rotate the entire visor assembly about 45-90 degrees towards the door. This will disengage the lock, and the visor will pull straight down from the headliner. 🎬 See how to safely remove the 5th Gen locking tab visor.
- Disconnect Wiring: If you have an illuminated visor, carefully disconnect the electrical connector.
- Installation: To install the new visor, first ensure it is in the 'unlocked' position. Connect the electrical plug, align the post in the ceiling hole, and rotate the visor towards the windshield until it clicks and locks into place.
For 2010-2011 Models (Screws):
- Expose the Screws: Use a small pick or flathead screwdriver to gently pry open the plastic cover at the base of the visor mount to reveal two screws.
- Remove the Screws: Using a T25 Torx driver or a Phillips screwdriver, remove both screws.
- Remove the Visor: The visor will now be free. If it has a light, disconnect the electrical connector.
- Installation: Installation is the reverse of removal. Reconnect the wiring (if applicable), position the new visor, and secure it with the two screws. 🎬 Watch this step-by-step guide for 2010-2011 screw-in visor replacement. Do not overtighten, as the screws go into a plastic base. Snap the cover back on.
Warning: The locking tab on 2012-2019 models can be tricky. Applying force in the wrong direction can break the mount. Watch a video of the procedure first to understand how the mechanism works before attempting the removal.
Frequently Asked Questions (FAQ)
Can I install an illuminated visor on my CR-V LX that didn't come with one?
No, this is not a simple plug-and-play swap. The LX trim is not equipped with the necessary wiring harness in the headliner to power the vanity mirror light.
Why did my sun visor suddenly get very stiff and hard to move?
This is another common failure mode where the internal pivot mechanism binds up instead of becoming loose. Forcing it can cause the plastic housing of the visor to crack or break. Replacement is the recommended solution.
Is there a recall for the drooping sun visor on my CR-V?
As of late 2023, there is no active recall specifically for the mechanical failure (drooping) of the sun visor on 2010-2019 Honda CR-Vs. You should always verify any applicable recalls for your specific vehicle using its VIN on the NHTSA website.
The replacement visor I bought has a different color. Will it still fit?
Mechanically, it may fit if it is from the same generation and has the same features (sunroof/no sunroof, illumination). However, Honda used several interior colors like Gray, Ivory, and Black, and an incorrect color will be visually obvious. Always try to match your interior color code.
Helpful Videos

Technical Specifications
OEM Part Numbers: 83230-SWA-A81ZA 83230-SWA-A82ZB 83230-SWA-A83ZA 83230-SWA-A91ZB 83230-T0A-A01ZA 83230-T0A-A21ZA 83230-T0A-A31ZA 83230-T0A-A31ZB 83230-T0A-A81ZA 83230-TLA-A01ZA 83230-TLA-A11ZA 83230-TLA-A11ZB 83230-TLA-A12ZA 83230-TLA-A12ZB 83280-T0A-A21ZA
Varies by generation. 2010-2011 models use a T25 Torx or Phillips screw mount. 2012-2019 models use a screwless locking tab mount.
We Have This Part in Stock





The information in this article is provided for general reference and educational purposes only. Vehicle specifications, procedures, and part compatibility can vary by production date, trim level, and region. Always consult your vehicle's factory service manual and verify part numbers before purchasing or performing repairs. Safety-critical components such as airbags, seat belts, and braking systems should be installed by a qualified professional.
- Honda CR-V:
- 🎬 Helpful Videos
- 🛍️ Shop This Part
- Symptoms of a Failing Honda CR-V Sun Visor
- Known Issues, Recalls, and Technical Service Bulletins (TSBs)
- 2010-2019 Honda CR-V Sun Visor Variants and Compatibility
- Key Compatibility Factors:
- How to Find Your CR-V's Interior Color Code
- Buying a Used 2010-2019 CR-V Sun Visor: What to Look For
- Sun Visor Replacement Cost Comparison
- How to Replace a 2010-2019 Honda CR-V Sun Visor (DIY Guide)
- For 2012-2016 and 2017-2019 Models (Locking Tab):
- For 2010-2011 Models (Screws):
- Frequently Asked Questions (FAQ)
- 🎟️ Get 5% Off