

2004 Ford Taurus & Mercury Sable Sun Visor: Fixing the Droop for Pre-December 2003 Models
This guide covers the common failure points, replacement procedure, and critical compatibility details for the passenger side sun visor on the 2004 Ford Taurus and Mercury Sable.
- This passenger side sun visor only fits 2004 Taurus and Sable models built BEFORE December 1, 2003. Always check the build date on the driver's door jamb sticker.
- The most common failure is a drooping visor that won't stay up, which can be a safety hazard by obstructing vision.
- Replacement is an extremely easy DIY task that takes less than 15 minutes with only a screwdriver.
- To ensure a perfect match, find the interior trim code ('INT TR') on the door jamb sticker and buy a used visor with the same code.
Symptoms of a Failing Sun Visor
The signs of a failing sun visor are almost always mechanical. Since this part is not connected to any vehicle systems, it will not trigger any warning lights or diagnostic trouble codes. The most common symptom is a drooping or sagging visor that will not stay in its stowed position against the headliner.
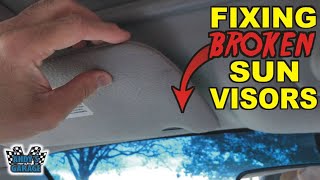
- Drooping or Sagging: The most frequent complaint is a visor that constantly falls down, either partially or fully. This happens when the internal pivot joint wears out and loses the friction needed to hold the visor's weight. This can become a safety issue if it unexpectedly blocks the driver's vision. 🎬 See how to troubleshoot and fix a broken sun visor.
- Loose or Wobbly Feel: When you move the visor, it may feel loose and lack the firm resistance it had when new.
- Rattling Noises: A worn internal mechanism or a broken mirror cover can cause rattling or buzzing sounds, especially when driving over rough roads.
- Broken Mirror or Cover: The vanity mirror or its protective cover can crack or break from age or impact.
Buying a Used Sun Visor
Since Ford has discontinued this part, a quality used OEM sun visor is the best option for replacement. A used original part ensures a perfect match for color, material, and fitment, which can be a problem with aftermarket alternatives. Here’s what to look for when buying a used sun visor for your 2004 Ford Taurus or Mercury Sable.
Warning: This specific passenger side sun visor (part number 4F1Z-5404104-AAB) only fits early 2004 models of the Ford Taurus and Mercury Sable that were manufactured before December 1, 2003. You must verify your vehicle's build date before purchasing.
How to Verify Compatibility
- Check the Manufacture Date: Open the driver's side door and look for the Safety Compliance Certification Label on the door jamb. The manufacturing date is printed at the top of this label. If the date is before 12/03, this part should fit.
- Match Your Interior Color Code: On the same door jamb label, look for a code listed under "INT TR" or "TR". This two-character code identifies your interior color. Common colors for these vehicles include Parchment (a tan color) and Graphite (a dark gray). Ensure the used visor you are buying comes from a vehicle with the same interior trim code.
- Inspect the Hinge: The most critical part of a used sun visor is the hinge. Ask the seller to confirm that the visor's pivot point is stiff and holds its position firmly. If you can inspect it in person, move it up and down. It should have smooth resistance and not fall under its own weight. 🎬 Watch this quick guide on how to fix a loose sunvisor.
- Check for Cosmetic Damage: Examine the fabric or vinyl for any rips, stains, or peeling. Check that the vanity mirror and its cover are not cracked or broken.
Step-by-Step Replacement Guide
Replacing the sun visor on a 2004 Ford Taurus or Mercury Sable is a very simple task that requires only basic hand tools and can be completed in under 15 minutes.
- Position the Visor: Swing the sun visor down as if you were blocking the sun to get better access to its mounting point on the headliner.
- Remove the Trim Cover: The base of the visor's mounting arm is covered by a small plastic trim piece. Use a small flathead screwdriver or a trim removal tool to gently pry this cover off. It is held on by small clips.
- Unscrew the Mount: With the cover removed, you will see two or three screws (typically Phillips or Torx head) that secure the visor's mounting bracket to the roof structure. Remove these screws completely.
- Remove the Old Visor: Support the visor as you remove the last screw, then pull it straight down and away from the headliner. As this is a non-illuminated visor, there should be no electrical wires to disconnect. 🎬 Watch this video for a similar Ford sun visor removal walkthrough.
- Install the New Visor: Position the replacement visor's mounting bracket against the headliner, aligning it with the screw holes.
- Secure the Screws: Start all the screws by hand to avoid cross-threading. Tighten them until they are snug, but do not overtighten, as this could crack the plastic mounting bracket.
- Replace the Trim Cover: Snap the plastic trim cover back into place over the mounting bracket. Test the visor to ensure it moves correctly and holds its position.
Known Issues, Recalls, and TSBs
There are no recalls or Technical Service Bulletins (TSBs) from the National Highway Traffic Safety Administration (NHTSA) specifically related to the sun visors on the 2004 Ford Taurus or Mercury Sable. While other recalls were issued for these vehicles for issues like power seat welds and stop lamp switches, the sun visor was not part of any safety campaign.
Cost of Replacement
The cost to replace a sun visor on these vehicles is minimal, especially if you do the work yourself.
| Part Type | Estimated Cost |
|---|---|
| New OEM | Discontinued |
| New Aftermarket | $40 - $60 (if available) |
| Used OEM | $25 - $65 |
| Shop Labor | $50 - $100 |
Frequently Asked Questions
How do I find my 2004 Taurus or Sable's manufacture date?
The build date is printed on the Safety Compliance Certification Label, which is a black sticker located on the driver's side door jamb. The date is usually at the top of the label and will be shown in a MM/YY format (e.g., 10/03 for October 2003).
How can I be sure I'm buying the right color sun visor?
On the same driver's door jamb sticker, find the code under "INT TR". This is your interior trim code. Provide this code to the seller of the used part to ensure an exact color match.
Is replacing the sun visor a difficult DIY job?
No, this is one of the easiest repairs you can do. It requires only a screwdriver and takes less than 15 minutes. There are no complex electrical connections or special tools needed for this non-illuminated visor.
Will a sun visor from a late 2004 model fit my early 2004 model?
No, the parts are different for vehicles built after December 1, 2003. It is critical to confirm your vehicle's build date and purchase a visor from a vehicle with a compatible (pre-12/01/2003) build date.
Helpful Videos


Technical Specifications
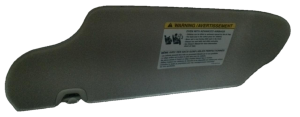
OEM Part Numbers: 4F1Z-5404104-AAB
Right (Passenger Side), Non-Illuminated Mirror, Fits vehicles manufactured before December 1, 2003.
We Have This Part in Stock

The information in this article is provided for general reference and educational purposes only. Vehicle specifications, procedures, and part compatibility can vary by production date, trim level, and region. Always consult your vehicle's factory service manual and verify part numbers before purchasing or performing repairs. Safety-critical components such as airbags, seat belts, and braking systems should be installed by a qualified professional.
- Ford Taurus:
- Mercury Sable: