

2015-2026 Mustang Sun Visor: Decoding Coupe, Convertible, and HomeLink Options
This guide covers common drooping issues, part number identification, and step-by-step replacement for S550 and S650 Mustang sun visors.
- The single most important factor is compatibility: Coupe and Convertible visors are NOT interchangeable.
- Verify if your vehicle requires the HomeLink (universal garage door opener) option before buying a replacement.
- The most common failure is a weak internal pivot, causing the visor to droop and obstruct vision, which is a safety hazard.
- Replacement is a simple DIY task, but the main mounting clip can be fragile and may break during removal.
Common Failure Symptoms

When a Mustang sun visor begins to fail, the symptoms are usually easy to spot. Understanding these signs can help you decide whether a simple fix or a full replacement is necessary.
Drooping or Sagging Visor
The most common issue is a visor that won't stay in its upright, stowed position. Over time, the internal pivot mechanism that provides friction can wear out, causing the visor to droop or fall down completely, often obstructing the driver's view. This can happen gradually or suddenly, especially after hitting a bump. While sometimes caused by loose mounting screws, it more often points to internal wear that requires replacing the entire visor assembly.
🎬 Watch: A quick trick to fix a floppy sun visor.Broken Retaining Clip
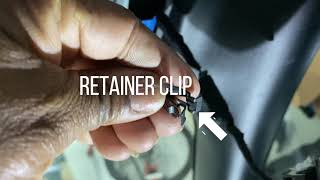
The visor is held in place at two points: the main pivot arm and a smaller retaining clip on the other end. This plastic clip can become brittle and break, especially during removal or from repeated use. If this clip fails, the visor will be loose on one end and will not stay flush against the headliner.
Electrical Malfunctions
If your visor is equipped with features like an illuminated mirror or HomeLink, you may experience electrical problems. This can manifest as flickering or non-functional vanity lights, 🎬 See how to easily replace a burnt-out vanity mirror bulb. or HomeLink buttons that no longer operate. These failures are typically due to a break in the wiring that runs through the pivot arm into the headliner. This wiring can become fatigued and break from the repeated movement of the visor over the years.
Broken Mirror or Mirror Cover
The vanity mirror or the sliding cover can be fragile. An accidental impact can crack the mirror glass or break the hinges on the cover door. While the mirror assembly itself can sometimes be removed, it is often easier and more cost-effective to replace the entire sun visor unit, especially when buying a used part.
Safety Warning: A drooping sun visor is not just an annoyance; it can be a serious safety hazard. If it falls unexpectedly, it can obstruct your vision and lead to a crash. Secure a failing visor in the up position or replace it immediately.
Known Issues, TSBs, and Recalls
As of early 2026, there are no specific recalls or widespread Technical Service Bulletins (TSBs) from Ford for sun visor failures on the 2015-2026 Mustang. However, forum discussions among owners confirm that drooping visors and broken retaining clips are common points of failure. While a recall for sun visor wiring fires was issued for other vehicles like the Jeep Grand Cherokee and Dodge Durango, this specific recall does not apply to the Ford Mustang.
Buying a Used 2015-2026 Mustang Sun Visor: Your Complete Checklist

Purchasing a used OEM sun visor is an excellent way to save money while retaining factory fit and finish. Aftermarket support for complete visor assemblies for this generation is limited, making used OEM the best alternative to a costly new part. Follow these steps to ensure you get the right part for your car.
Step 1: Identify Your Mustang's Body Style (Coupe vs. Convertible)
This is the most critical step. Sun visors for Coupe (fastback) and Convertible models are not interchangeable. The mounting points and overall shape are different to accommodate the unique roof and A-pillar structures of each body style. Always confirm the donor vehicle's body style before purchasing.
Step 2: Determine Your Feature Requirements (HomeLink)
Ford offered two main electronic variants: with and without the HomeLink universal garage door opener. Both versions typically include an illuminated vanity mirror. Check your current visor for the three small buttons that indicate the presence of HomeLink. If you are replacing a non-HomeLink visor, you must source a non-HomeLink replacement for the wiring to be plug-and-play.
Step 3: Match Your Interior Color Code
To ensure a perfect match with your headliner, you need to find your vehicle's interior trim code. This code is printed on the Federal Certification Label located in the driver's side door jamb. Look for the label and find the code listed under "INT TR". The second character of this two-character code typically represents the color. Provide this code to the seller to guarantee a color match.
Step 4: Physical Inspection Checklist for a Used Visor
- Pivot Tension: Hold the visor by its mounting arm and swing it. It should move smoothly but with enough resistance to hold any position. If it feels loose or floppy, it will droop in your car.
- Fabric and Body Condition: Check for stains, tears, or separating fabric. Ensure the plastic body isn't cracked or warped from heat.
- Mirror and Cover: Slide the mirror cover open and closed. It should move smoothly and click into place. Inspect the mirror for cracks.
- Electrical Connector: Look at the electrical connector and wires at the base of the mounting arm. Ensure the pins are straight and the wiring isn't frayed or damaged.
Sun Visor Replacement Cost Breakdown

Prices can vary based on condition, features, and supplier. The following table provides an estimated cost comparison.
| Part Type | Estimated Cost (Per Side) |
|---|---|
| New OEM | $125 - $185 |
| New Aftermarket | $30 - $100 (Generally limited to clips or older generations) |
| Used OEM | $65 - $100 |
| Shop Labor | $50 - $100 |
Step-by-Step Sun Visor Replacement Guide
Replacing a Mustang sun visor is a simple DIY project that can be completed in under 30 minutes with basic tools.
🎬 Watch this step-by-step walkthrough of the visor replacement process.Tools & Materials Needed:
- Flathead screwdriver or trim removal tool
- Needle-nose pliers (recommended)
- Replacement sun visor
Instructions:
- Expose the Retaining Clip: Use a small flathead screwdriver or trim tool to carefully pry off the plastic cover at the base of the visor's pivot arm. This will reveal a metal retaining clip underneath.
- Release the Visor: This can be the trickiest step. Some guides suggest using needle-nose pliers to compress the metal clip while pulling down on the visor. Others have found success by simply wiggling and pulling the visor assembly firmly downwards until it dislodges from the clip in the roof. Be prepared for it to release suddenly.
- Disconnect Electrical Connector: With the visor loose, tilt it down to access the small electrical plug tucked into the headliner. Carefully unplug the connector. Do not let the visor hang by its wires.
- Install the New Visor: Plug the electrical connector from the new visor into the vehicle's harness.
- Secure the Visor: Align the pivot arm with the opening in the headliner. Push it straight up firmly until you hear or feel it click securely into place. Give it a gentle tug to ensure it's locked in.
- Reinstall Cover: Snap the plastic trim cover back over the mounting base. Test the visor's movement and the function of the lights and/or HomeLink buttons.
Pro Tip: The metal retaining clip at the mounting point can be fragile and may bend or break during removal. If you are concerned, you can order a new clip (Part Number DS7Z-9904132-A) beforehand.
Frequently Asked Questions (FAQ)
Can I upgrade to a sun visor with HomeLink?
While physically possible, it is not a simple plug-and-play swap. The vehicle's wiring harness for a non-HomeLink car will not have the necessary connections to power the garage door opener. It would require significant custom wiring to make it functional.
Is the sun visor the same for the driver and passenger side?
No, they are not. Sun visors are side-specific due to the mirror placement and the shape of the mounting arm. They are sold as Left (driver) and Right (passenger) side parts.
Why did my visor start drooping?
Drooping is almost always caused by wear in the internal friction mechanism inside the pivot arm. Constant use, combined with heat cycles from the sun, weakens the components that are designed to hold the visor in place.
Can I just replace the broken mirror or cover?
The mirror and light assembly can be removed from the visor body by prying off the light lenses and removing screws. However, Ford does not typically sell these as separate components. Your best option for a broken mirror is to source a complete used sun visor assembly.
Helpful Videos


Technical Specifications
OEM Part Numbers: FR3Z-6304104-AD FR3Z-7604104-AD KR3Z-6304104-AA KR3Z-6304104-AB KR3Z-6304105-AB KR3Z-7604104-AA DS7Z-9904132-A
Variations exist for Coupe vs. Convertible and with/without HomeLink. All versions typically include an illuminated vanity mirror.
We Have This Part in Stock



The information in this article is provided for general reference and educational purposes only. Vehicle specifications, procedures, and part compatibility can vary by production date, trim level, and region. Always consult your vehicle's factory service manual and verify part numbers before purchasing or performing repairs. Safety-critical components such as airbags, seat belts, and braking systems should be installed by a qualified professional.
- Ford Mustang:
- 🎬 Helpful Videos
- 🛍️ Shop This Part
- Common Failure Symptoms
- Drooping or Sagging Visor
- Broken Retaining Clip
- Electrical Malfunctions
- Broken Mirror or Mirror Cover
- Known Issues, TSBs, and Recalls
- Buying a Used 2015-2026 Mustang Sun Visor: Your Complete Checklist
- Step 1: Identify Your Mustang's Body Style (Coupe vs. Convertible)
- Step 2: Determine Your Feature Requirements (HomeLink)
- Step 3: Match Your Interior Color Code
- Step 4: Physical Inspection Checklist for a Used Visor
- Sun Visor Replacement Cost Breakdown
- Step-by-Step Sun Visor Replacement Guide
- Tools & Materials Needed:
- Instructions:
- Frequently Asked Questions (FAQ)
- 🎟️ Get 5% Off