

2000 Stratus, Sebring, Cirrus, Avenger & Breeze Sun Visor Droop & Replacement
This guide covers the common causes of sun visor failure on these platform-sharing sedans and how to find the correct replacement, avoiding the common coupe-vs-sedan part trap.
- The most critical compatibility check is body style: visors from 2-door coupes DO NOT fit 4-door sedans.
- Common failure is a drooping visor that won't stay up; replacement is the only permanent fix.
- Replacement is very easy for DIYers, requiring only a T25 Torx driver and about 15 minutes.
- You must match the features of your old visor exactly (no light, illuminated, or illuminated + HomeLink) for the new part to work.
Symptoms of a Failing Sun Visor
When a sun visor begins to fail, the symptoms are usually obvious and annoying. Because these vehicles share the same core interior components, you will see the same issues across the 2000 Dodge Stratus, Chrysler Sebring Sedan, Chrysler Cirrus, and Plymouth Breeze.
Sun Visor Droops or Won't Stay Up
This is the most common failure. The internal pivot mechanism that creates friction to hold the visor in place wears out over time. The visor will no longer stay flush against the headliner, instead drooping down and partially obstructing your view. Hitting a bump can often cause it to fall completely.
Broken Mounting Point or Retaining Clip
The plastic can become brittle with age and sun exposure. The main mounting arm, which attaches to the roof with two screws, can crack. More commonly, the smaller C-shaped clip that holds the other end of the visor near the rearview mirror will break, leaving the visor to swing freely on one side.
Electrical Failures (Vanity Light or HomeLink)
For visors equipped with features, the electronics can fail. The small switch that activates the vanity light when the mirror door is opened can break, causing the light to stay off or, in some cases, stay on and drain the battery. The HomeLink buttons can also stop working, though this is less common than mechanical failure.
Vehicle and Part Compatibility Guide
Finding the correct sun visor is critical, as several different versions were made that are not interchangeable. Pay close attention to your vehicle's body style and options before buying a replacement.
Warning: The sun visor for a 2000 Chrysler Sebring or Dodge Avenger Coupe (2-door) is NOT the same as the one for a Sedan (4-door). These cars were built on different platforms (the coupe was based on the Mitsubishi Eclipse), and their interior parts do not interchange. This guide applies only to the sedan models and their platform mates: the Chrysler Cirrus and Plymouth Breeze.
Feature Levels: Match Your Options
You must replace your visor with one that has the exact same features. Inspect your current visor to see what you have:
- Base Model: May have no mirror or a non-lit mirror.
- Illuminated Vanity Mirror: Has a mirror with a sliding or hinged cover that turns on a light. It will have an electrical connector at the mounting base.
- Illuminated Mirror + HomeLink: Includes the lighted mirror plus a set of three buttons for a built-in garage door opener. This version also has an electrical connector.
A visor with different features will have a different wiring harness and will not work correctly.
How to Find Your Interior Color Code
The most common interior colors for these models were a medium gray (often called Quartz or Agate) and a beige/tan (often called Camel or Taupe). To ensure a perfect match, find your vehicle's interior trim code. This code is located on a sticker inside the driver's side door jamb. The code will be labeled as "TRIM" and is typically a four-character code. Providing this code to a seller can help guarantee you get the right color.
Buying a Used Sun Visor: What to Inspect
A used OEM sun visor is often the best choice, as it guarantees a perfect fit and color match compared to aftermarket alternatives, which are rare for these specific models. When inspecting a used visor, check the following:
- Pivot Stiffness: Hold the mounting base and try to pivot the visor. It should move smoothly but with enough resistance to hold any position. If it feels loose or floppy, it will droop in your car.
- Fabric and Mirror Condition: Check for stains, tears, or sagging fabric. Open the vanity mirror and check for cracks in the mirror or the plastic door.
- Retaining Clip: Check the separate plastic clip that holds the other end of the visor. Ensure it isn't cracked or broken. These are often sold separately if you only need the clip.
- Electrical Connector: If it's an illuminated or HomeLink model, make sure the electrical plug and a short bit of wiring are intact with no damage.
Step-by-Step Replacement Guide
Replacing the sun visor is a very easy DIY job that typically takes less than 15 minutes.
Tools Needed:
- T25 Torx screwdriver
- Small flathead screwdriver or trim removal tool (optional)
- Unhook the Visor: Unclip the visor from the center retaining clip and let it hang down.
- Remove the Screw Cover: At the base of the visor where it mounts to the roof, there is a small plastic cover over the screws. Gently pry this cover off with a small screwdriver to expose the two T25 Torx screws.
- Unscrew the Mount: While holding the visor to keep it from falling, remove the two T25 screws.
- Disconnect Electrical Plug: If your visor has lights or HomeLink, carefully pull it down from the headliner. You will see a small electrical connector. Press the tab on the connector and pull it apart to free the old visor.
- Install the New Visor: Installation is the reverse of removal. Plug in the electrical connector for the new visor, tuck the wire into the headliner, and secure the mounting base with the two T25 screws. Snap the plastic screw cover back into place and test the visor's operation.
Pro Tip: Before tightening the screws, test the vanity light and HomeLink buttons (if equipped) to ensure the electrical connection is good.
Cost of Replacement
| Part Type | Estimated Cost |
|---|---|
| New OEM | $150 - $250+ (if available) |
| New Aftermarket | $50 - $100 (availability is limited) |
| Used OEM | $30 - $90 |
| Shop Labor | $50 - $100 |
Frequently Asked Questions (FAQ)
How do I program the HomeLink garage door opener?
First, clear any old codes by pressing and holding the two outer buttons for about 20-30 seconds until the indicator light flashes rapidly. Next, hold your original garage door remote a few inches from the HomeLink buttons. Press and hold both the button on your remote and the HomeLink button you wish to program. The indicator light will flash slowly, then rapidly. Once it flashes rapidly, you can release both buttons. Finally, you may need to press the 'Learn' button on your garage door opener motor unit in the garage, and then within 30 seconds, press the programmed HomeLink button in your car two or three times to sync it.
Can I just fix my drooping sun visor?
Some owners attempt temporary fixes using velcro strips attached to the headliner and visor, or by wedging something into the pivot to increase friction. These are not permanent solutions and the best long-term fix is to replace the visor with a unit that has a good internal pivot.
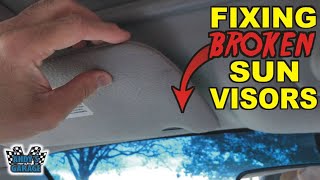
🎬 Watch: How to fix a broken sun visorWill a sun visor from a 2001-2005 Stratus or Sebring fit my 2000 model?
No. The 2001 model year marked the beginning of a new generation for these cars. While they look similar, the interior components, including the sun visors and their mounting points, are different and not interchangeable.
Is the driver's side visor the same as the passenger's side?
No, they are not interchangeable. They are mirror images of each other and mount on opposite sides of the vehicle. You must order the specific side you need (Left for Driver, Right for Passenger).
Helpful Videos


Technical Specifications
OEM Part Numbers: Part numbers for these models are highly specific to color and features. It is recommended to verify compatibility by visually matching your existing part rather than relying on a single part number.
Mounts with two T25 Torx screws. Features a single electrical connector for models with illumination and/or HomeLink.
We Have This Part in Stock


The information in this article is provided for general reference and educational purposes only. Vehicle specifications, procedures, and part compatibility can vary by production date, trim level, and region. Always consult your vehicle's factory service manual and verify part numbers before purchasing or performing repairs. Safety-critical components such as airbags, seat belts, and braking systems should be installed by a qualified professional.
- Dodge Avenger:
- Chrysler Sebring:
- Dodge Stratus:
- Chrysler Cirrus:
- Plymouth Breeze:
- 🎬 Helpful Videos
- 🛍️ Shop This Part
- Symptoms of a Failing Sun Visor
- Sun Visor Droops or Won't Stay Up
- Broken Mounting Point or Retaining Clip
- Electrical Failures (Vanity Light or HomeLink)
- Vehicle and Part Compatibility Guide
- Feature Levels: Match Your Options
- How to Find Your Interior Color Code
- Buying a Used Sun Visor: What to Inspect
- Step-by-Step Replacement Guide
- Cost of Replacement
- Frequently Asked Questions (FAQ)
- 🎟️ Get 5% Off